Create New Lifecycle
Using either your Experiment Tenant or your Production Tenant, create the lifecycle we will use for this exercise in the Process Map.
Step 1
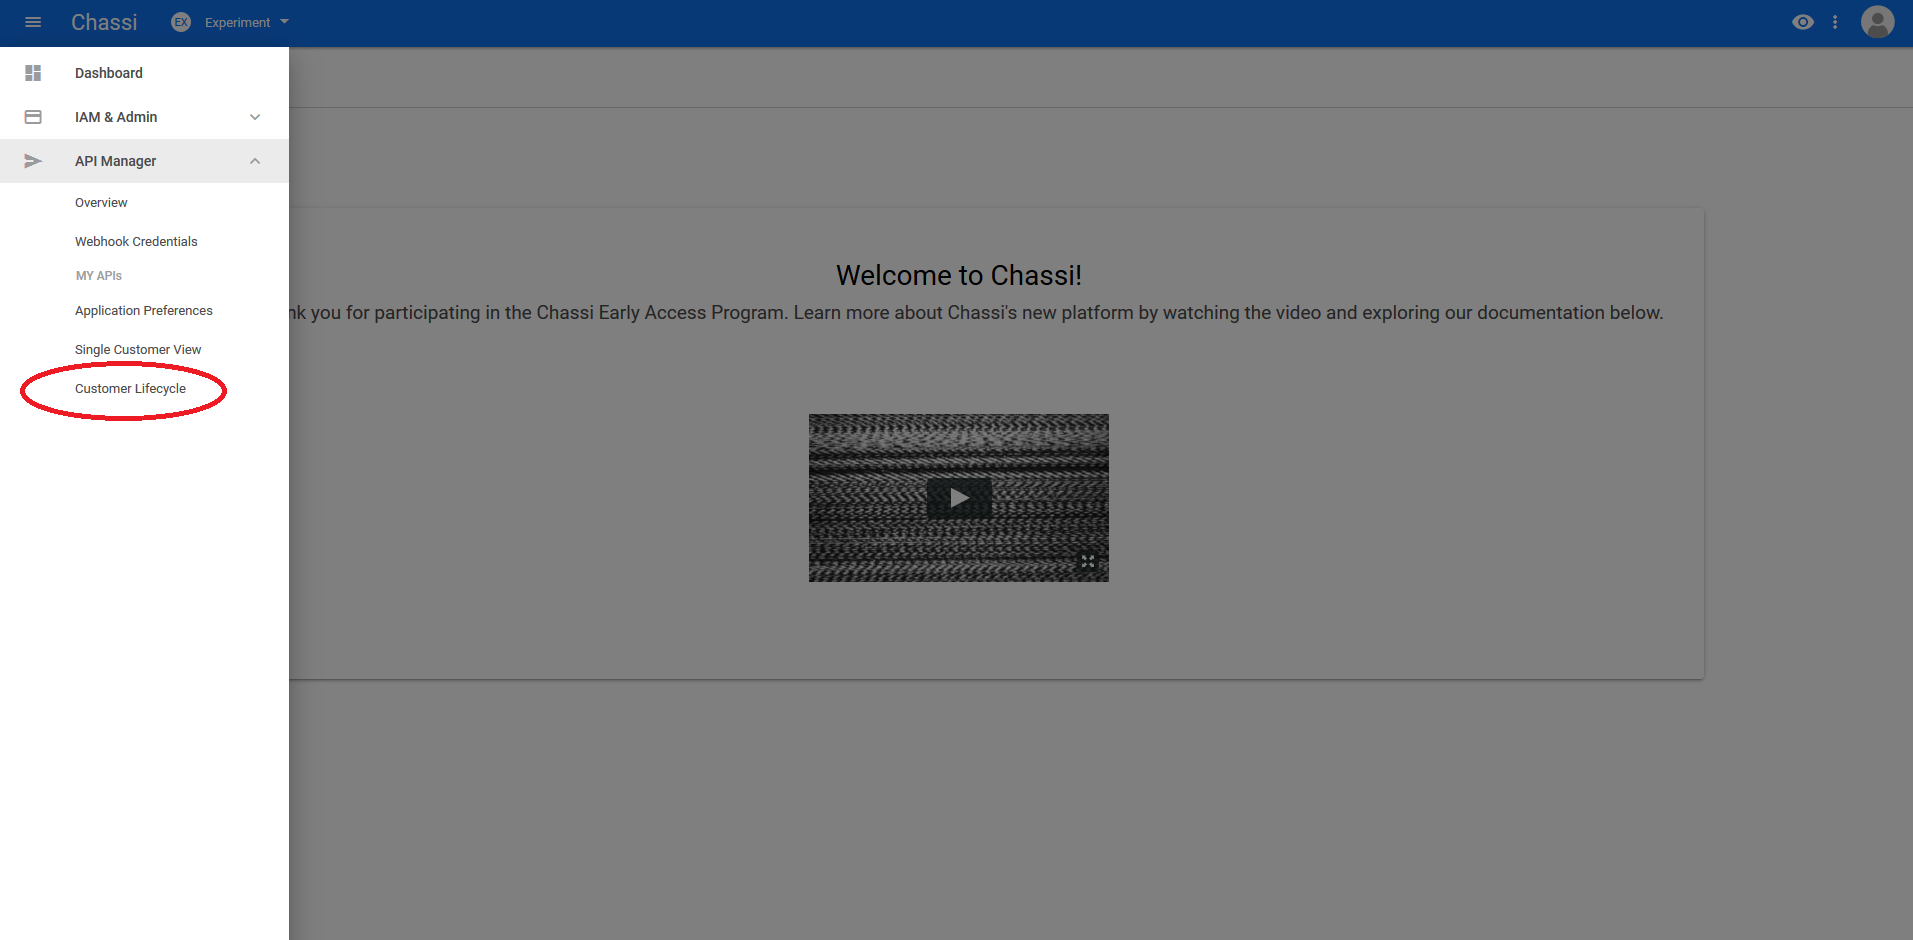
For your first step, you will want to open the menu on the top left and select Customer Lifecycle under the API Manager section.
Step 2
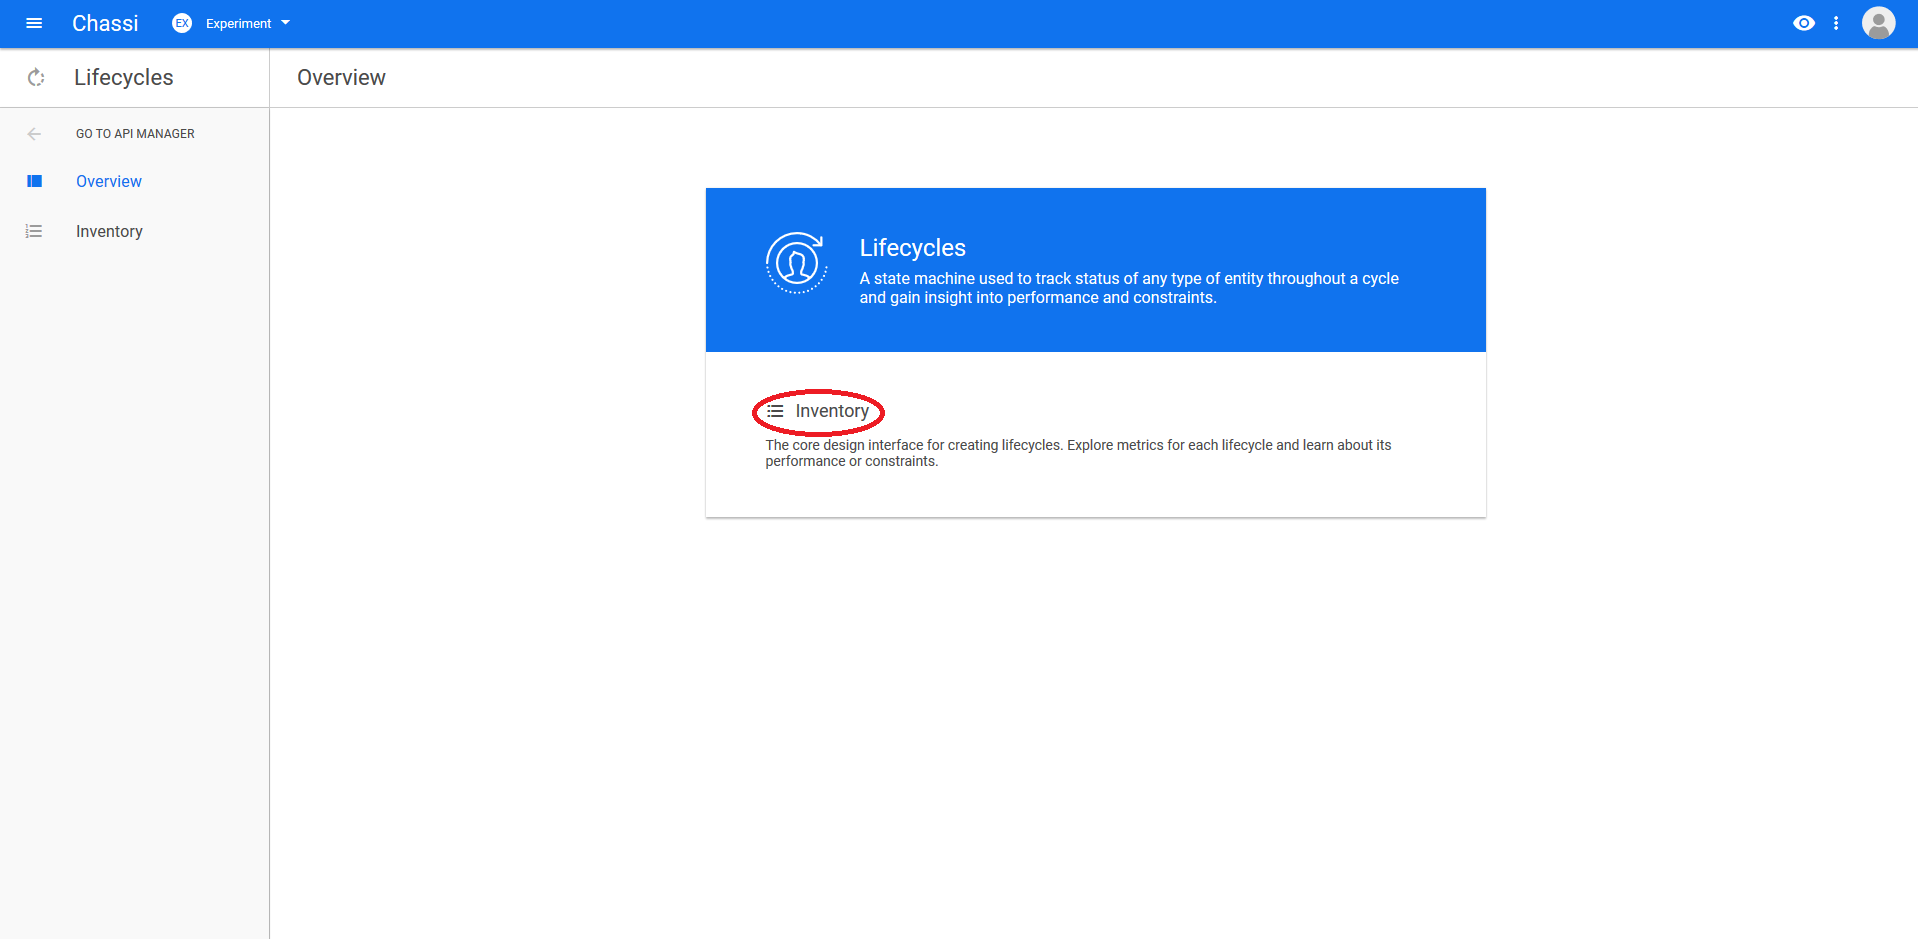
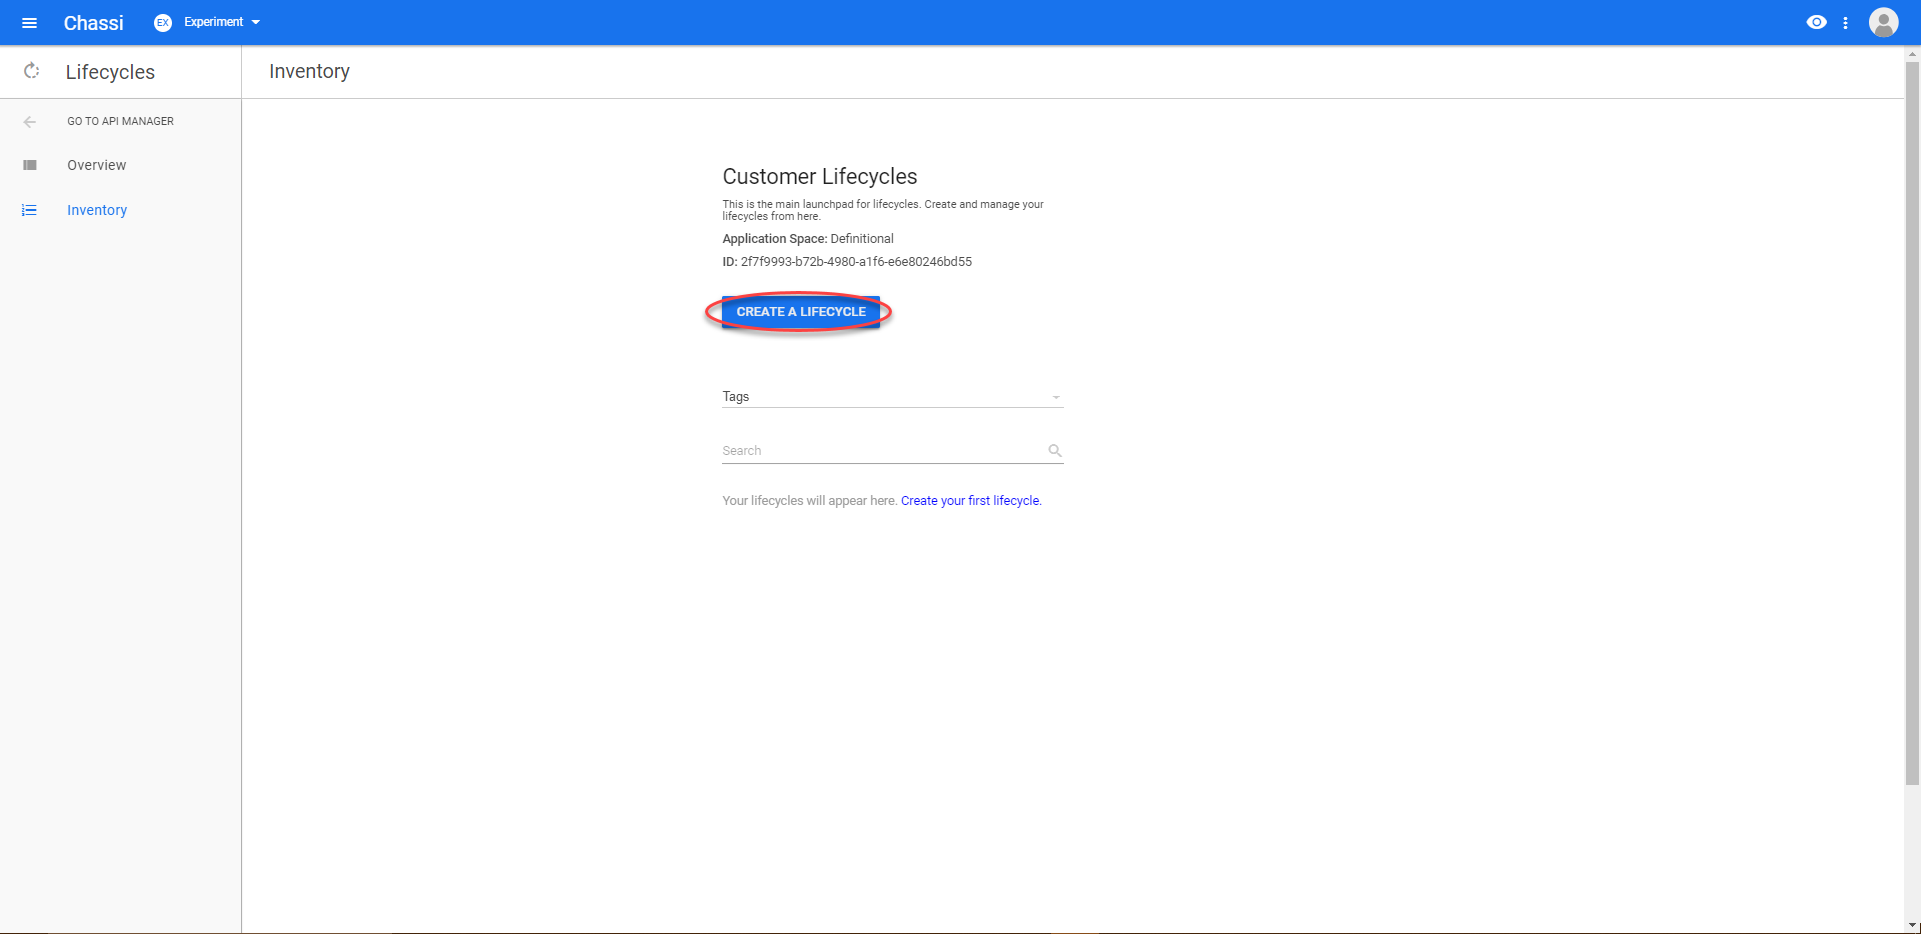
Next, you want to open the current inventory and select Create Lifecycle
Step 3
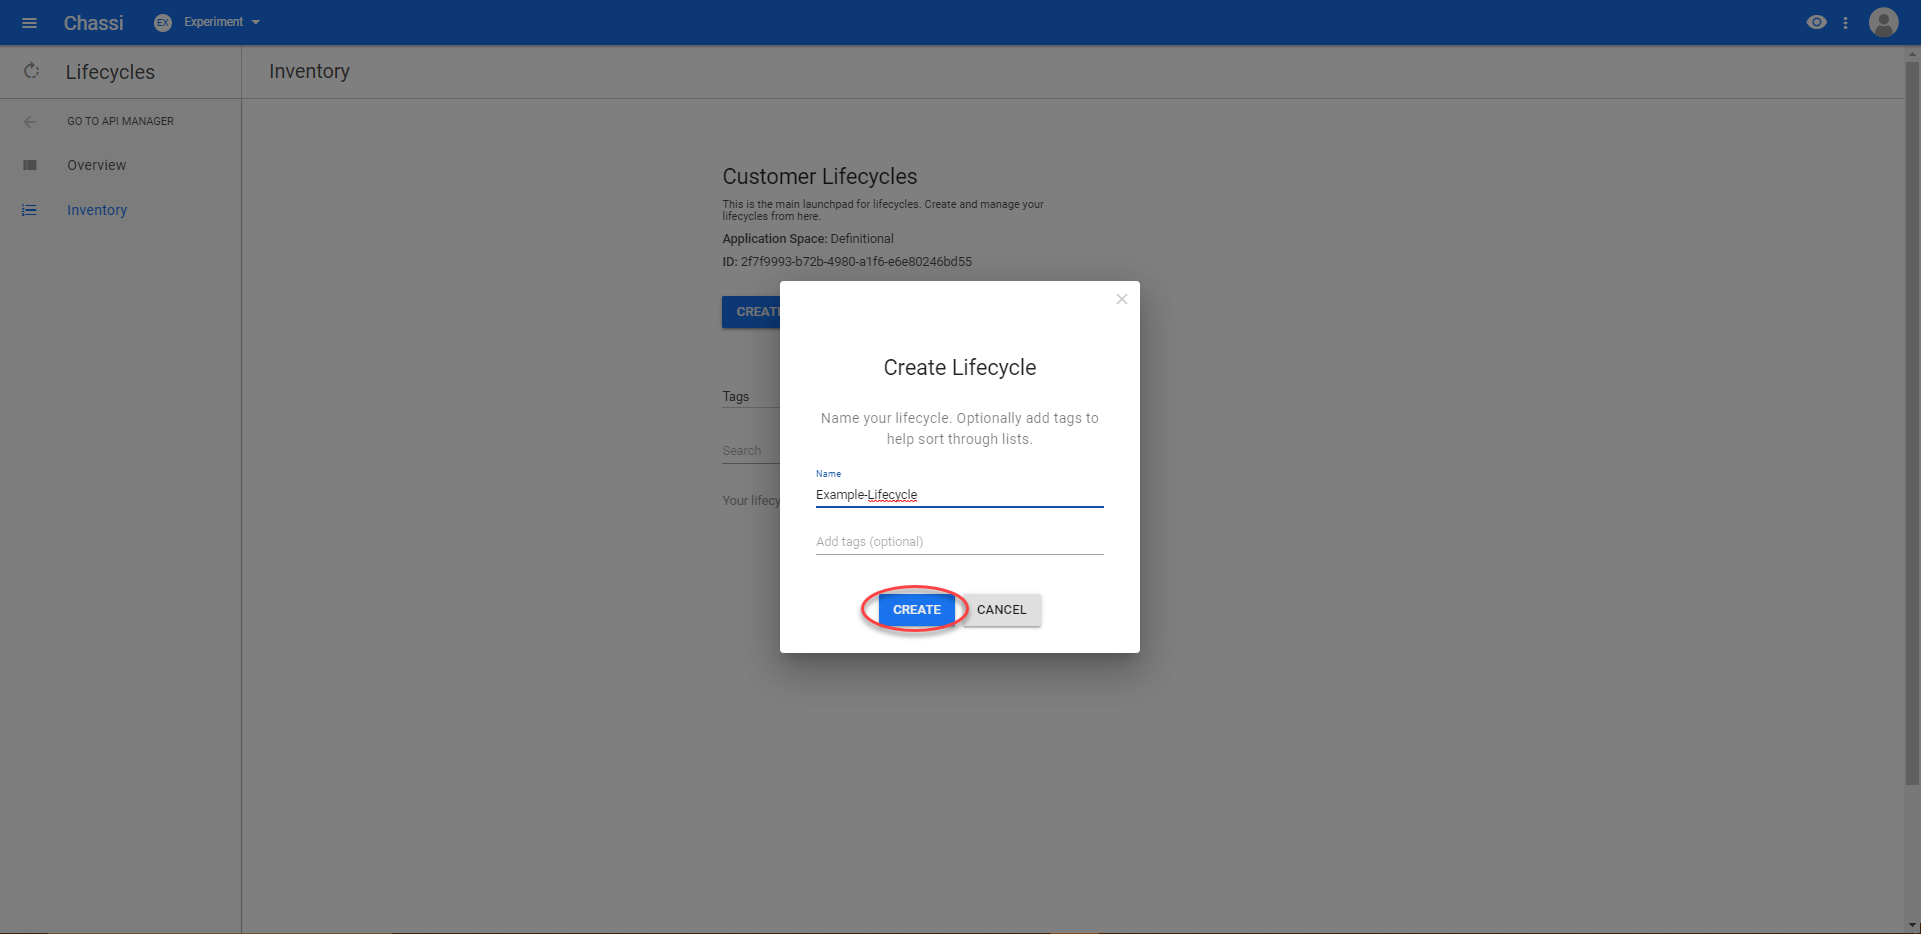
Here you will be prompted to enter a name for your lifecycle and any tags (optional). Next, click CREATE to move on to the next step.
Step 4
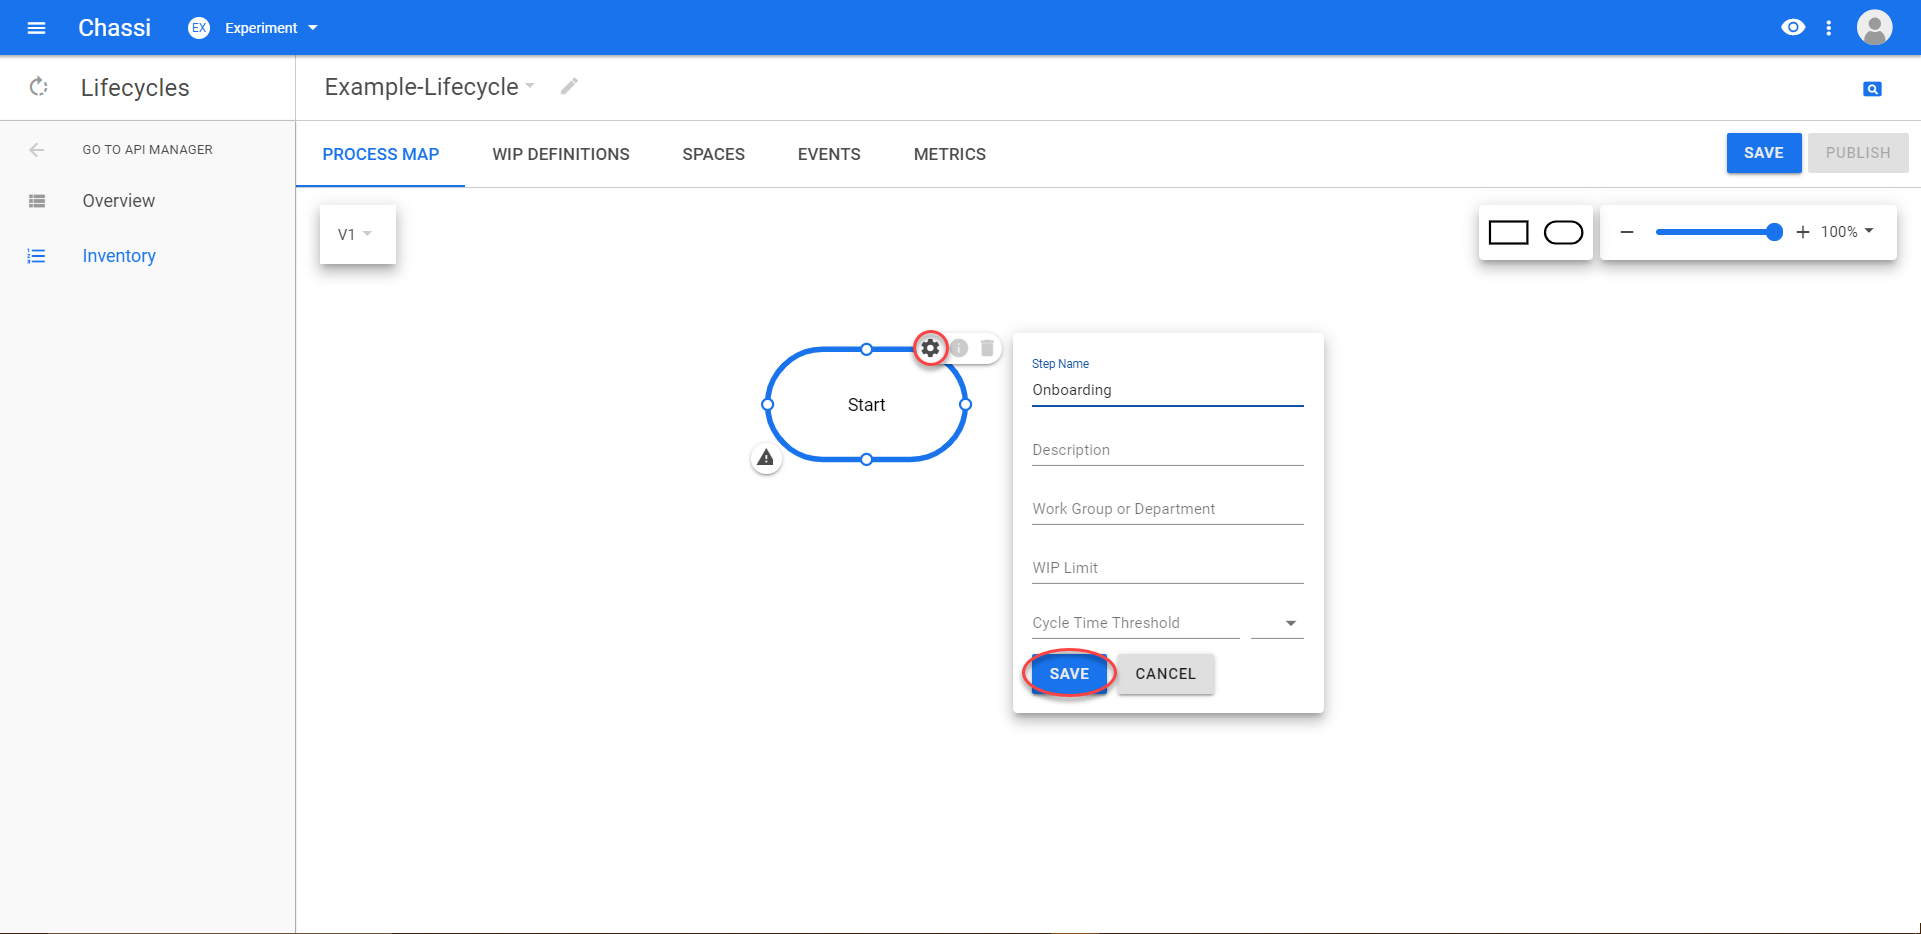
On this screen, you will see your lifecycle with your Start step already created. From there, you can click on the gear icon to have options to change the step name, add a description, add a Work Group or Department, add a WIP limit, or add a Cycle Time Threshold. See Using Process Map Events and Using WIP Definition Events for more information on this process.
Step 5
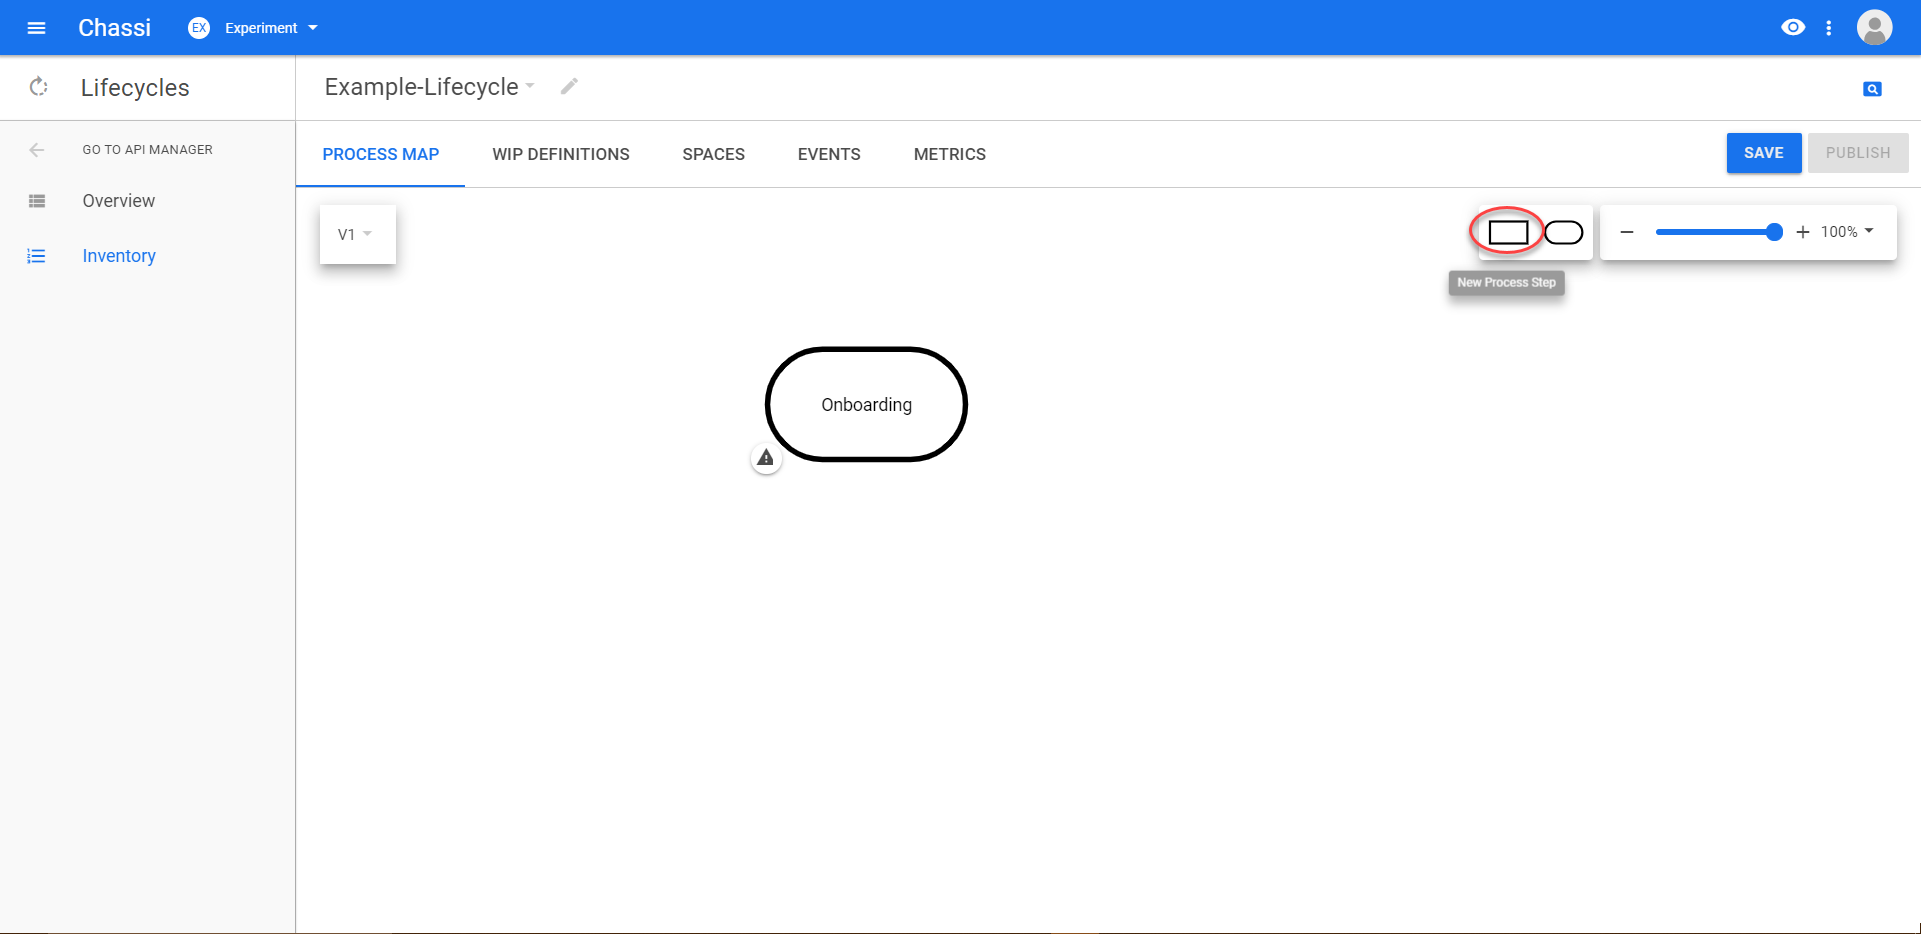
Our next step, we want to add some more steps to our lifecycle.
At the top right of this Process Map screen, we see both a square (adds a New Process step) and an oval icon (adds a Terminal Step).
For this example, we will click on the New Process Step icon to add another process step to our lifecycle.
Step 6
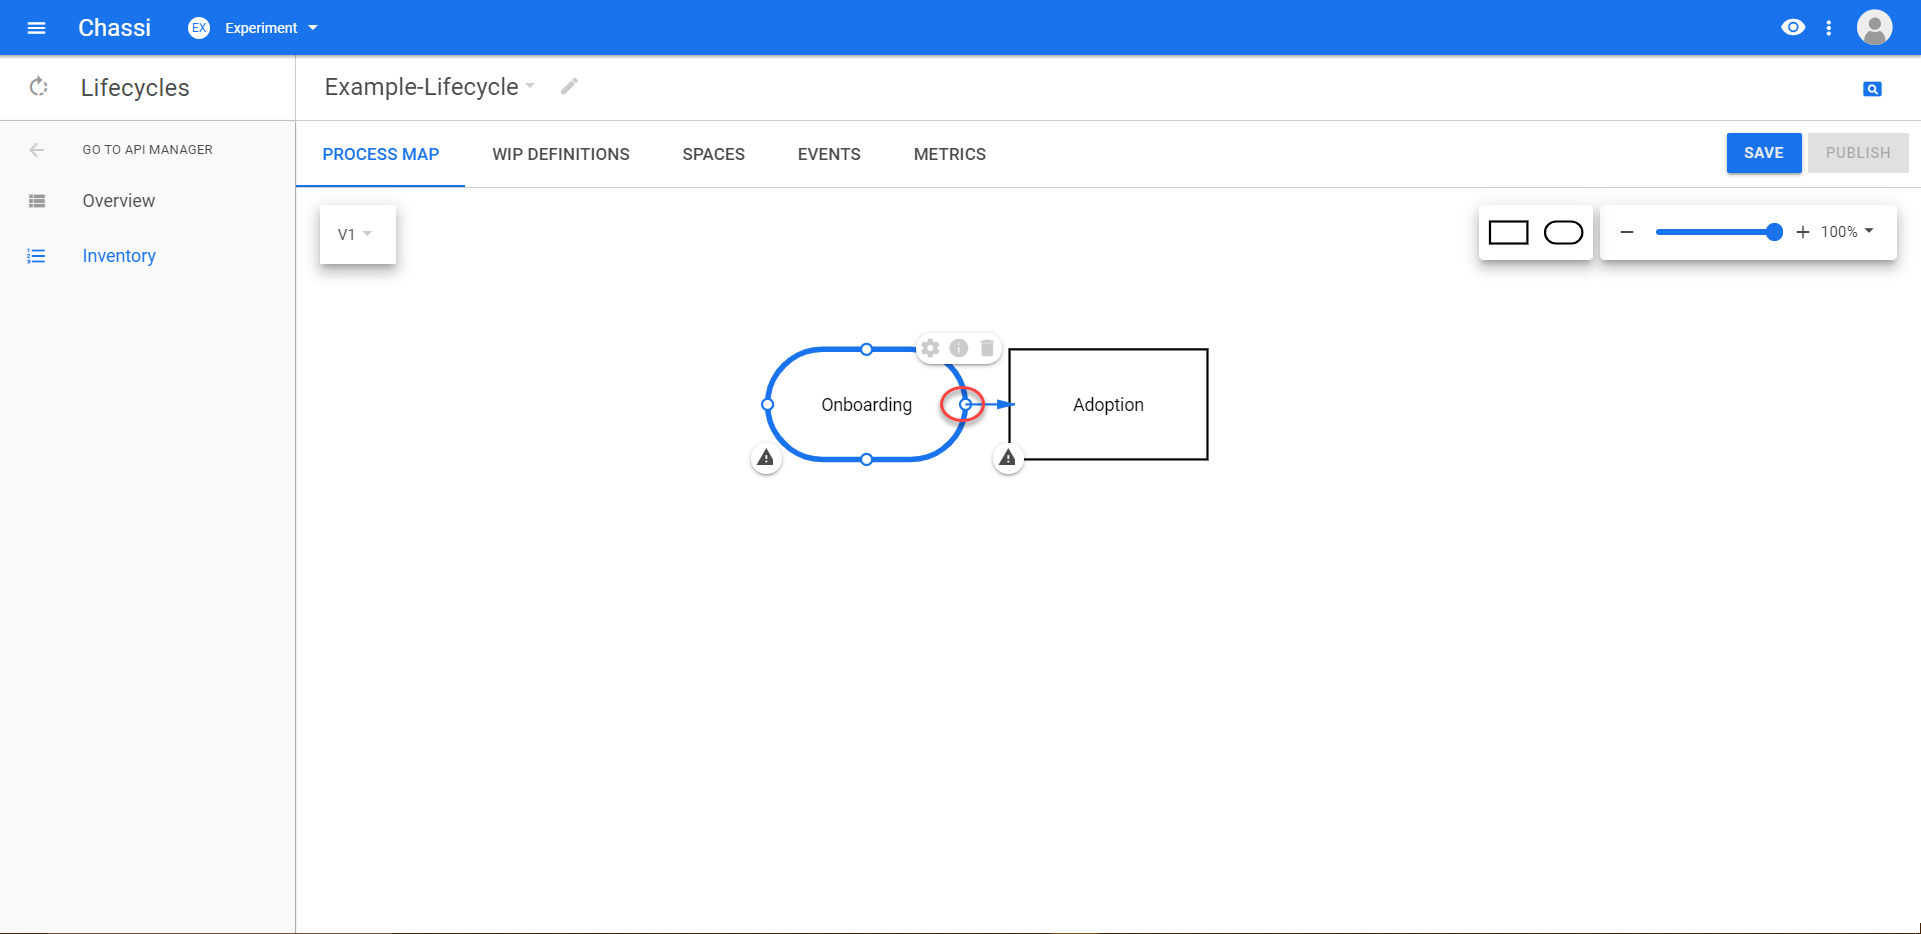
For this step, our second process step name was changed to Adoption first. Next we are demonstrating how we can link this step to the starting step, by clicking and dragging from the small circle icon on the start step to the Adoption step.
Step 7
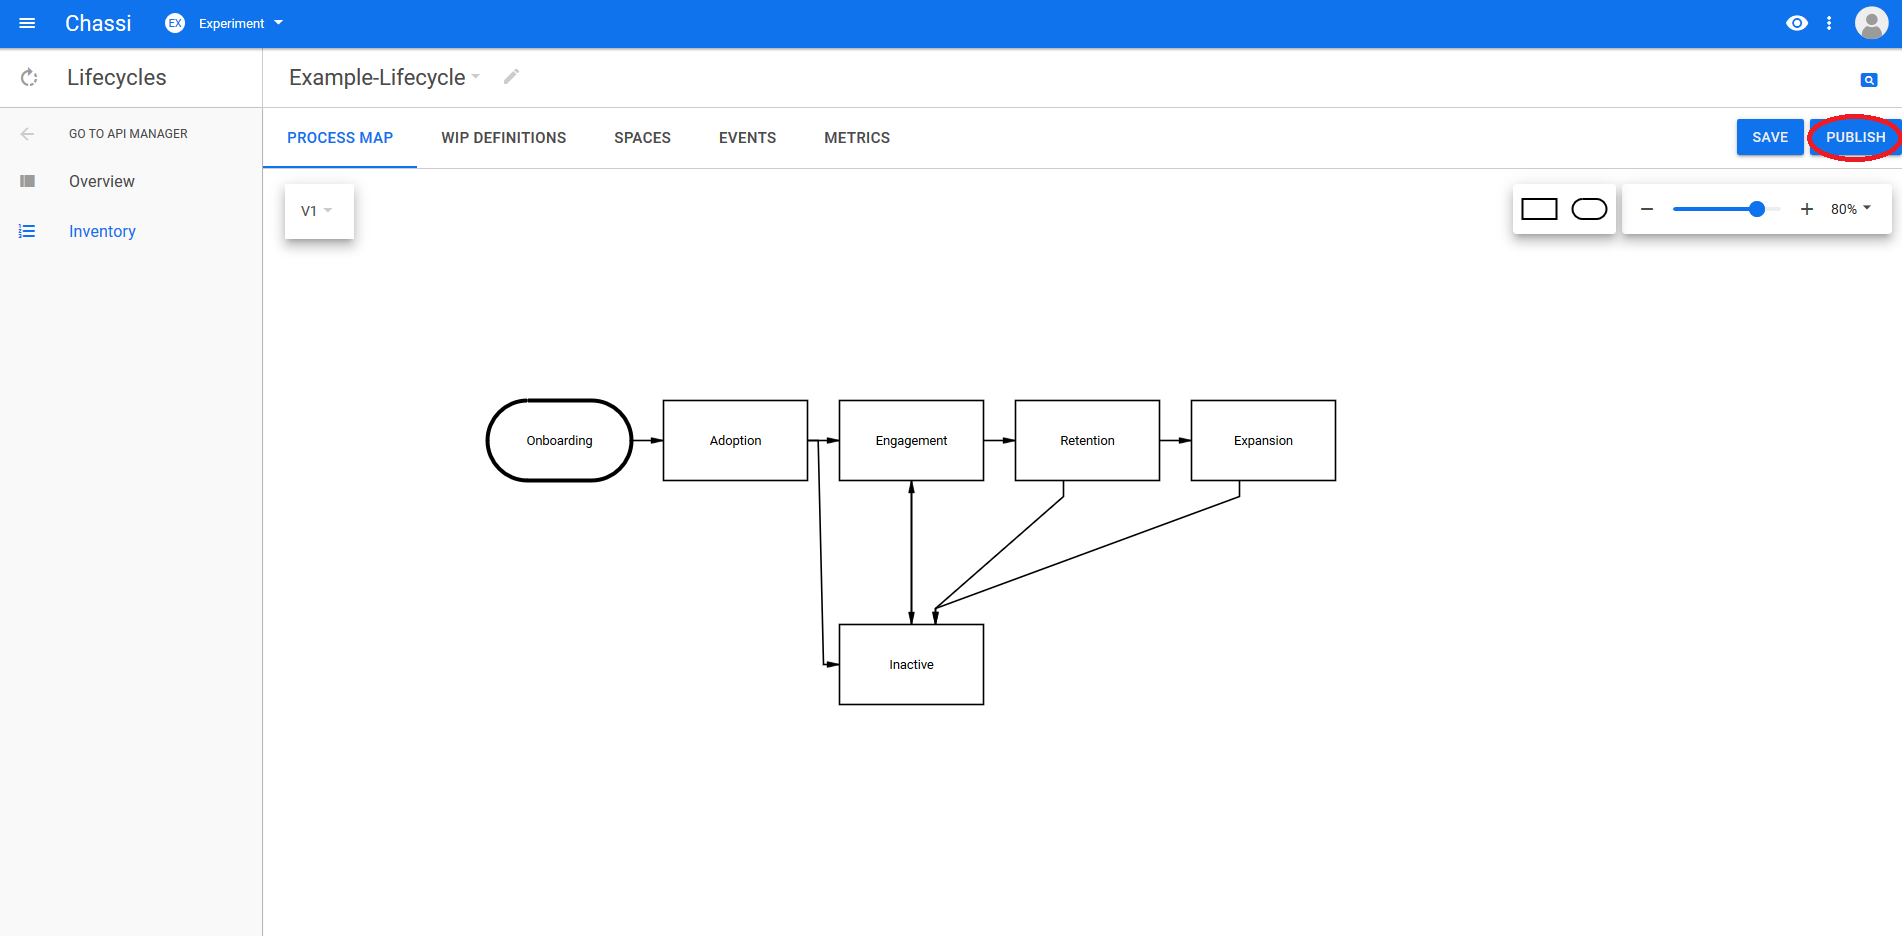
This step is a combination of Steps 5 and 6, until we have created all the steps we want in our lifecycle. For example, we have added the steps Engagement, Retention, Expansion, and Inactive were added to our lifecycle.
Once our lifecycle steps are complete, we will want to click the PUBLISH button at the top right of the view.
Step 8
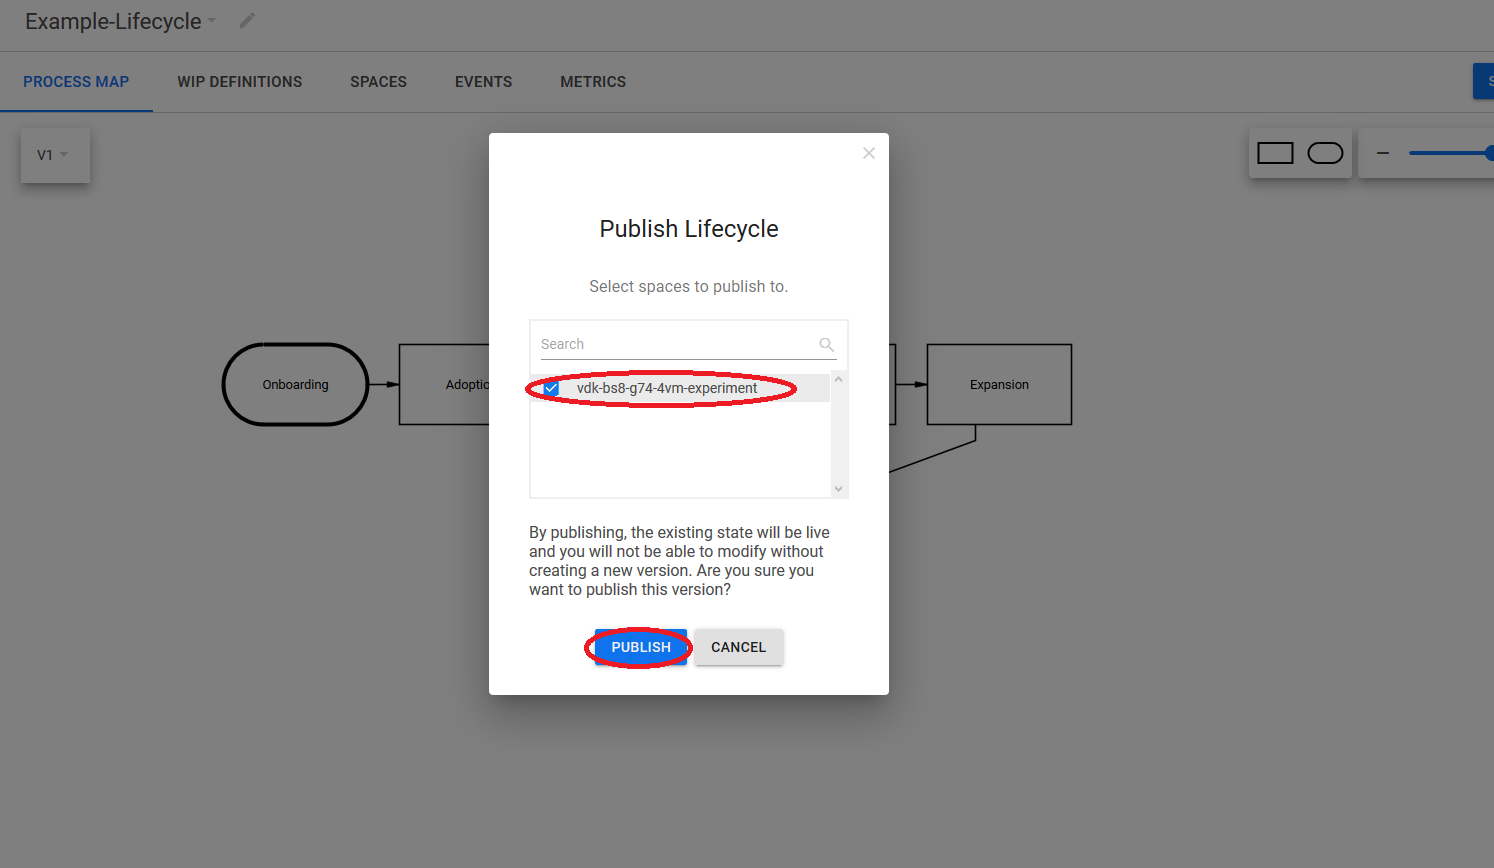
Once PUBLISH was clicked, you will have the option to publish to multiple application spaces if you so choose. After selecting which spaces, click PUBLISH to complete the publication process.
Step 9
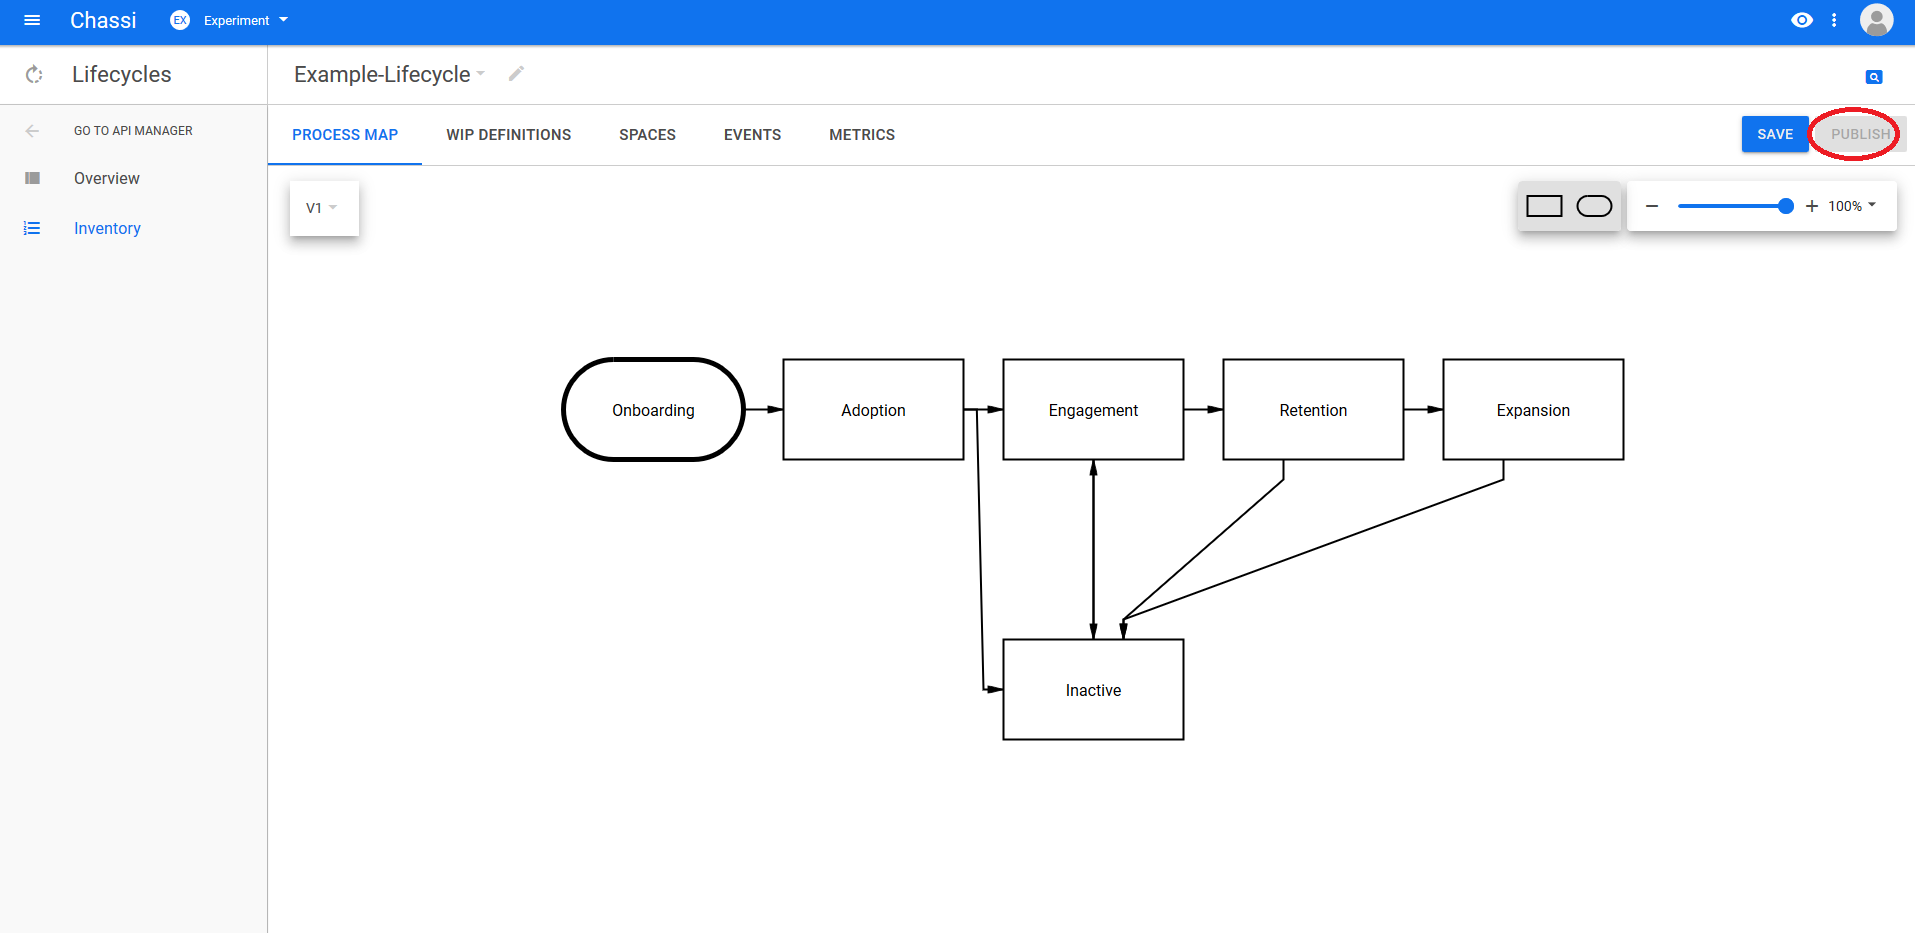
Once the popup disappeared, we can verify that the lifecycle was published by confirming that the PUBLISH button is greyed out.
Updated almost 7 years ago
Use the Chassi UI to optionally create a Customer in Single Customer View before forking the Github project and working with the Postman/cURL examples. Otherwise, move forward to Fork the Sample Project.
