Create Customer
Optionally, create a customer in Single Customer View if you intend to link the customer, defined in Chassi, to a Journey.
Step 1
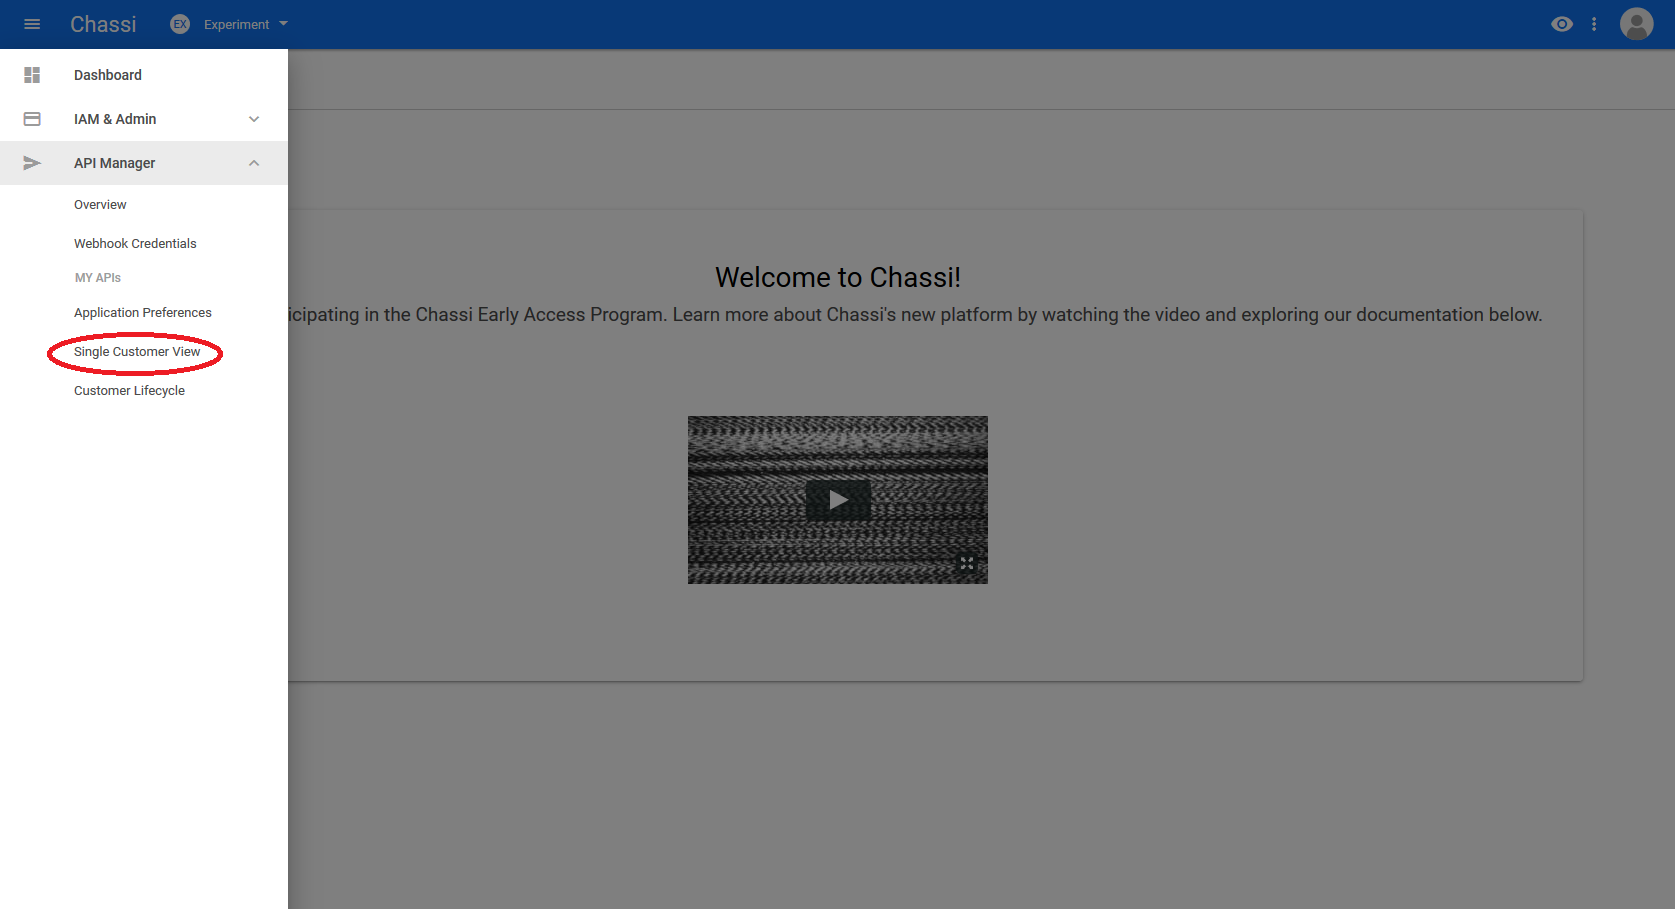
For your first step, you will want to open the menu on the top left and select Single Customer View under the API Manager section.
Step 2
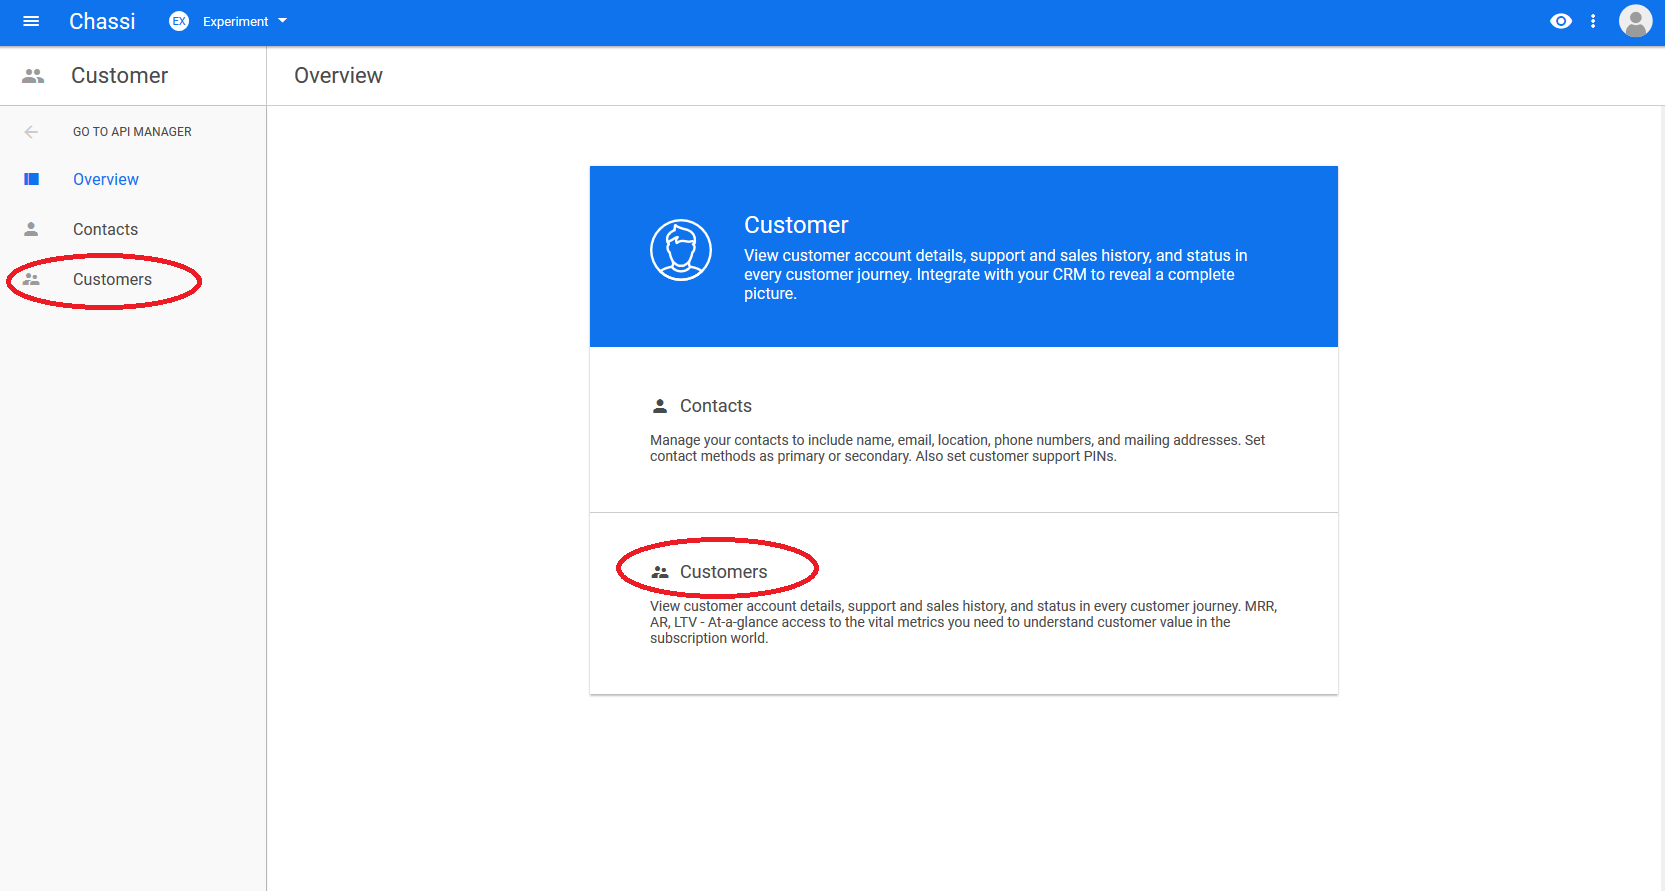
Next we need to navigate into our Customers section by one of the two links circled in this step.
Step 3
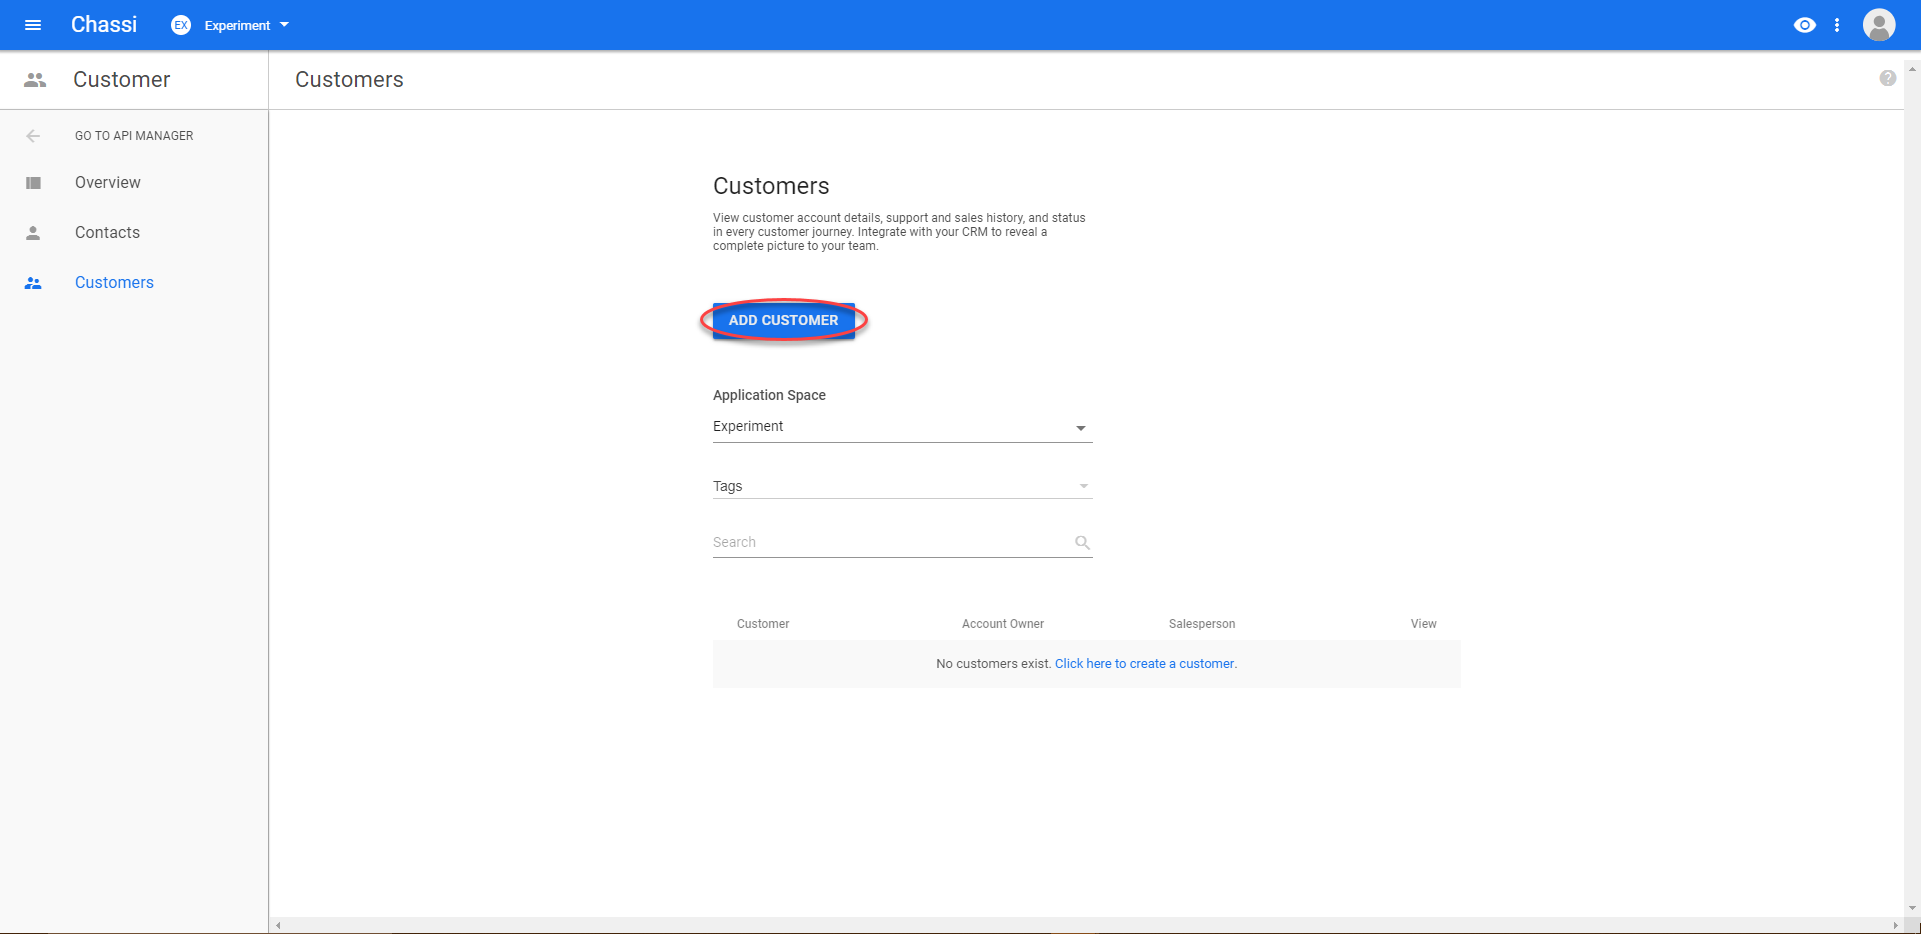
From here, we are able to create a new customer... so we will click the ADD CUSTOMER button to get started.
Step 4
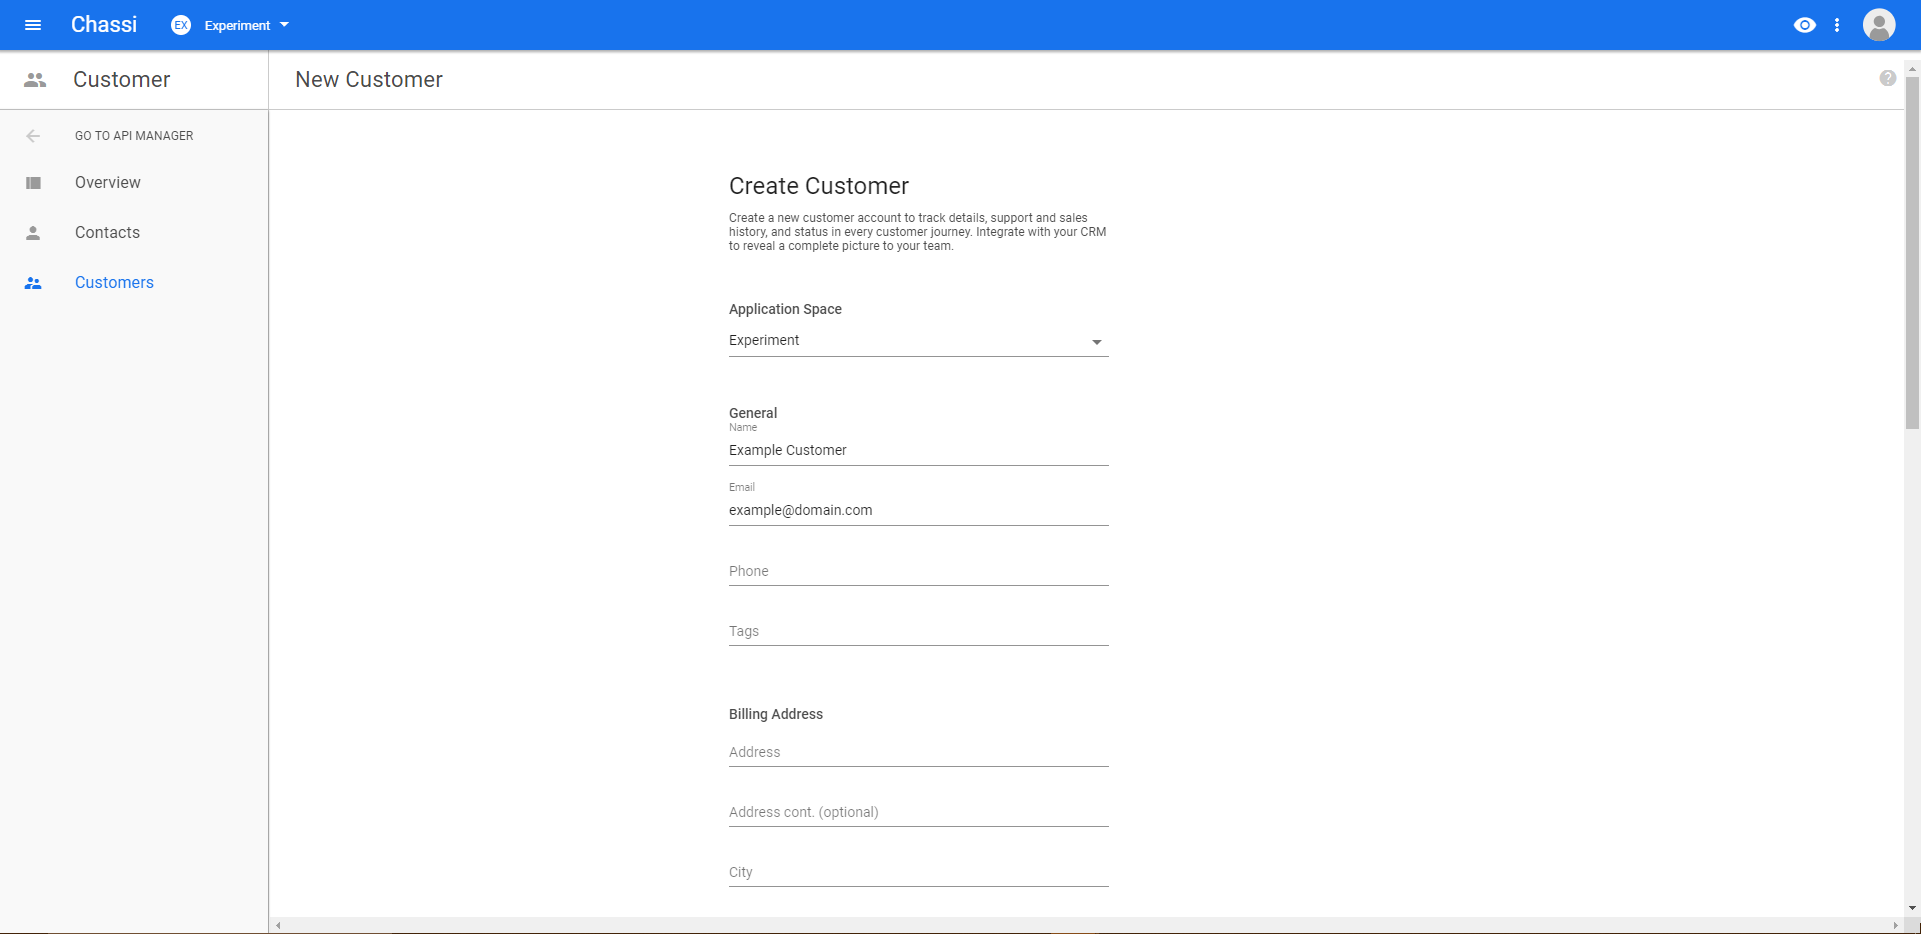
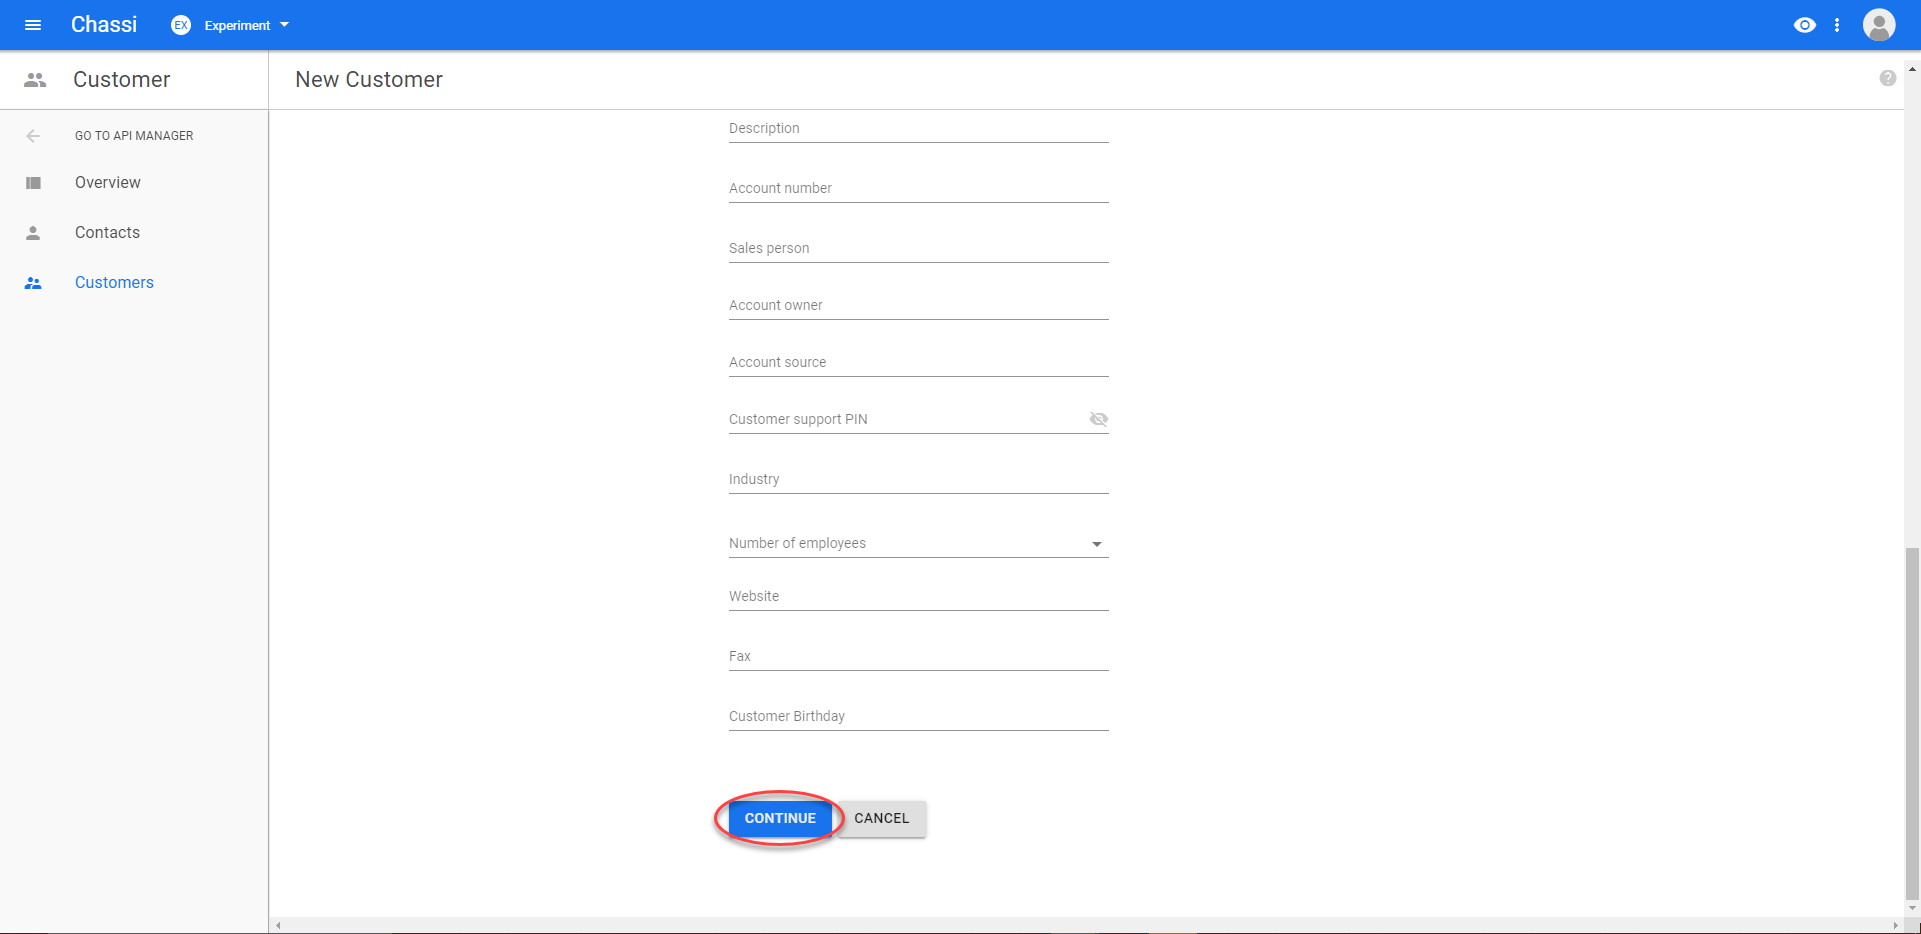
On this page, we are able to select which Application Space, where we want the customer to be created, as well as fill in all the details that we want about the customer. Only Name and an Email or Phone number are required for creating a customer, so we will only fill out those fields for now. We can always go back and update our customer's details later, if needed.
When we are completed with filling out all the details of the customer, we can go ahead and click on CONTINUE at the bottom of this screen.
Step 5
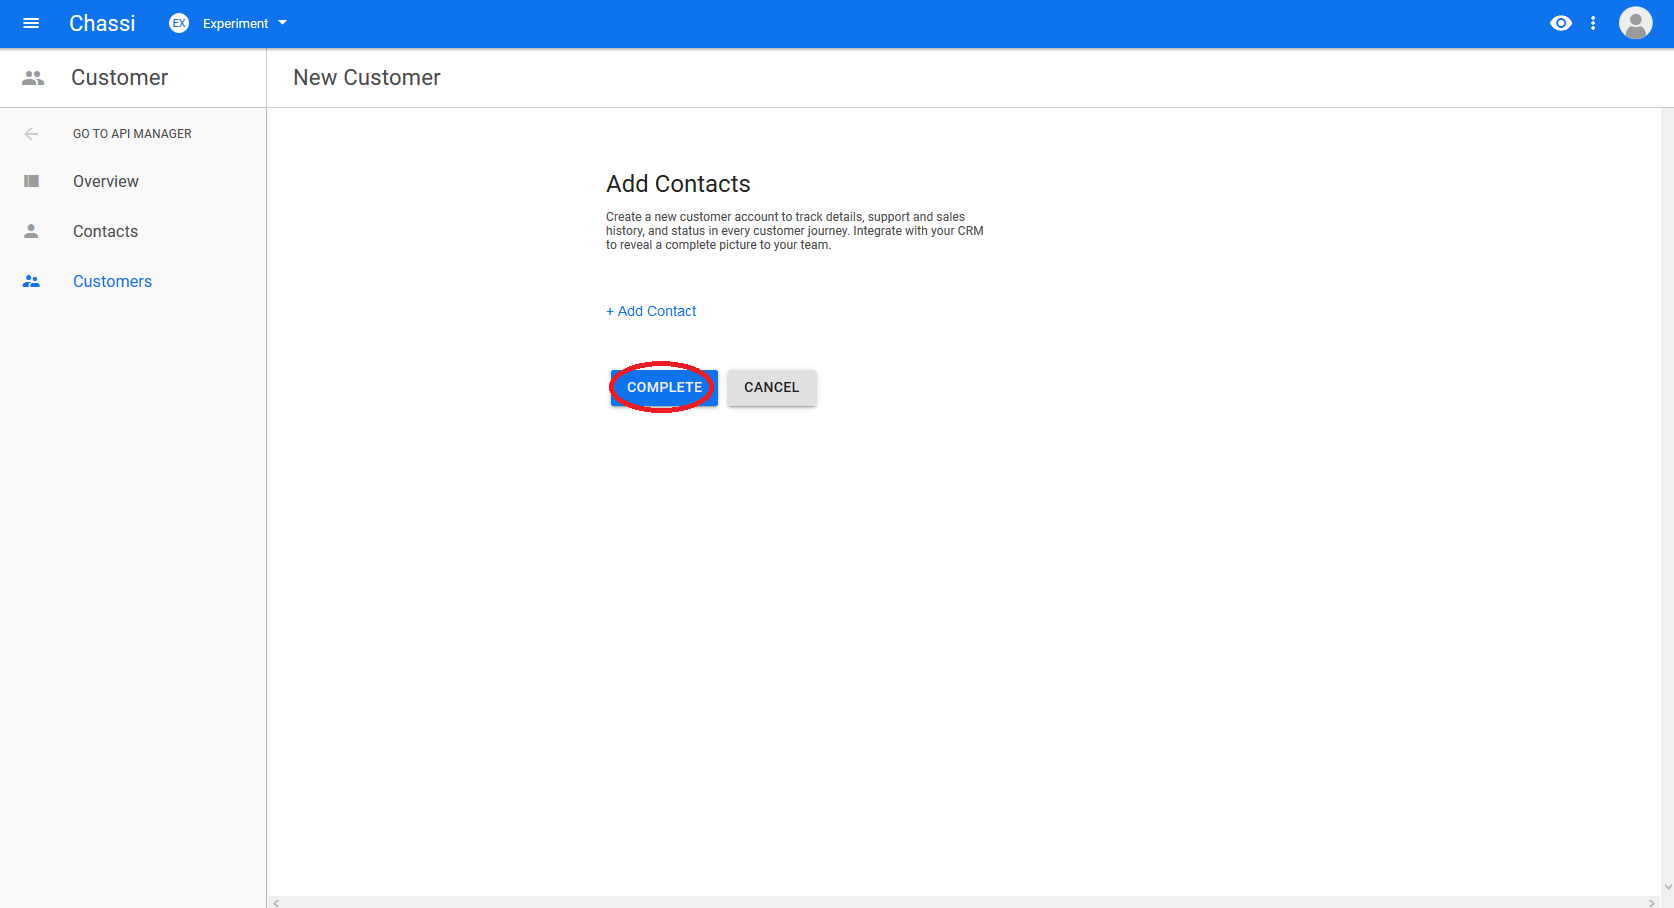
On this screen, we have the option to add a contact to this customer. For this example, we are going to skip this and click on COMPLETE to finish the creation process of our new customer.
Step 6
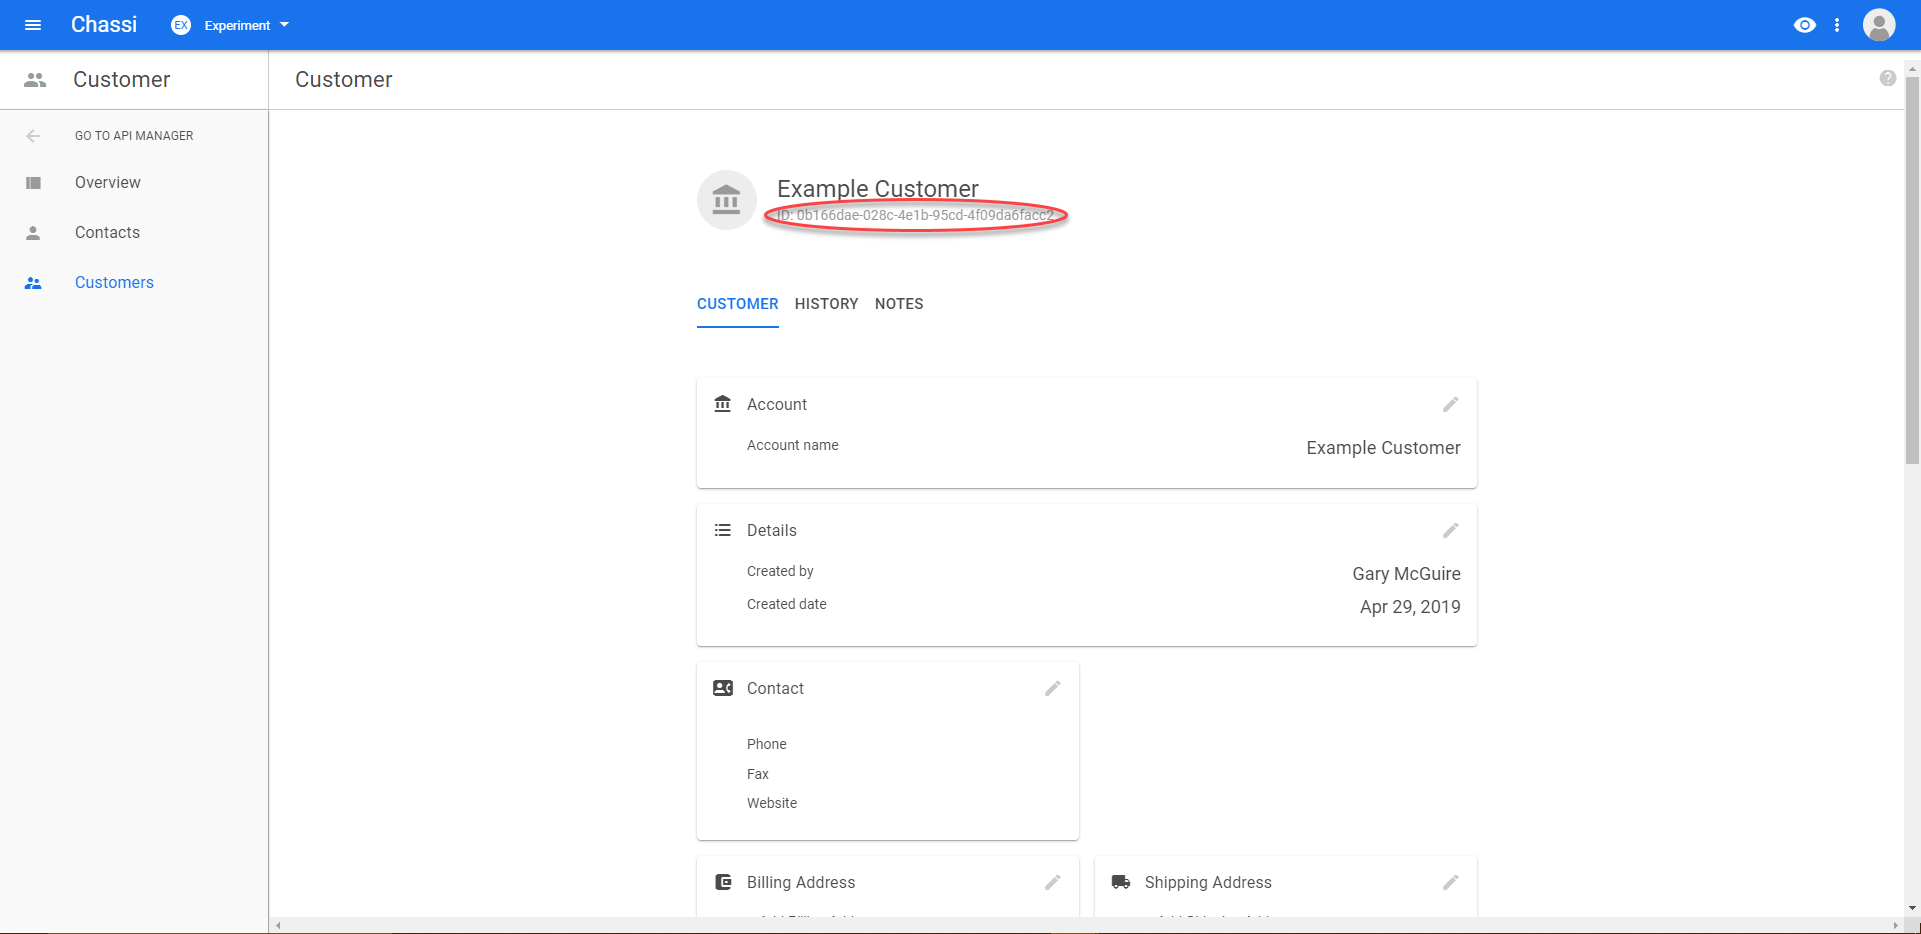
Finally, we are brought to our new customer's dashboard. Here we can verify all the information and edit if needed. We also may want to note the customer's id (circled in the example screenshot) if we are going to create a journey with this customer.
Updated over 6 years ago
Use git to fork the Github project and begin working with the Postman/cURL example.
