Update your Postman Environment Variables
Using the information found in the API Spy and Entity Spy, update the Postman environment variables so the Postman scripts can execute on the proper resources.
Step 1
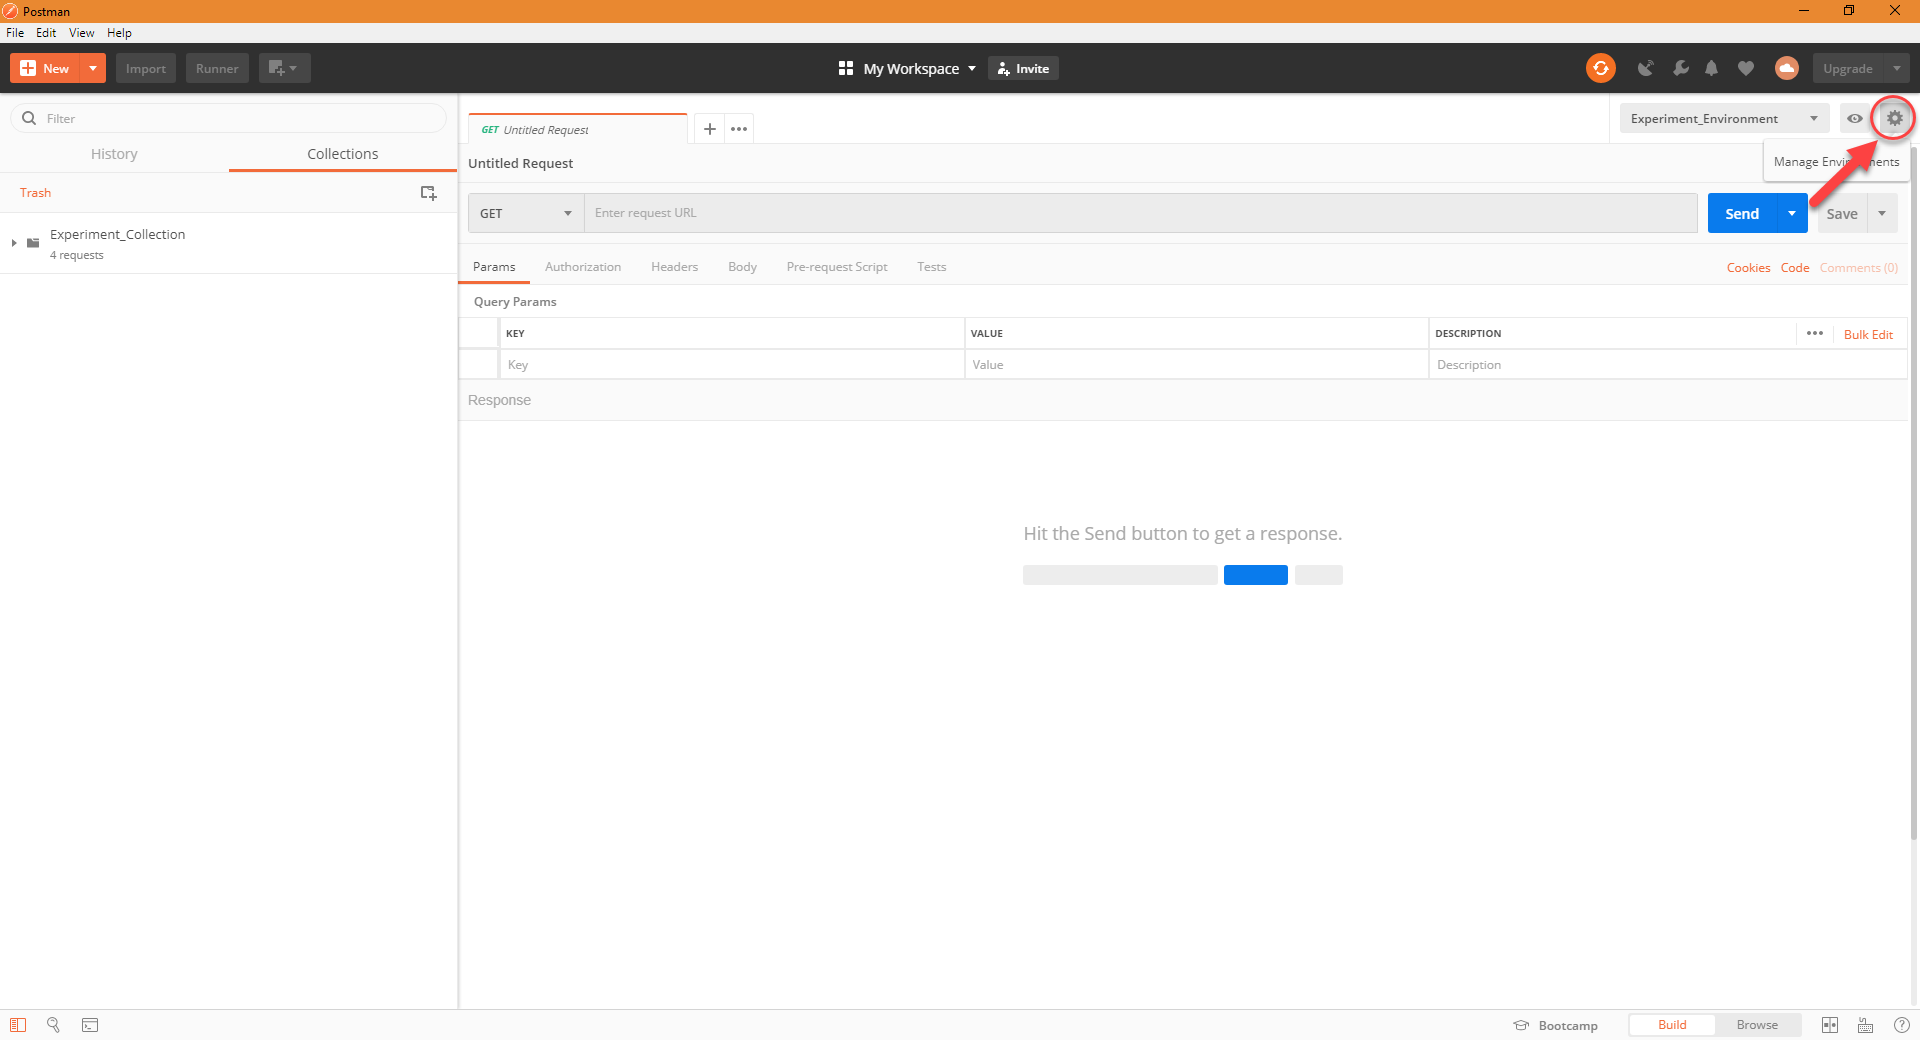
The first step to updating your environment variables is to access them via the gear icon on the top right of the postman workspace, immediately to the right of th environment drop down bar. This will open the MANAGE ENVIRONMENTS window.
Step 2
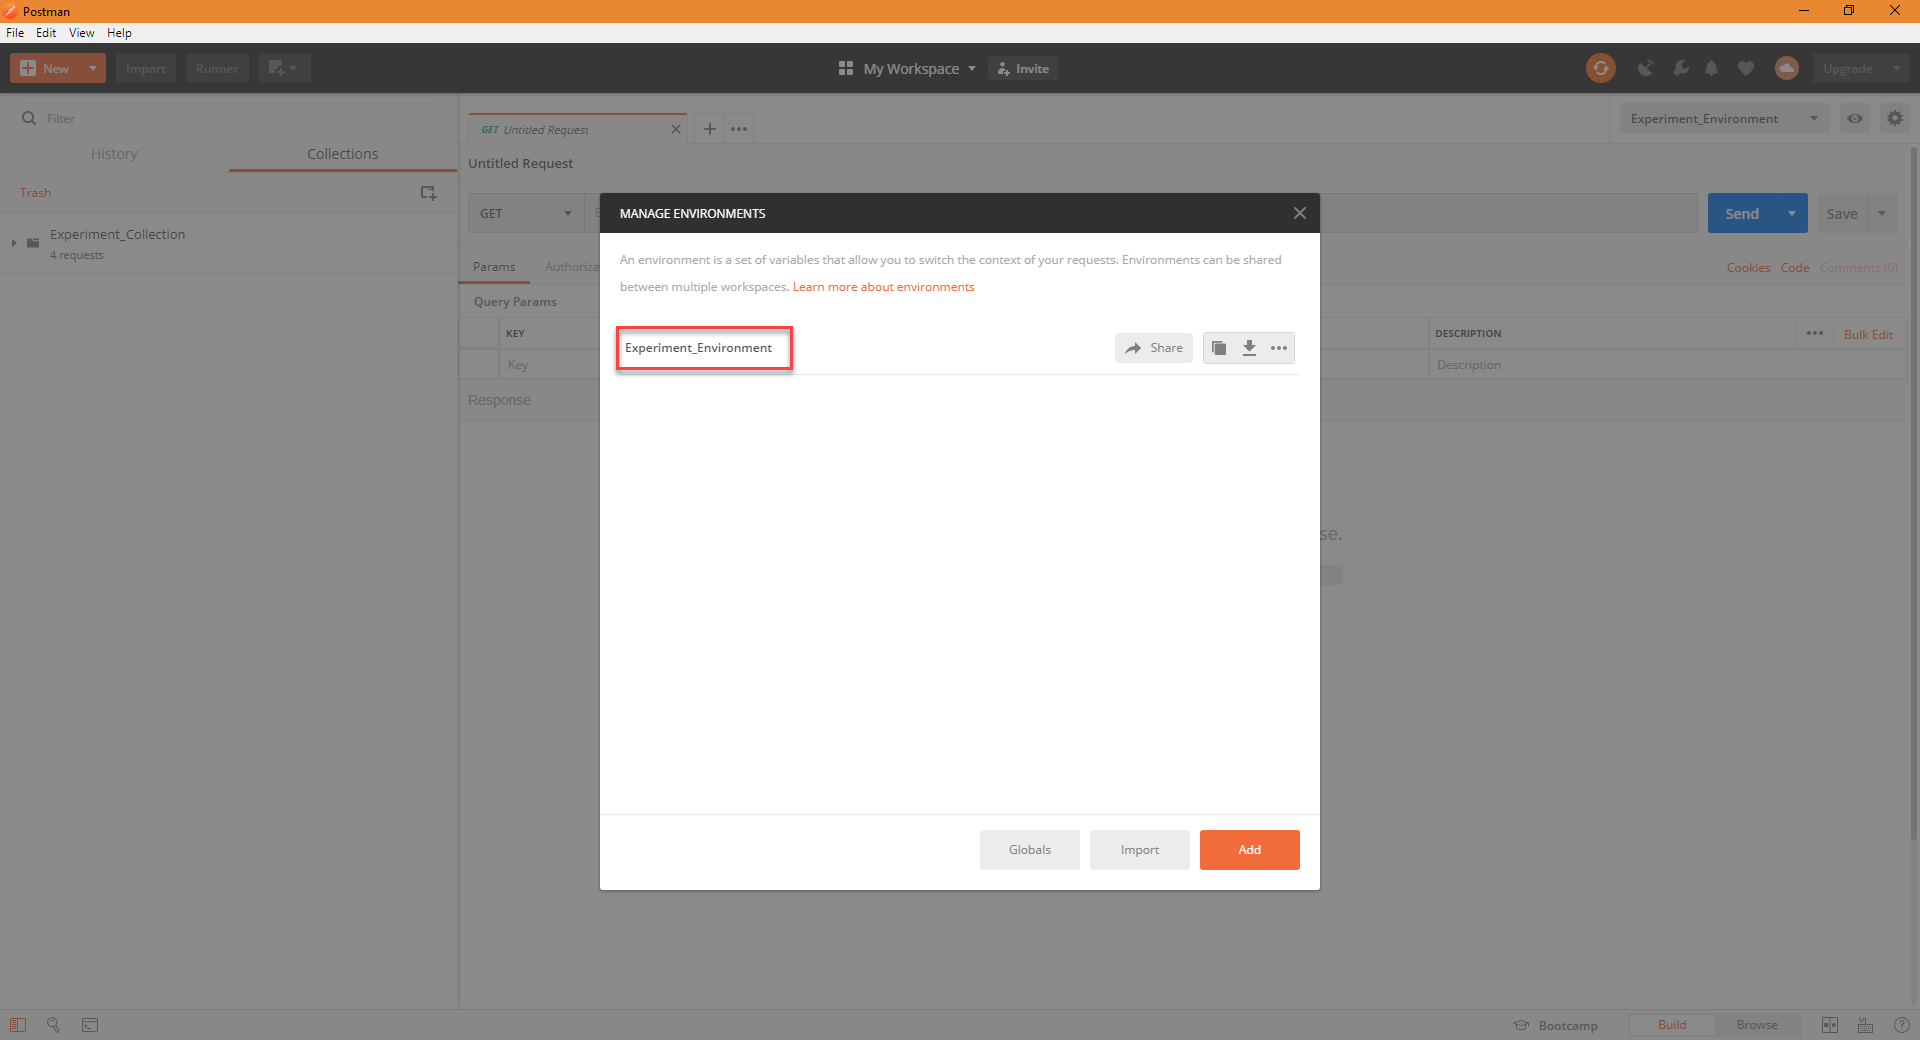
Once the window is open, you will want to click on your environment that you wish to update. In this case, we will be clicking on Experiment_Environment.
Step 3
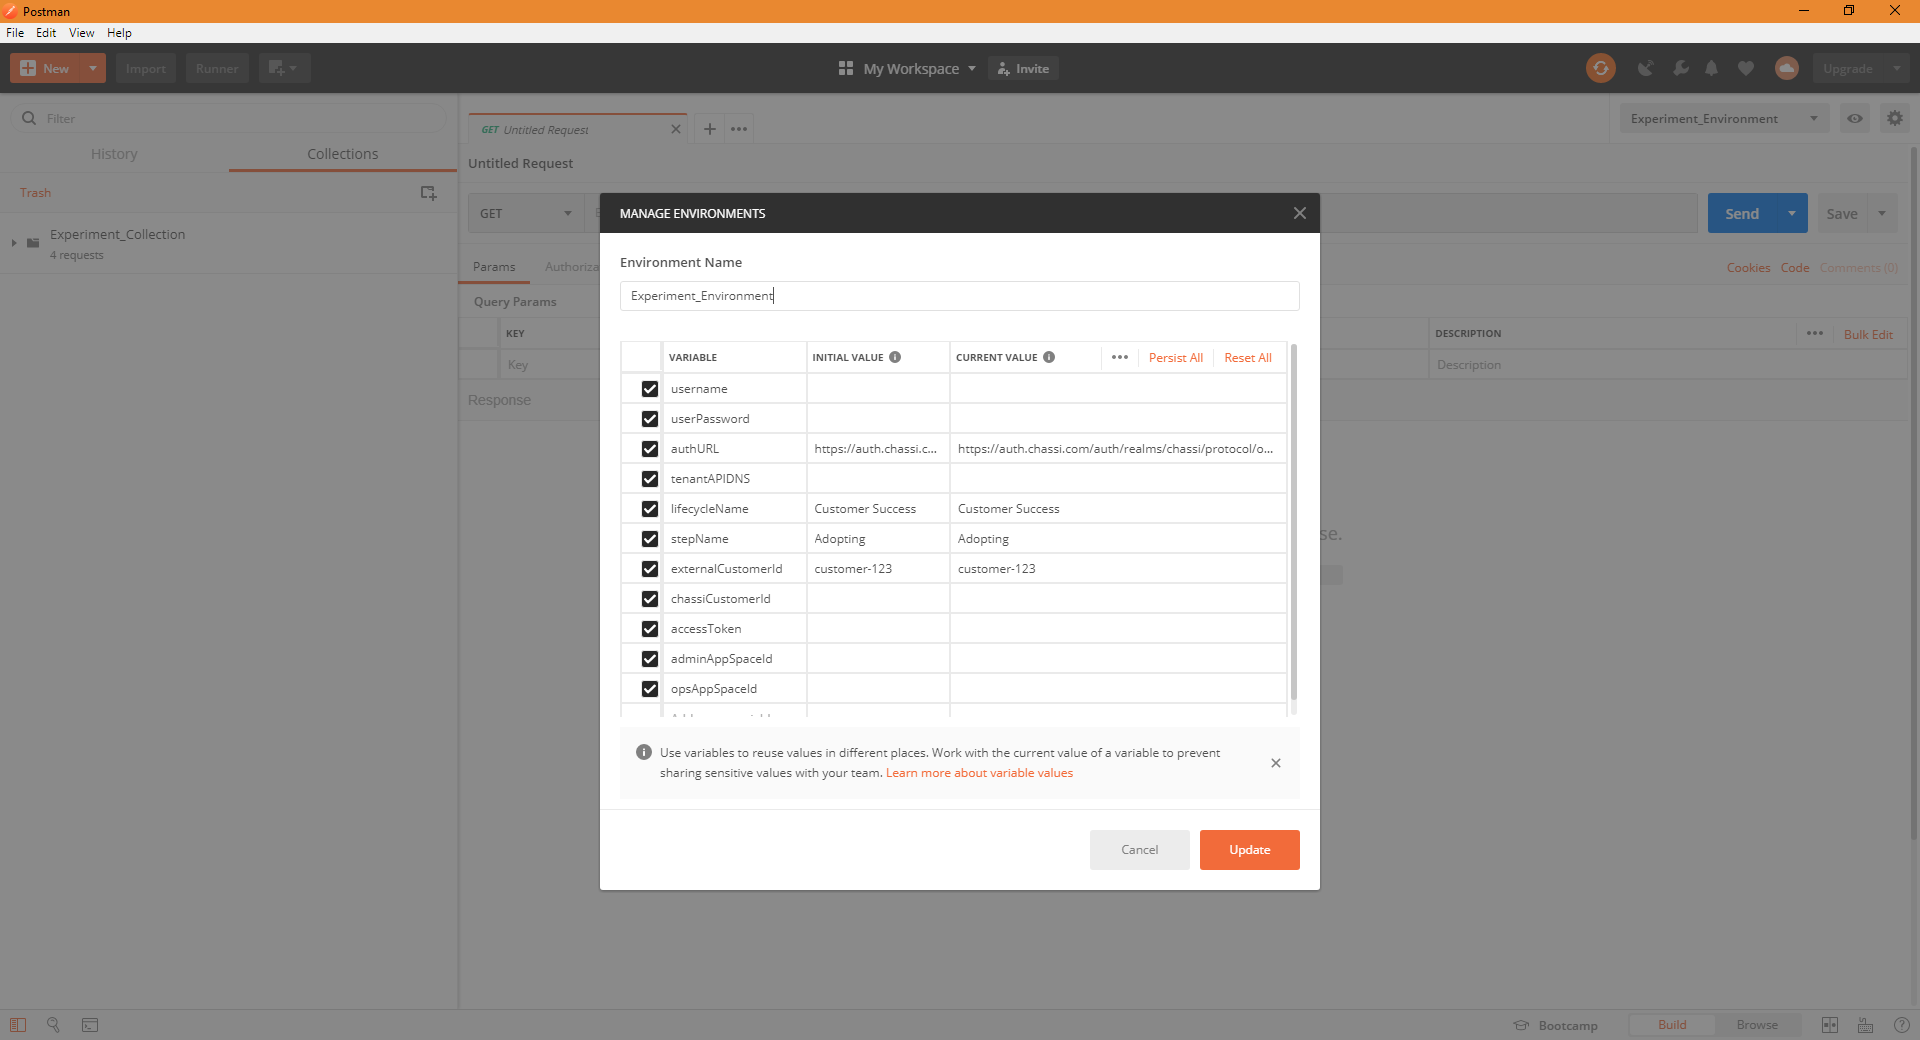
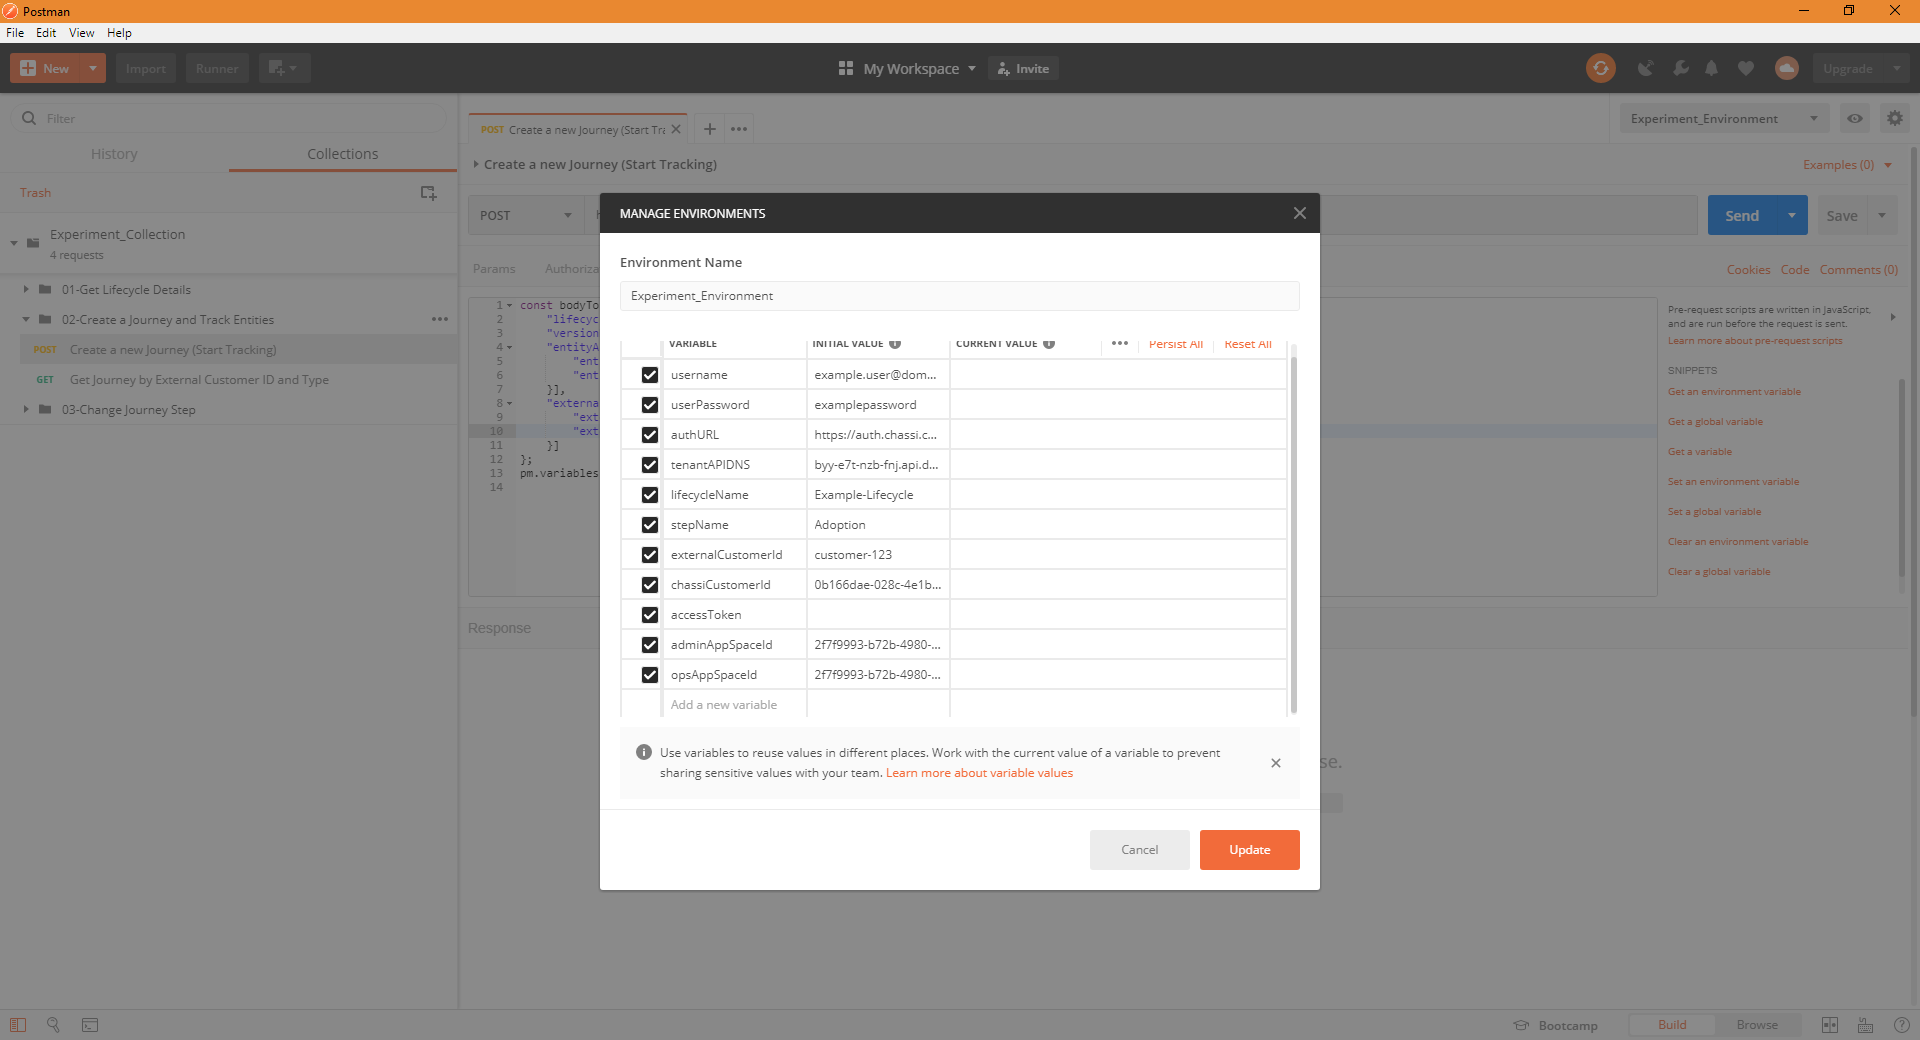
Once clicked, you will see all the environment variables and have the option to add initial and current values to them. For the most part, we will only be concerned with adding initial values to them... unless there are current values already assigned to them that are incorrect, in which case we will change those values as well. I.e. for this case, lifecycleName, stepName, and externalCustomerId are all values that already contain a current value that will need to be changed (we will do this in another step).
Step 4
Now we will need to obtain the values to fill in for this environment. To do this we will minimize postman, open an internet browser, navigate to the Chassi login, and sign in.
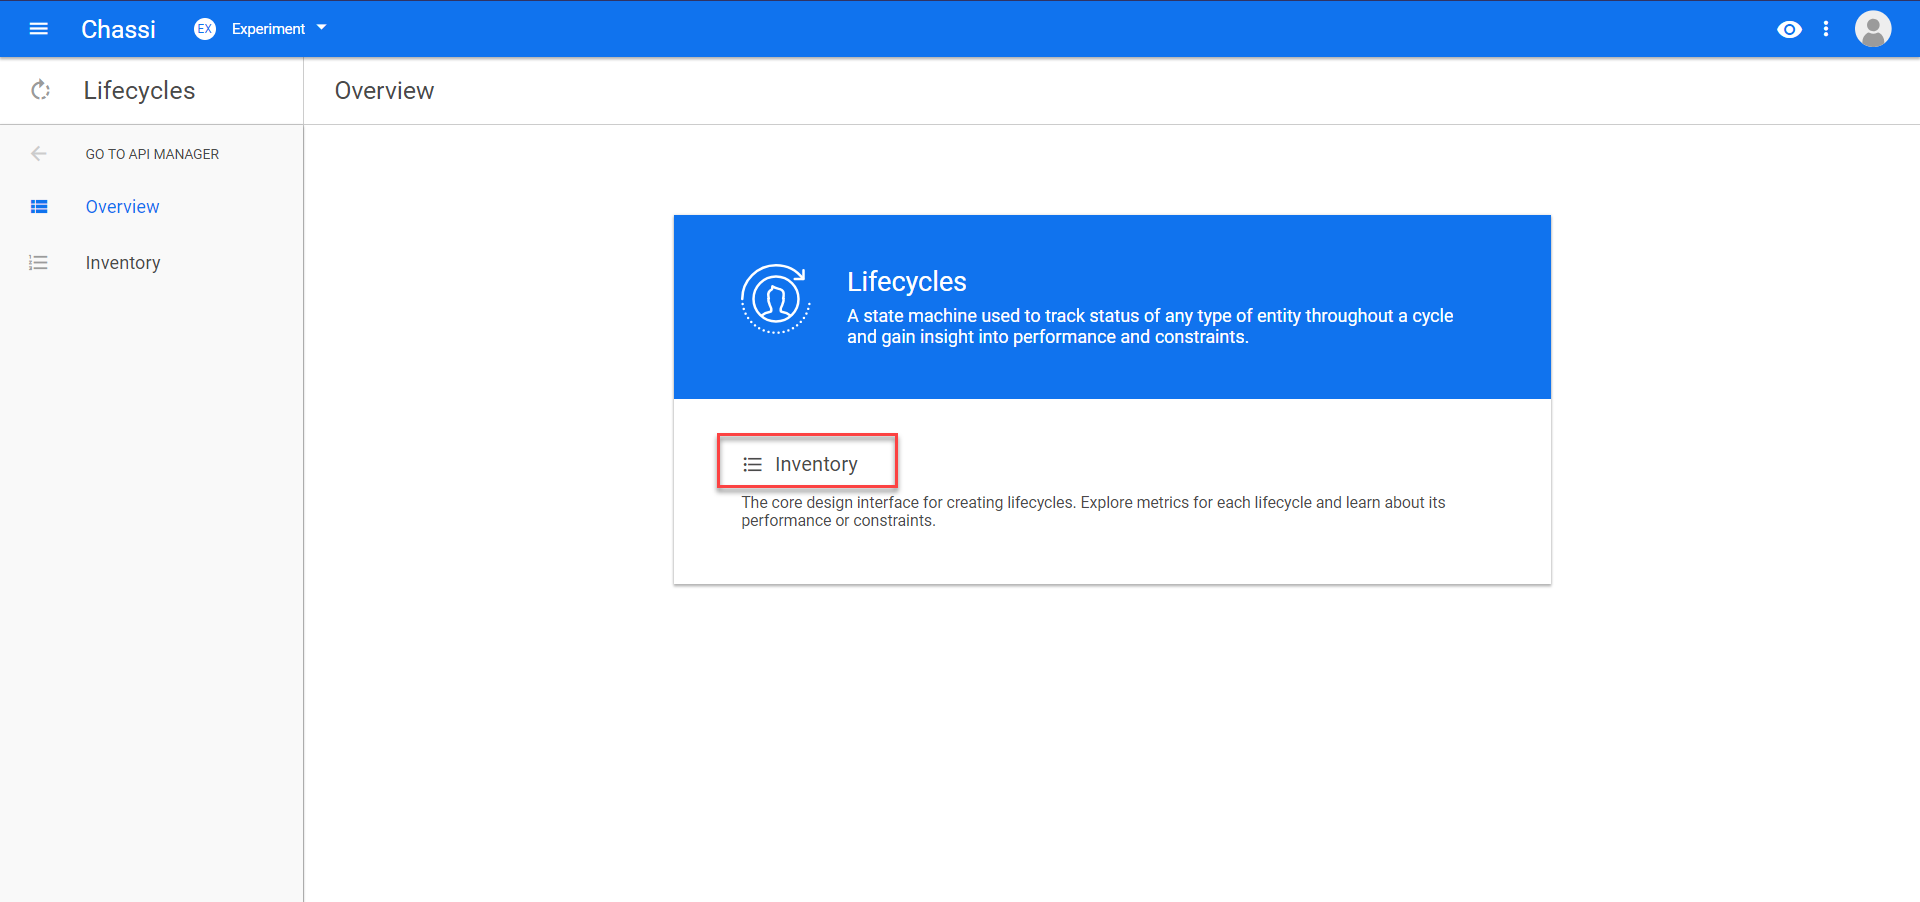
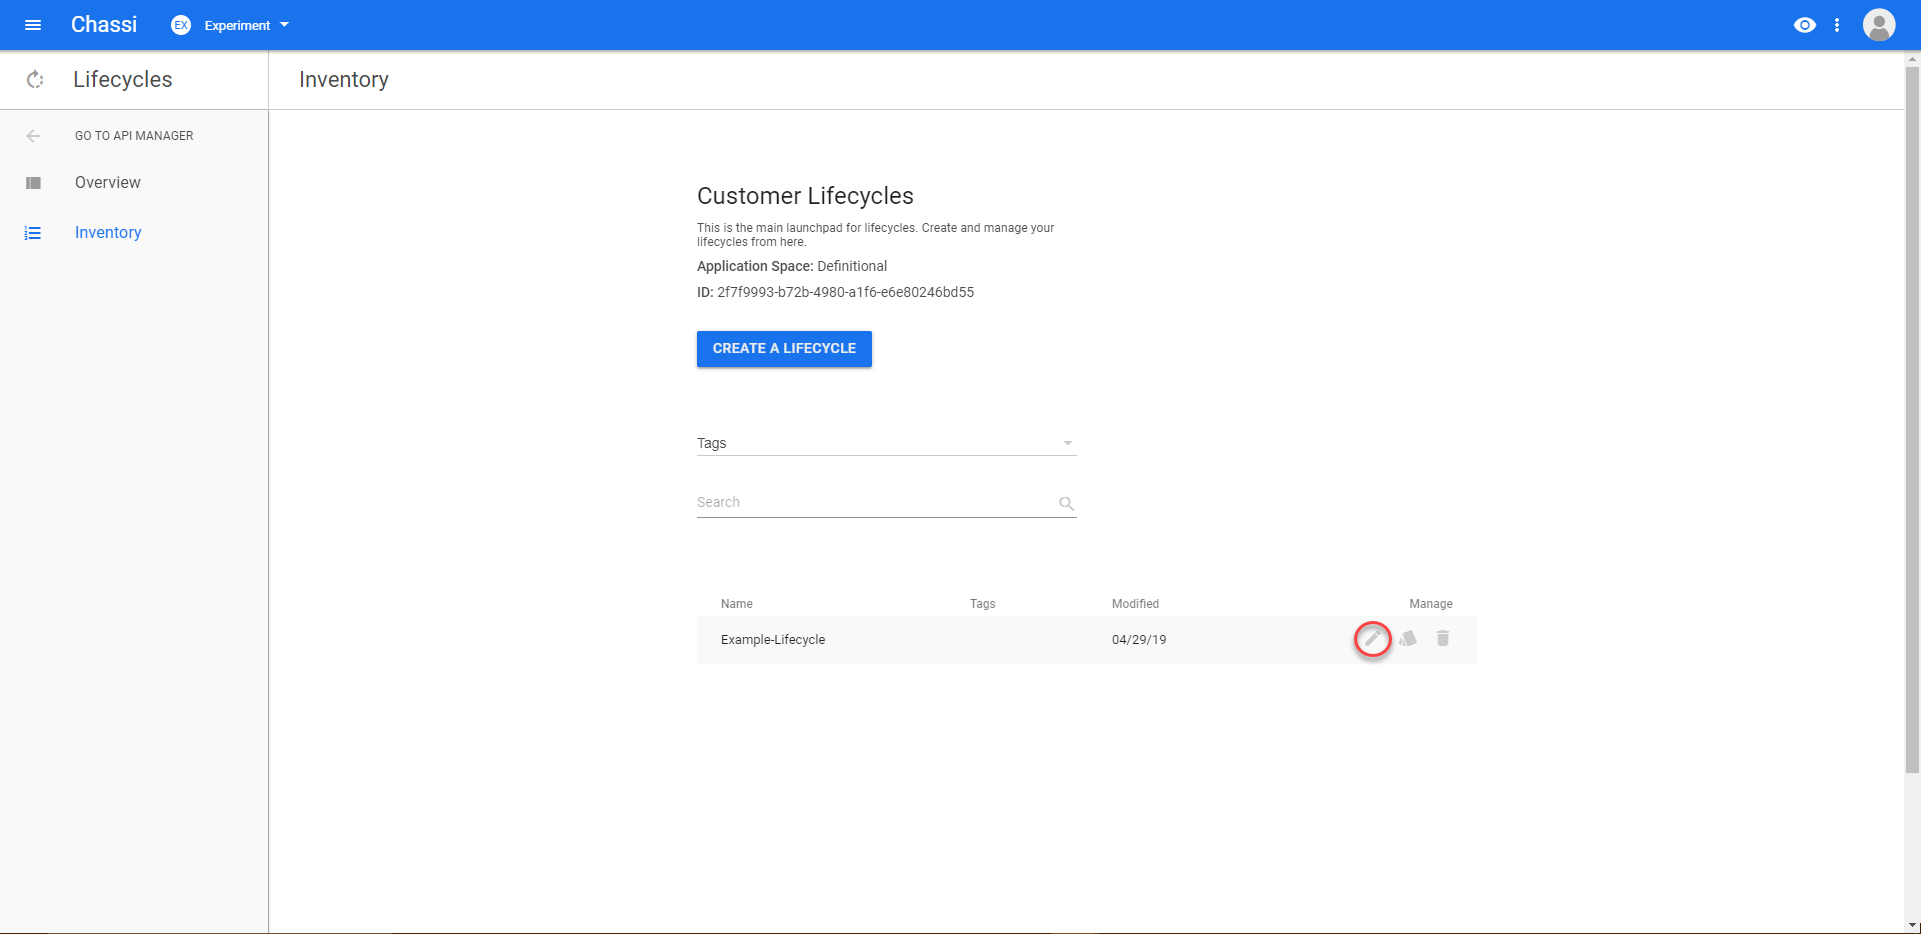
Next we want to navigate to our lifecycle inventory and click on the Edit icon (as indicated by the pencil) to open our Example-Lifecycle.
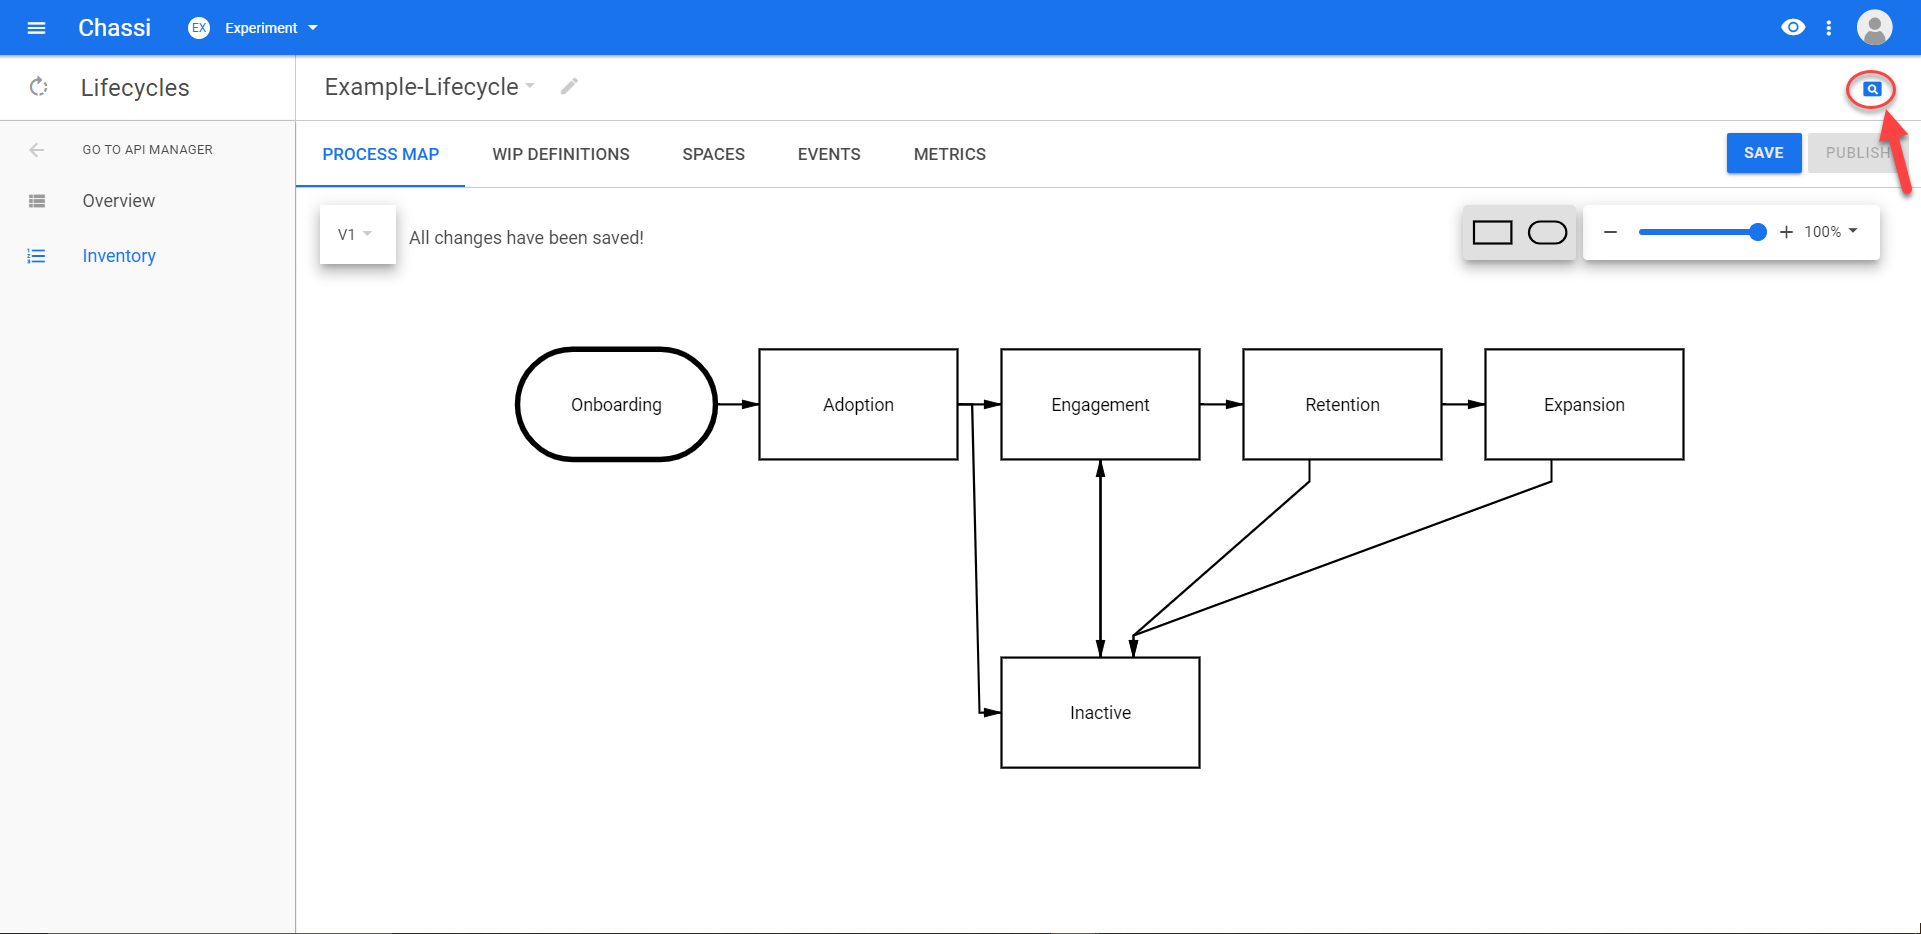
Step 5
Once on our Example-Lifecycle dashboard, we want to open up the Entity Spy by selecting the magnifying glass icon at the top right (as indicated in the above screen shot).
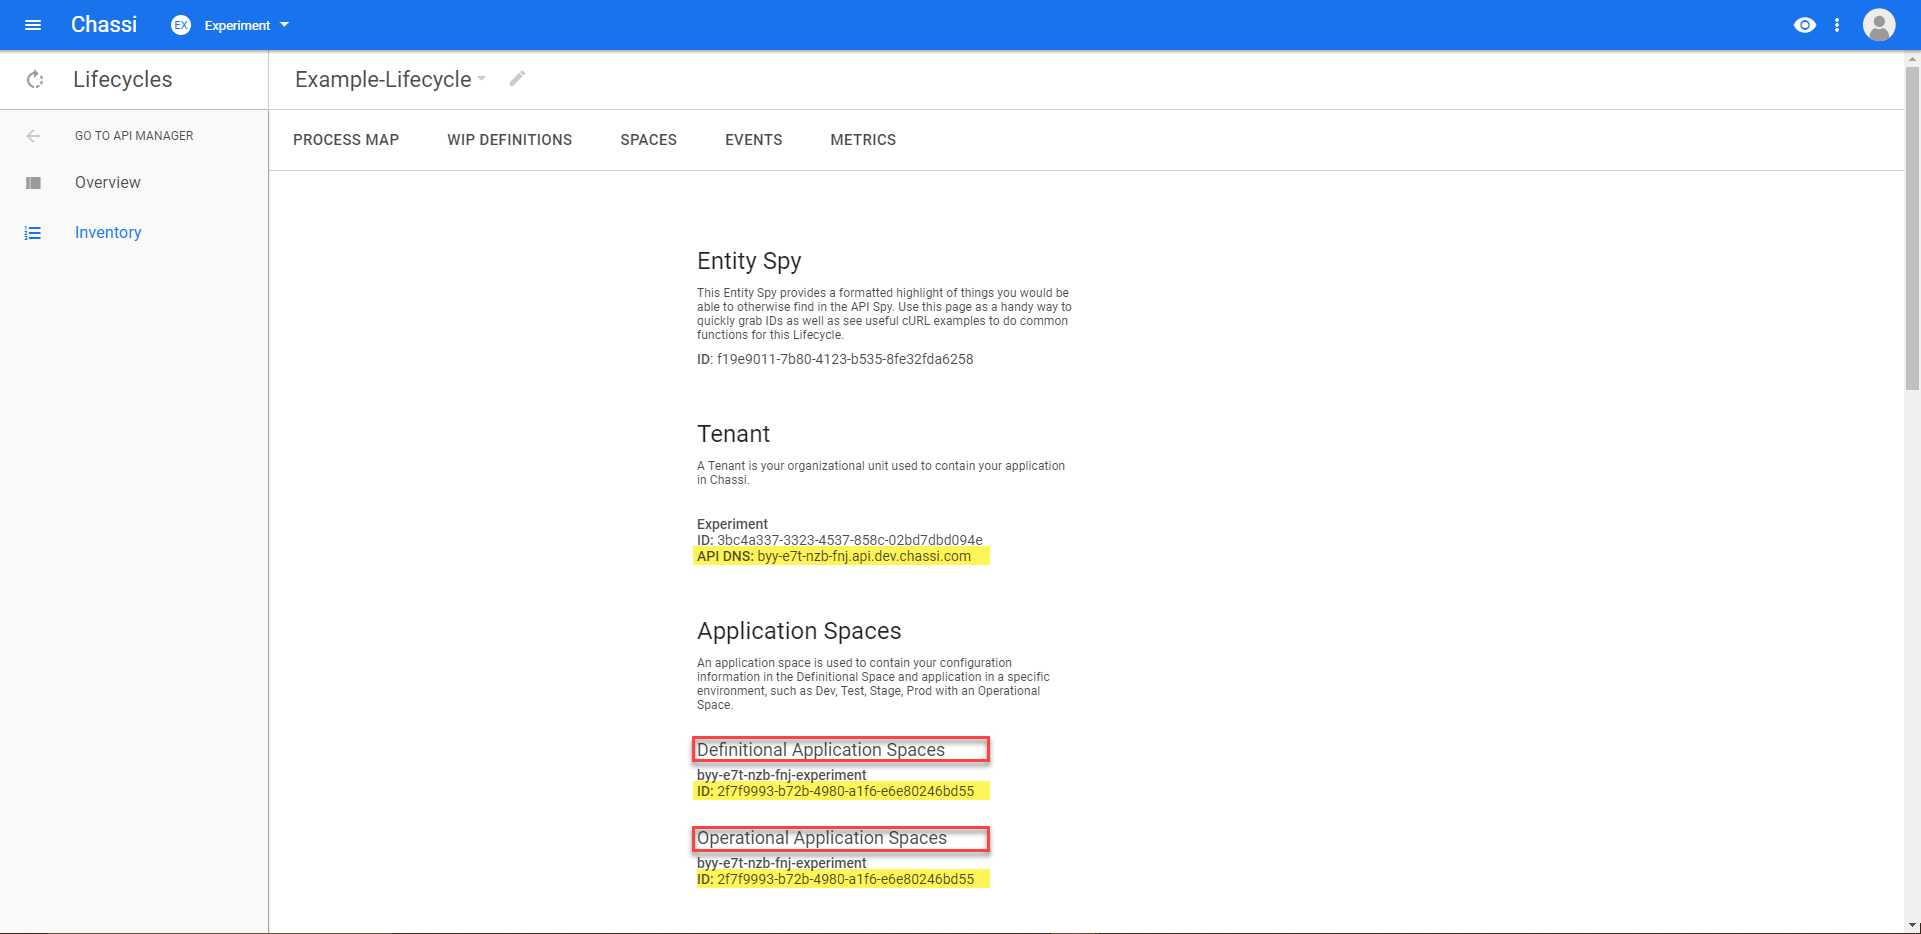
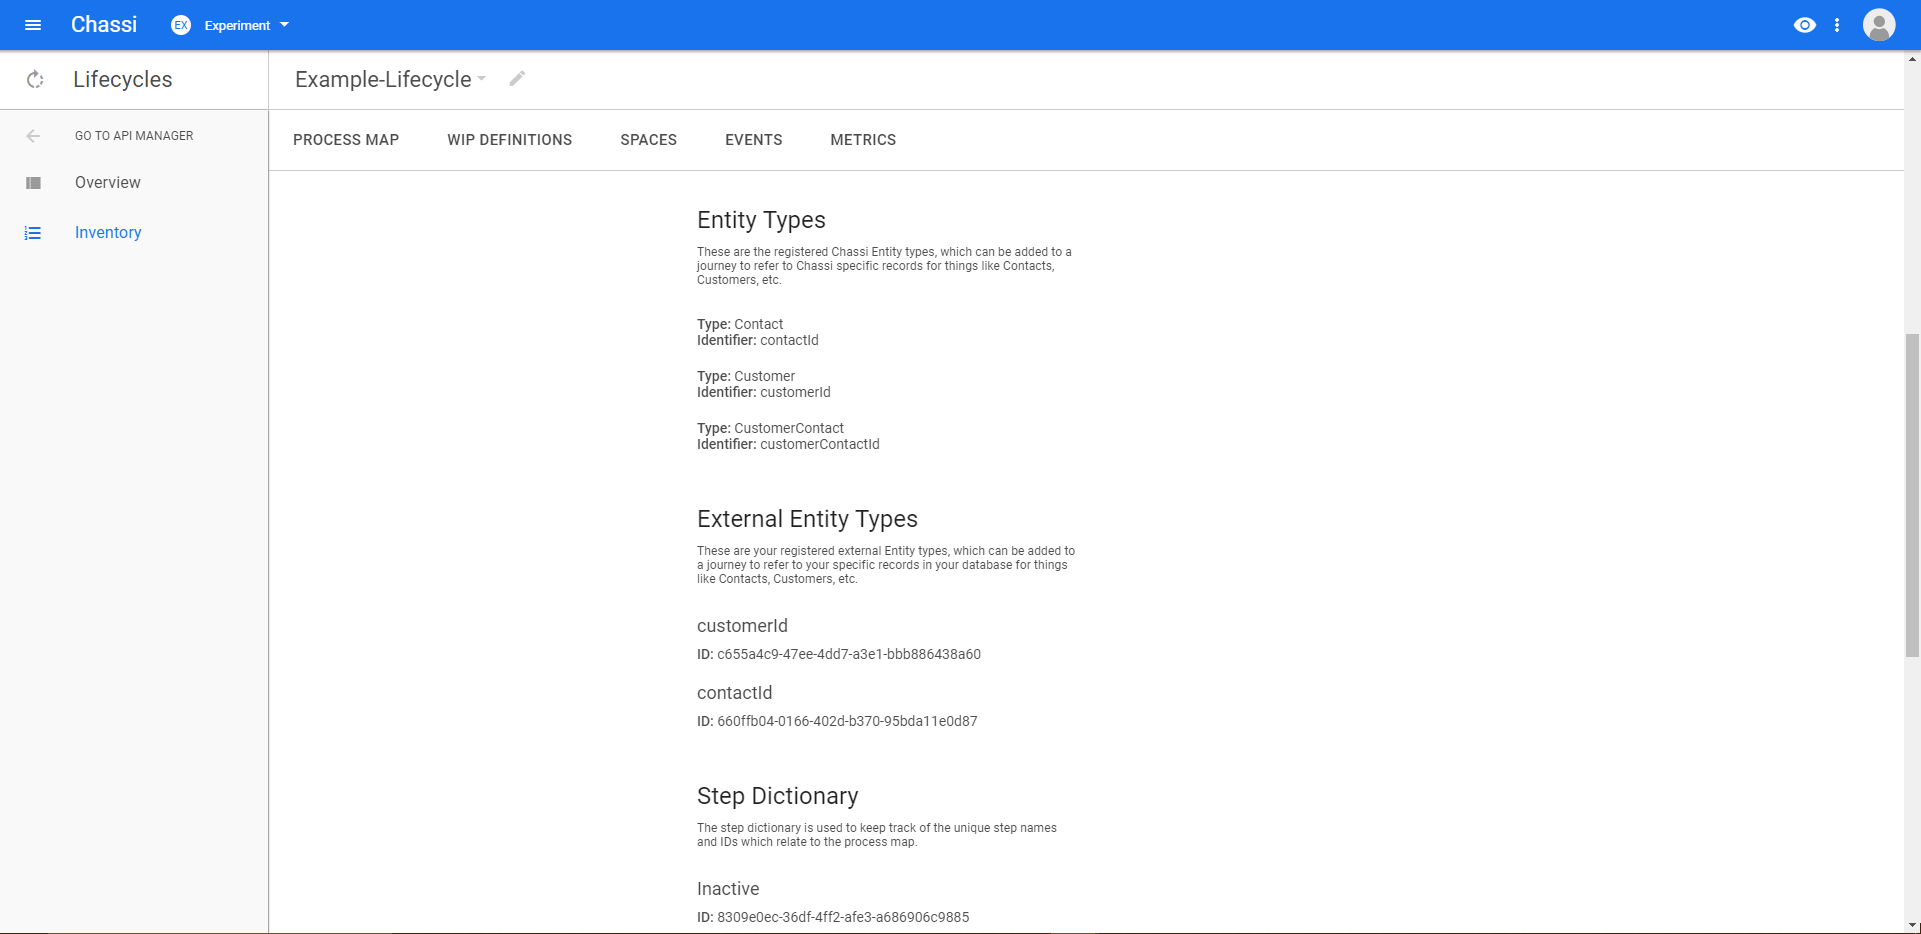
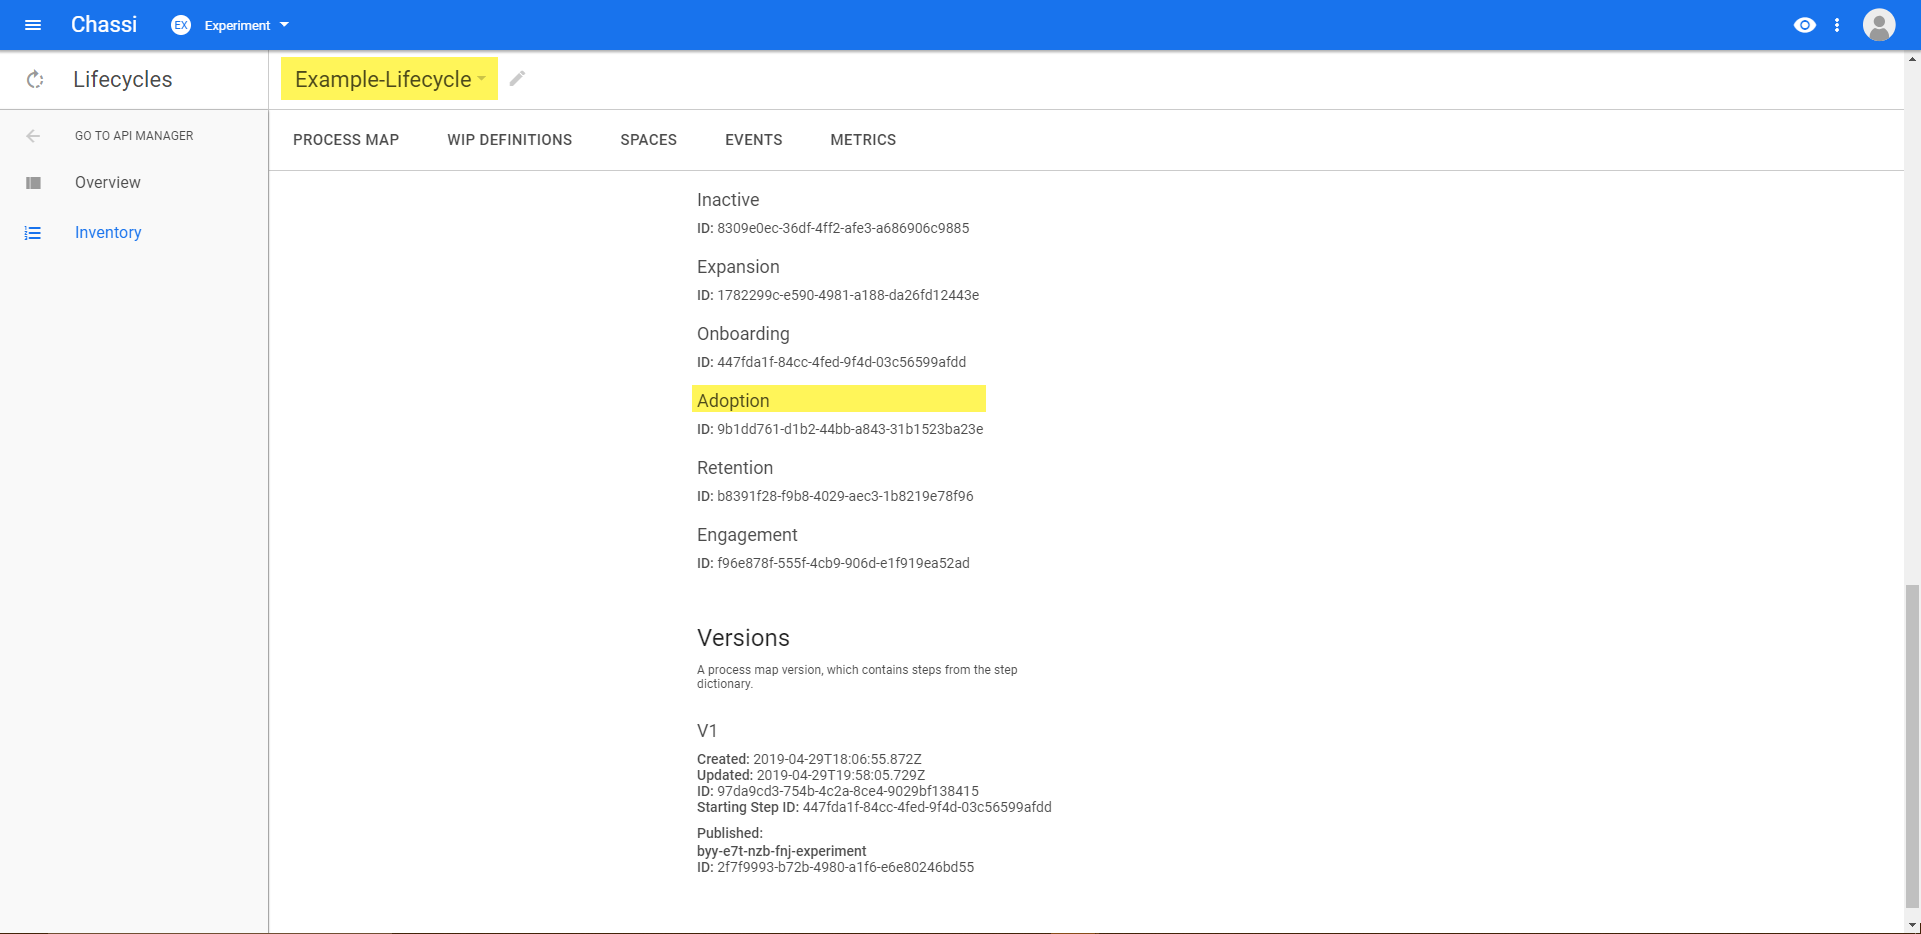
The above three screen shots show us the entirety of the Entity Spy values.
Step 6
We now want to switch back to out postman window and paste all values into their respective places.
The value for the environment variable tenantAPIDNS is labeled as API DNS under the Tenant section. Our adminAppSpaceId value would be labeled as the ID under our Definitional Application Spaces section and our opsAppSpaceId value would be labeled as the ID under our Operational Application Spaces section. These values will be placed in the INITIAL VALUE column on their respective rows.
Note: For this example, the adminAppSpaceId and opsAppSpaceId are the same, as we are working out of our Experiment Tenant... which utilizes only one app space which is both definitional and operational
For stepName value, we will go ahead and choose *Adoption from the Step Dictionary section, and our lifecycleName value can be found in the top left corner, as seen in the last screen shot.
Finally, we want to change the values for our username, userPassword, externalCustomerId, and chassiCustomerId. Our username and userPassword values are simply your login info for Chassi's login page. For externalCustomerId, we will just leave it as it's default value for now. The chassiCustomerId value has been taken from Step 6 of the Create Customer documentation.
Updated almost 7 years ago
