Using WIP Definition Events
A step by step guide to getting started using WIP Definition Events
Prerequisites:
In order to move forward with this guide, you will need to:
- Set up a lifecycle : see [Getting Started with Lifecycle](doc:getting-started-with-lifecycle)
- Set up webhook credentials : see [Web Authenication Primer](doc:web-authenication-primer)
To start utilizing Chassi's eventing feature, you will need to first set up a WIP Definition and then subscribe to the sub events said definition.
Setting up the WIP Definition:
Step 1:
The first thing you need to do is open your lifecycle and then go to the WIP DEFINITIONS tab.
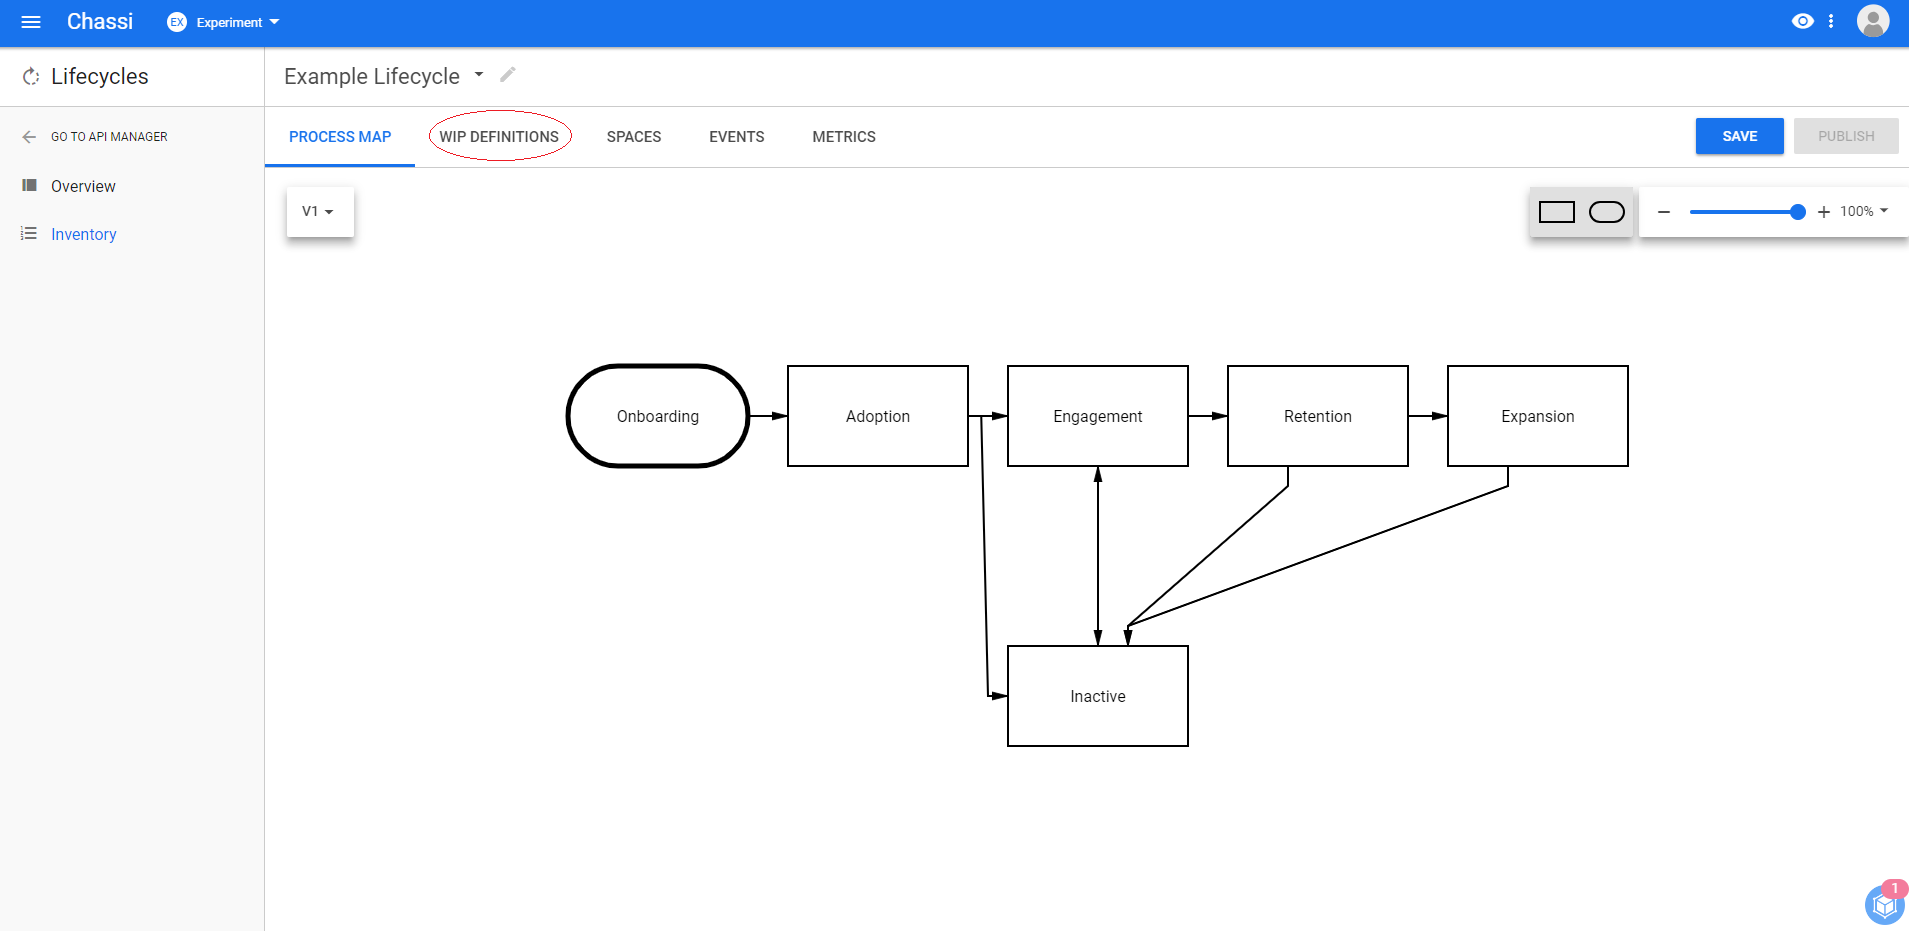
Step 2:
From here you will want to click CREATE WIP DEFINITION
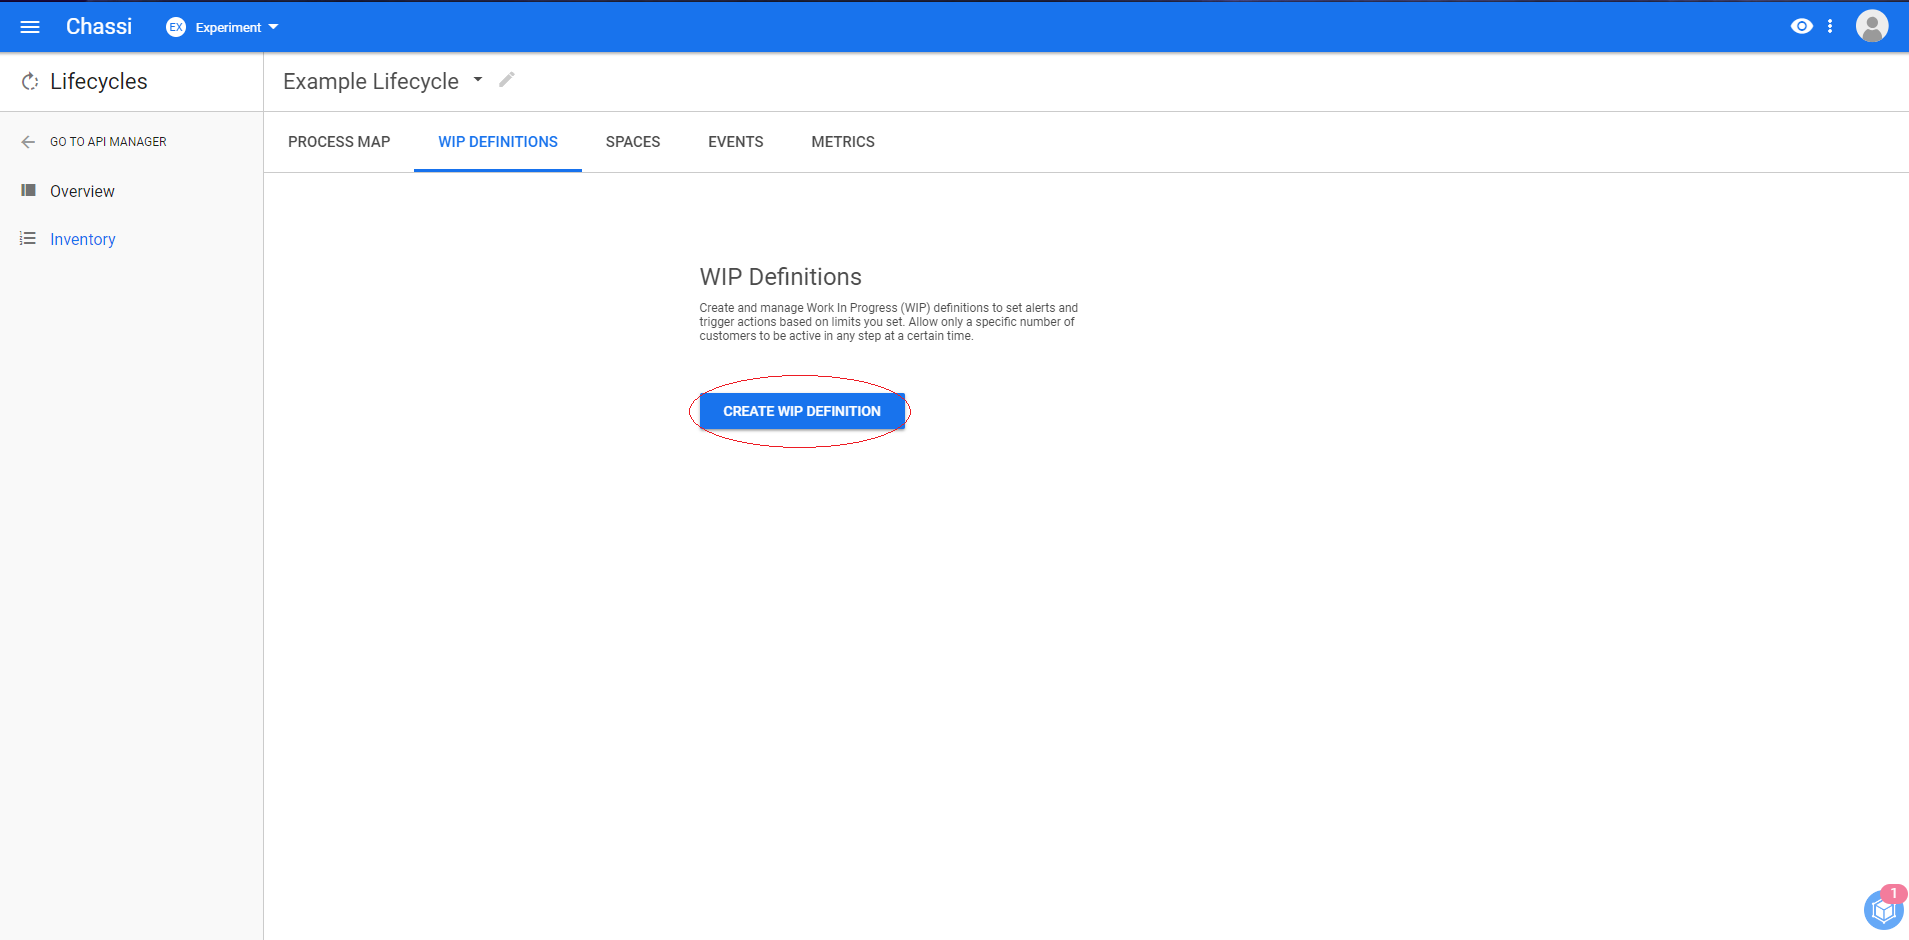
Step 3:
The first thing it will ask you to do is to name your definition and ,optionally, give it a description. After that is complete, click CREATE.
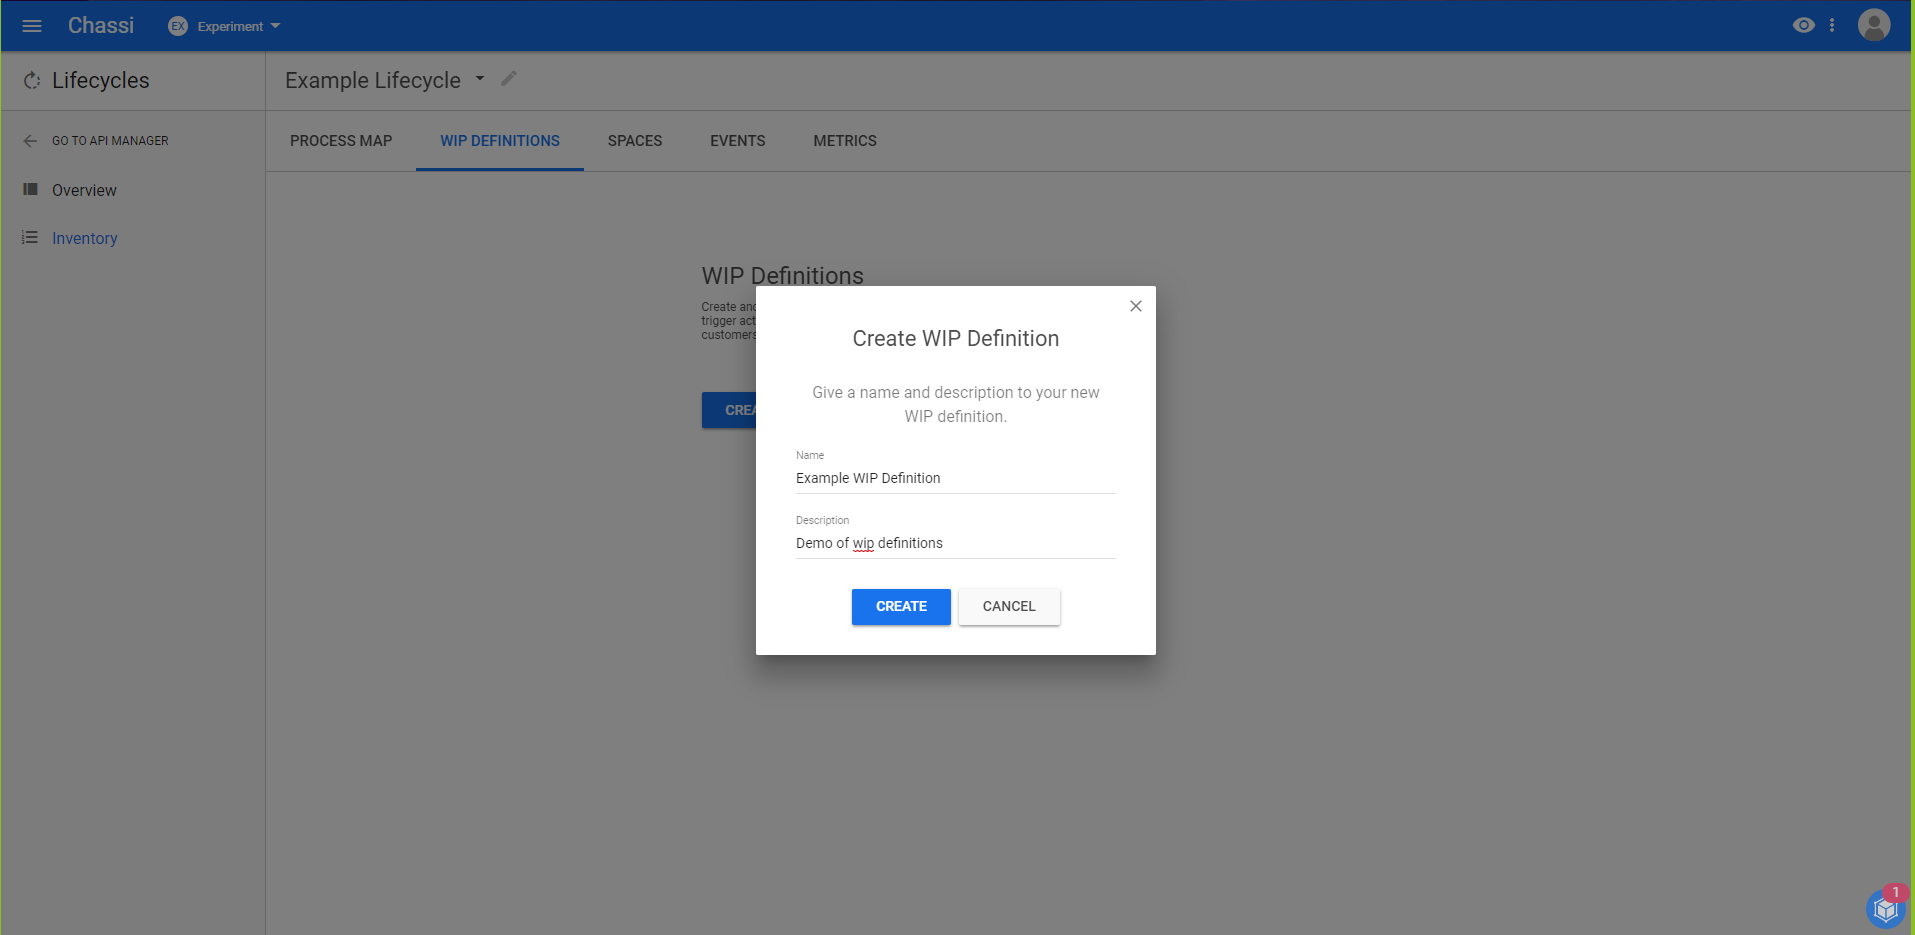
Step 4:
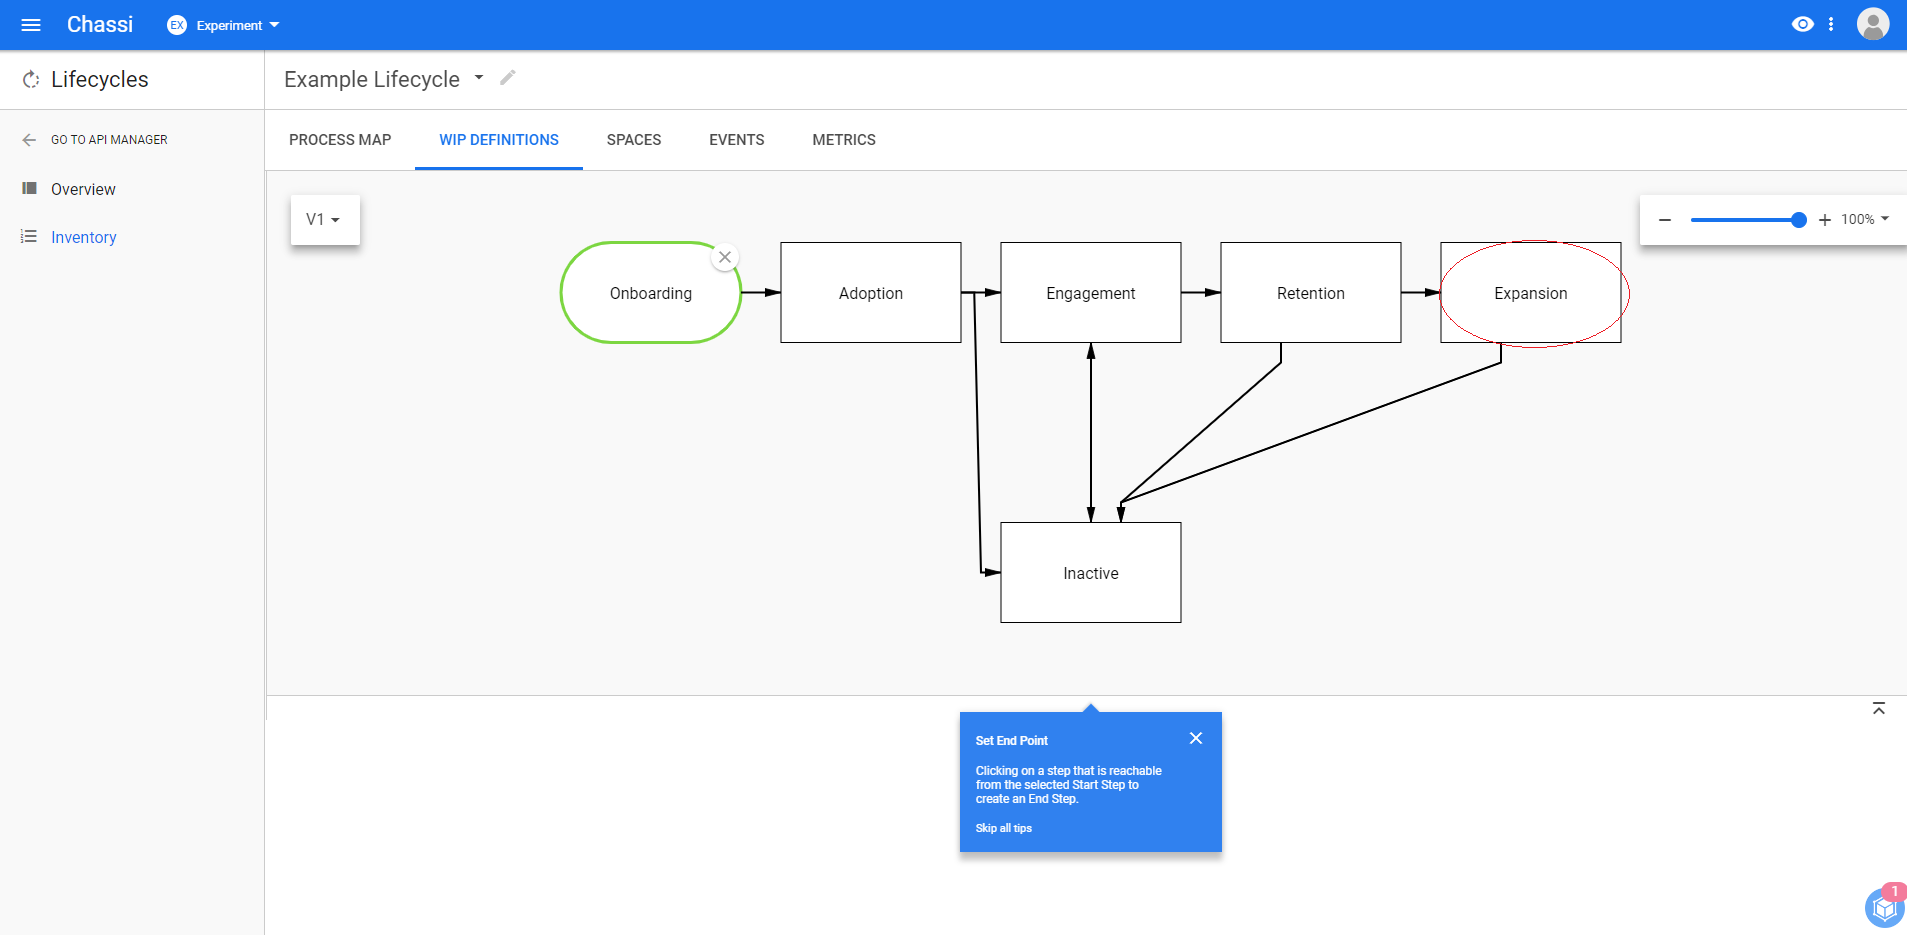
On this step, you will notice a blue tip pop-up occur, asking you to select your start step. For this guide, we will be selecting Onboarding as our starting step... however you are free to select any step in your lifecycle as the starting step.
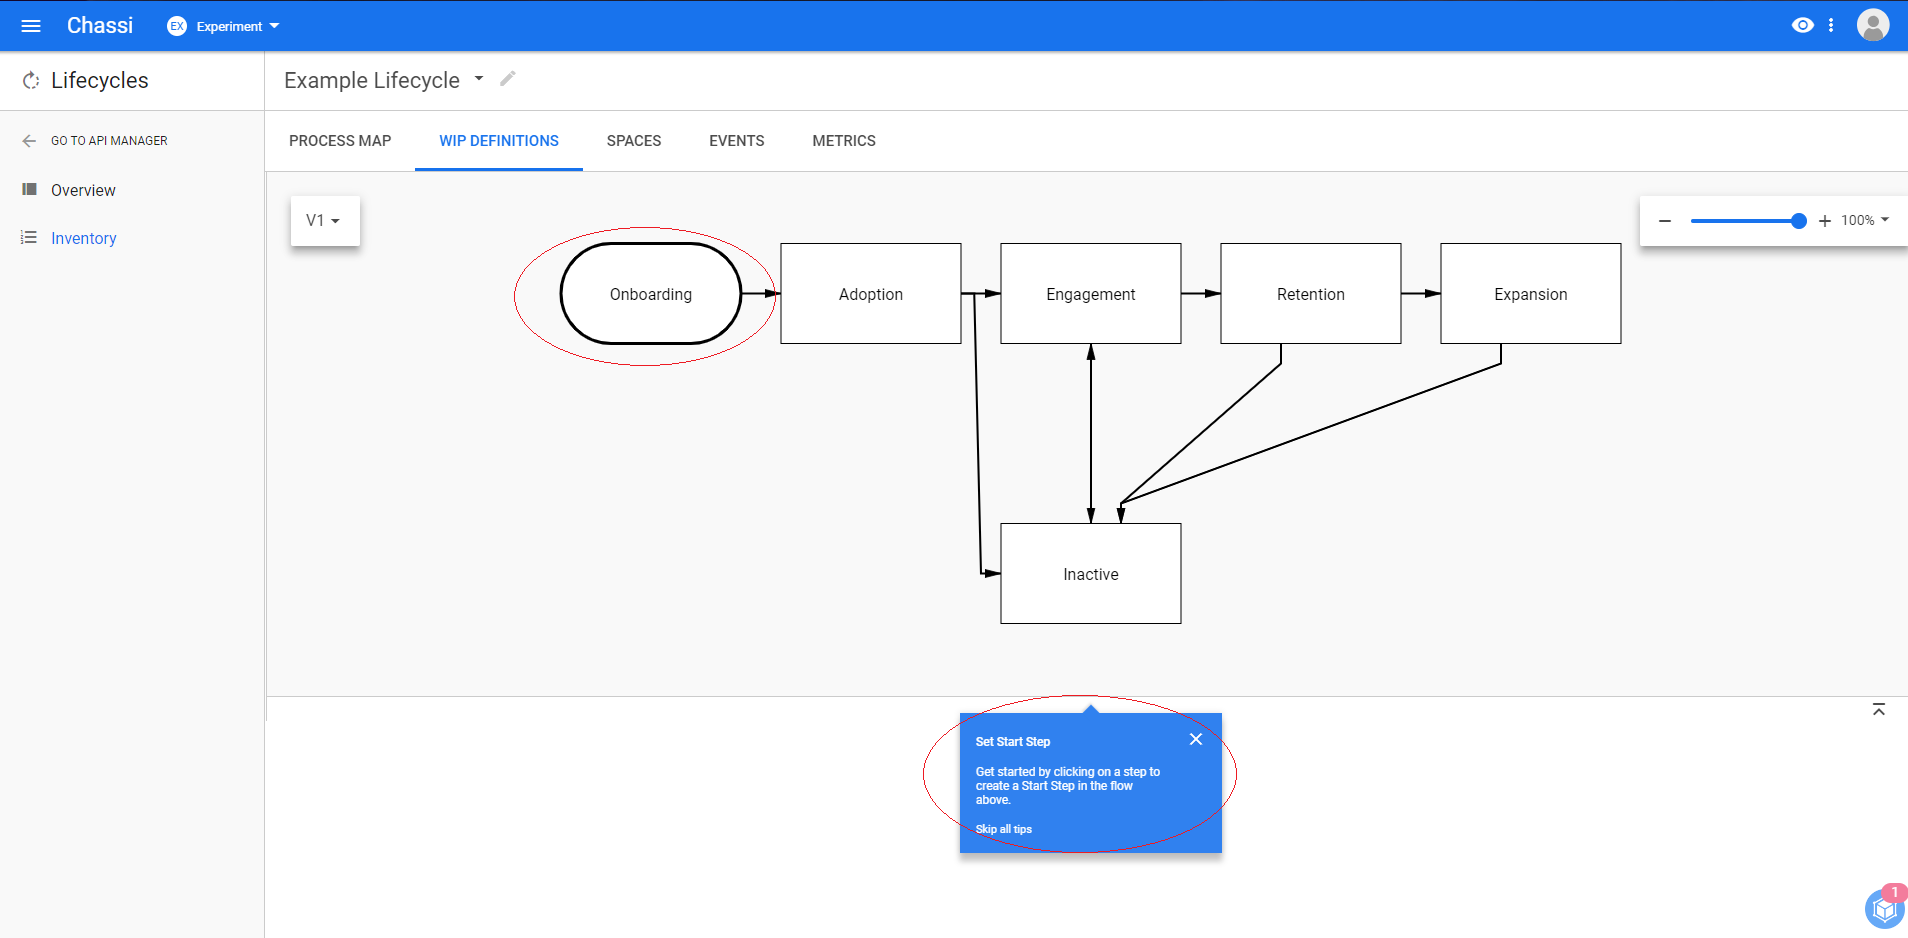
Step 5:
Once the starting step is selected, it will turn green and the blue tip pop-up will then ask you to select a end point. For this example, we will be selecting the Expansion step.
Step 6:
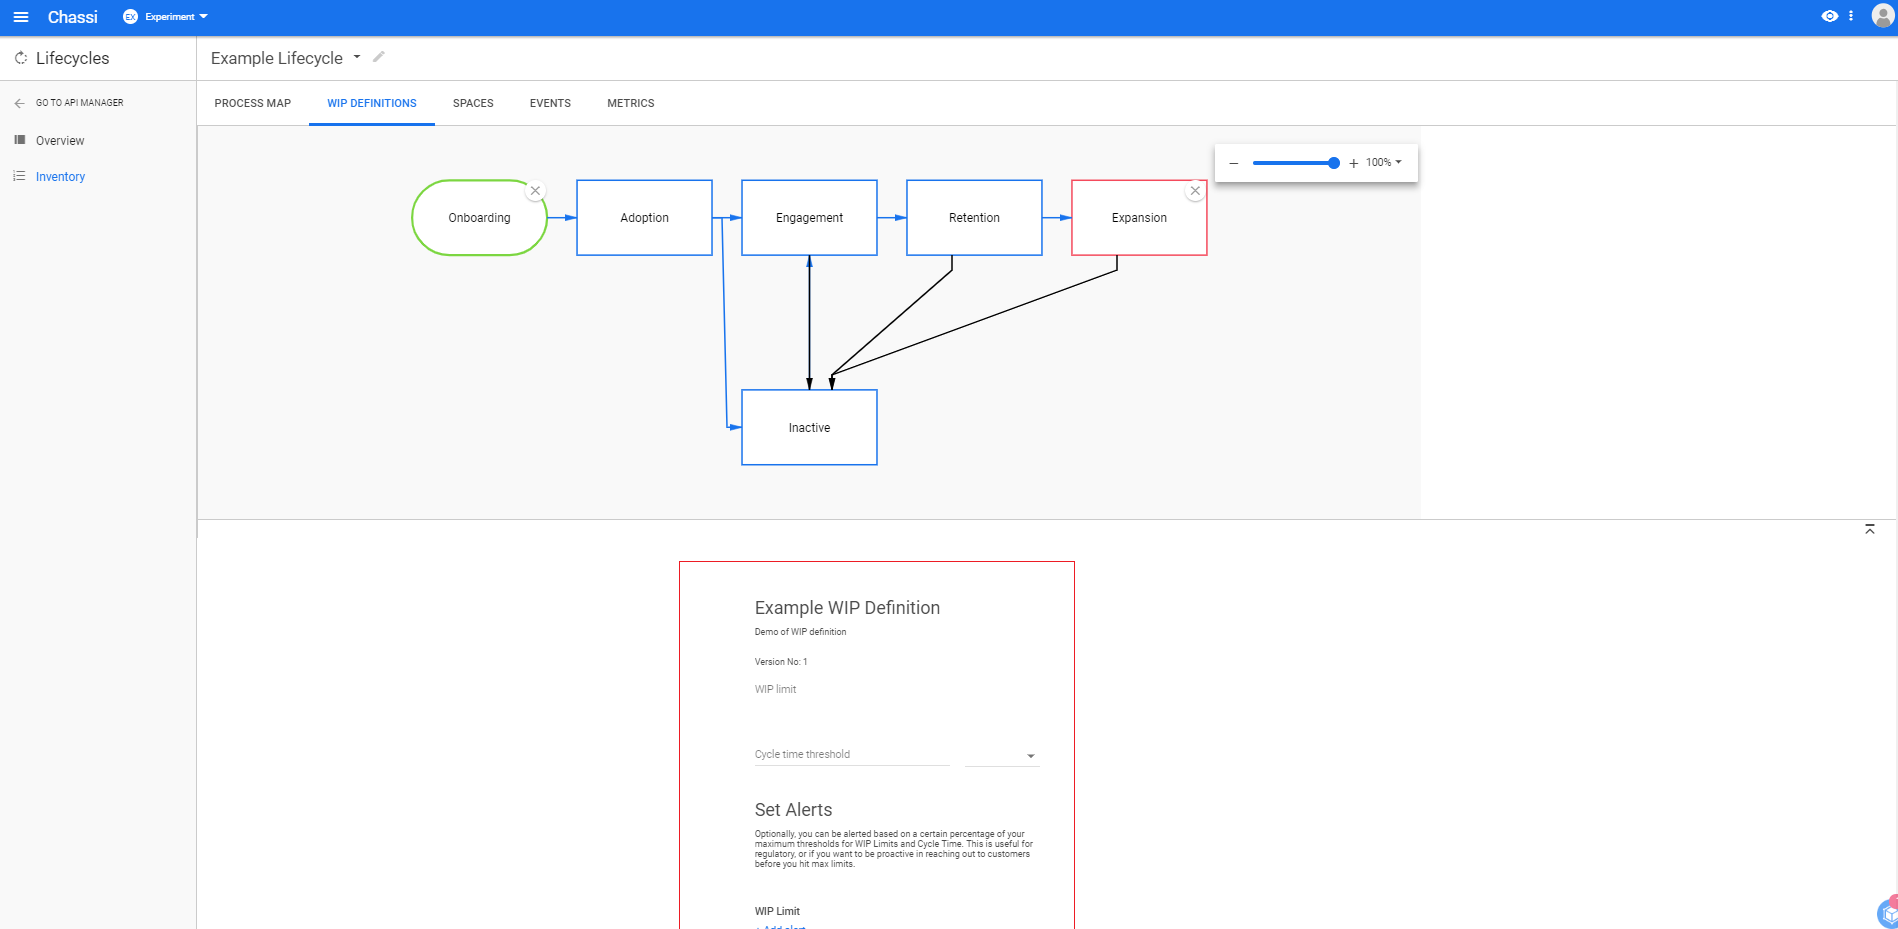
Once the endpoint is selected, it will turn red and the window will then expand, revealing the WIP Definition options that can be set.
Step 7:
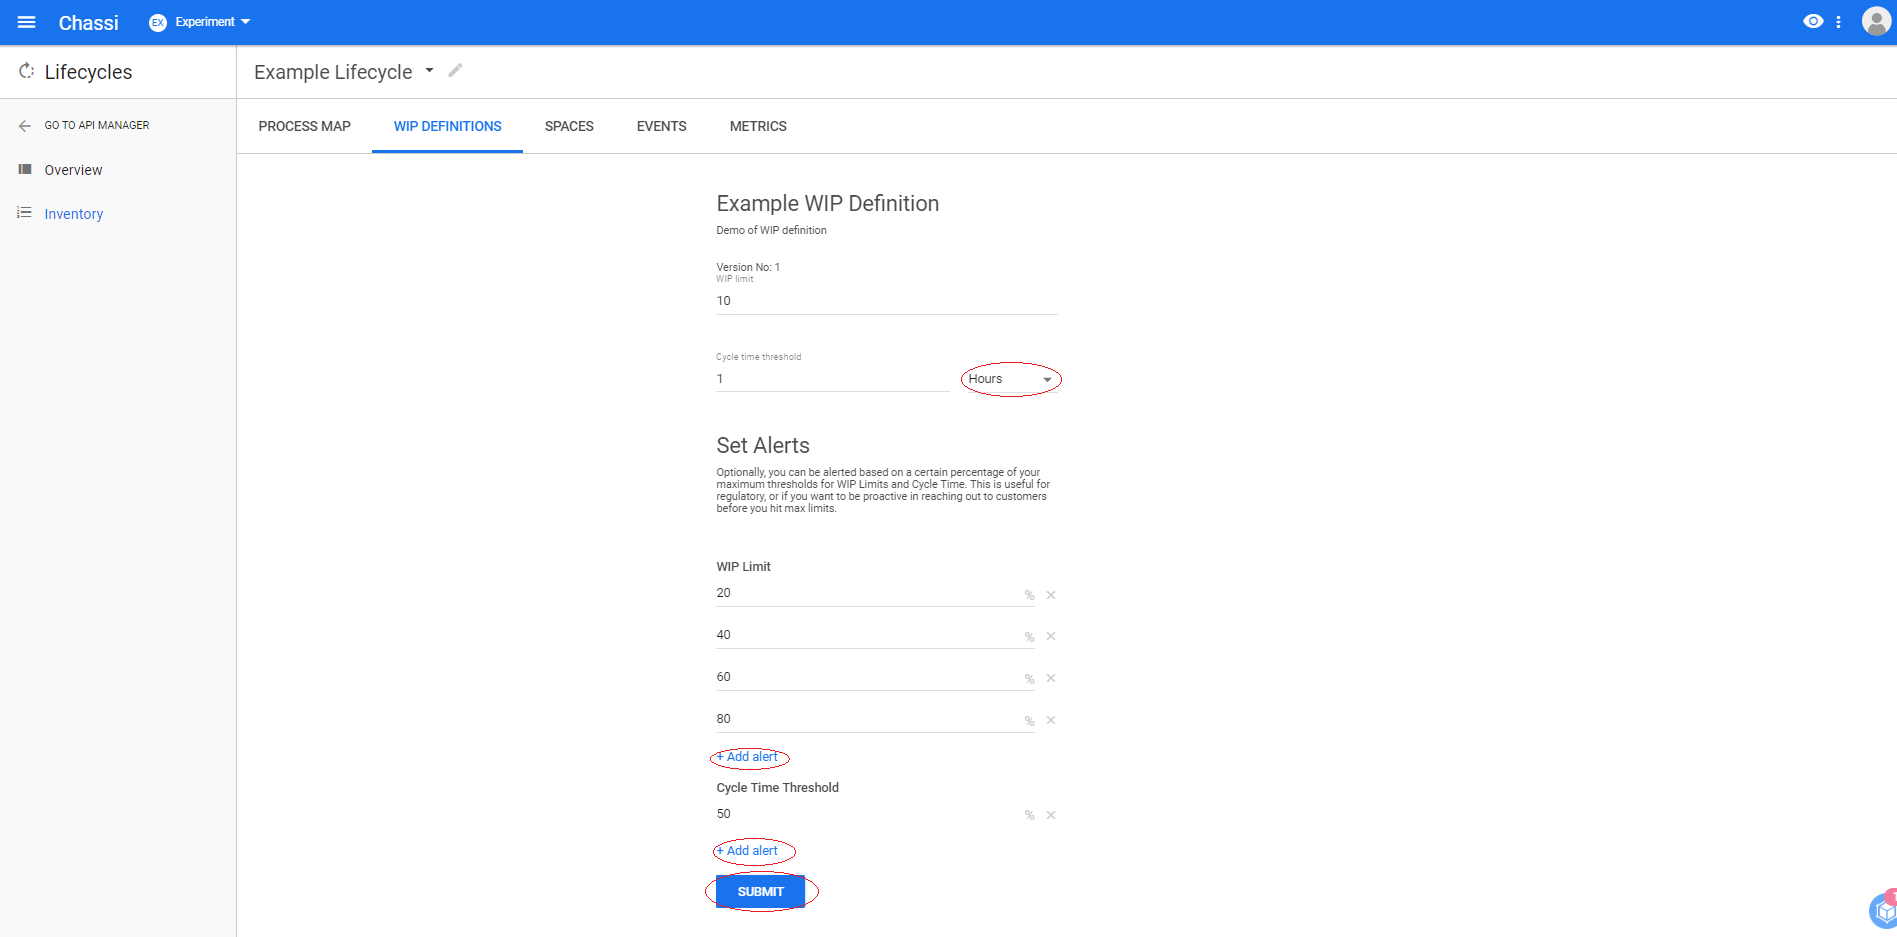
We now have the options to set a WIP limit, cycle time threshold, WIP limit alerts, and cycle time threshold alerts. For this example, we will begin by setting a WIP limit of 10 and Cycle time threshold of 1. We then can select the drop down next to the Cycle time threshold to select our unit of time, currently making our threshold to be 1 hour.
We then want to add some alerts to our WIP Definition. This is done by clicking the + Add Alert button under the WIP Limit and Cycle time threshold alert sections. As seen in the image, we decided to set a WIP limit alert to go off every 20%, and a cycle time alert to warn us at the 50% mark.
Once you have the settings your desire, click SUBMIT to save the WIP Definition.
Step 8:
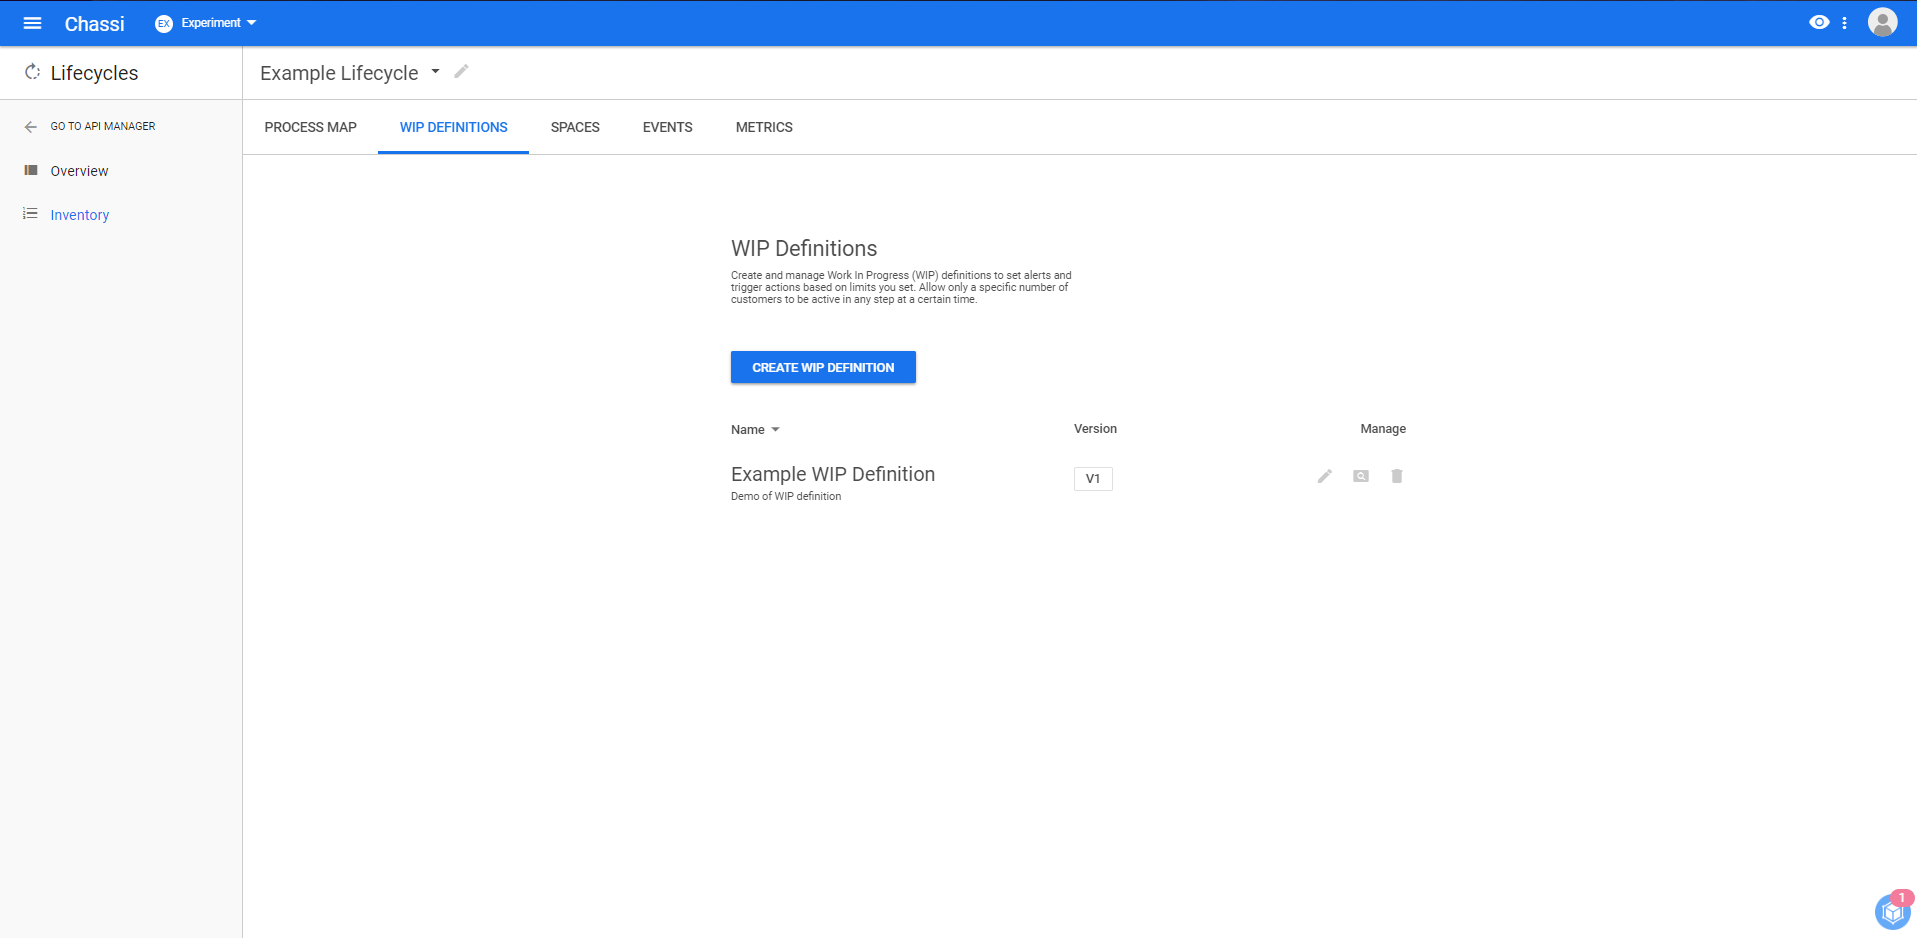
Upon successful creation, you will see your new WIP Definition is now available to you under the WIP DEFINITIONS tab.
Now that your WIP Definition is created, you will want to then want to set up subscriptions that definition so your application can be notified when those limits, thresholds, and alerts occur.
Subscribing to the WIP Definition Events
Step 1:
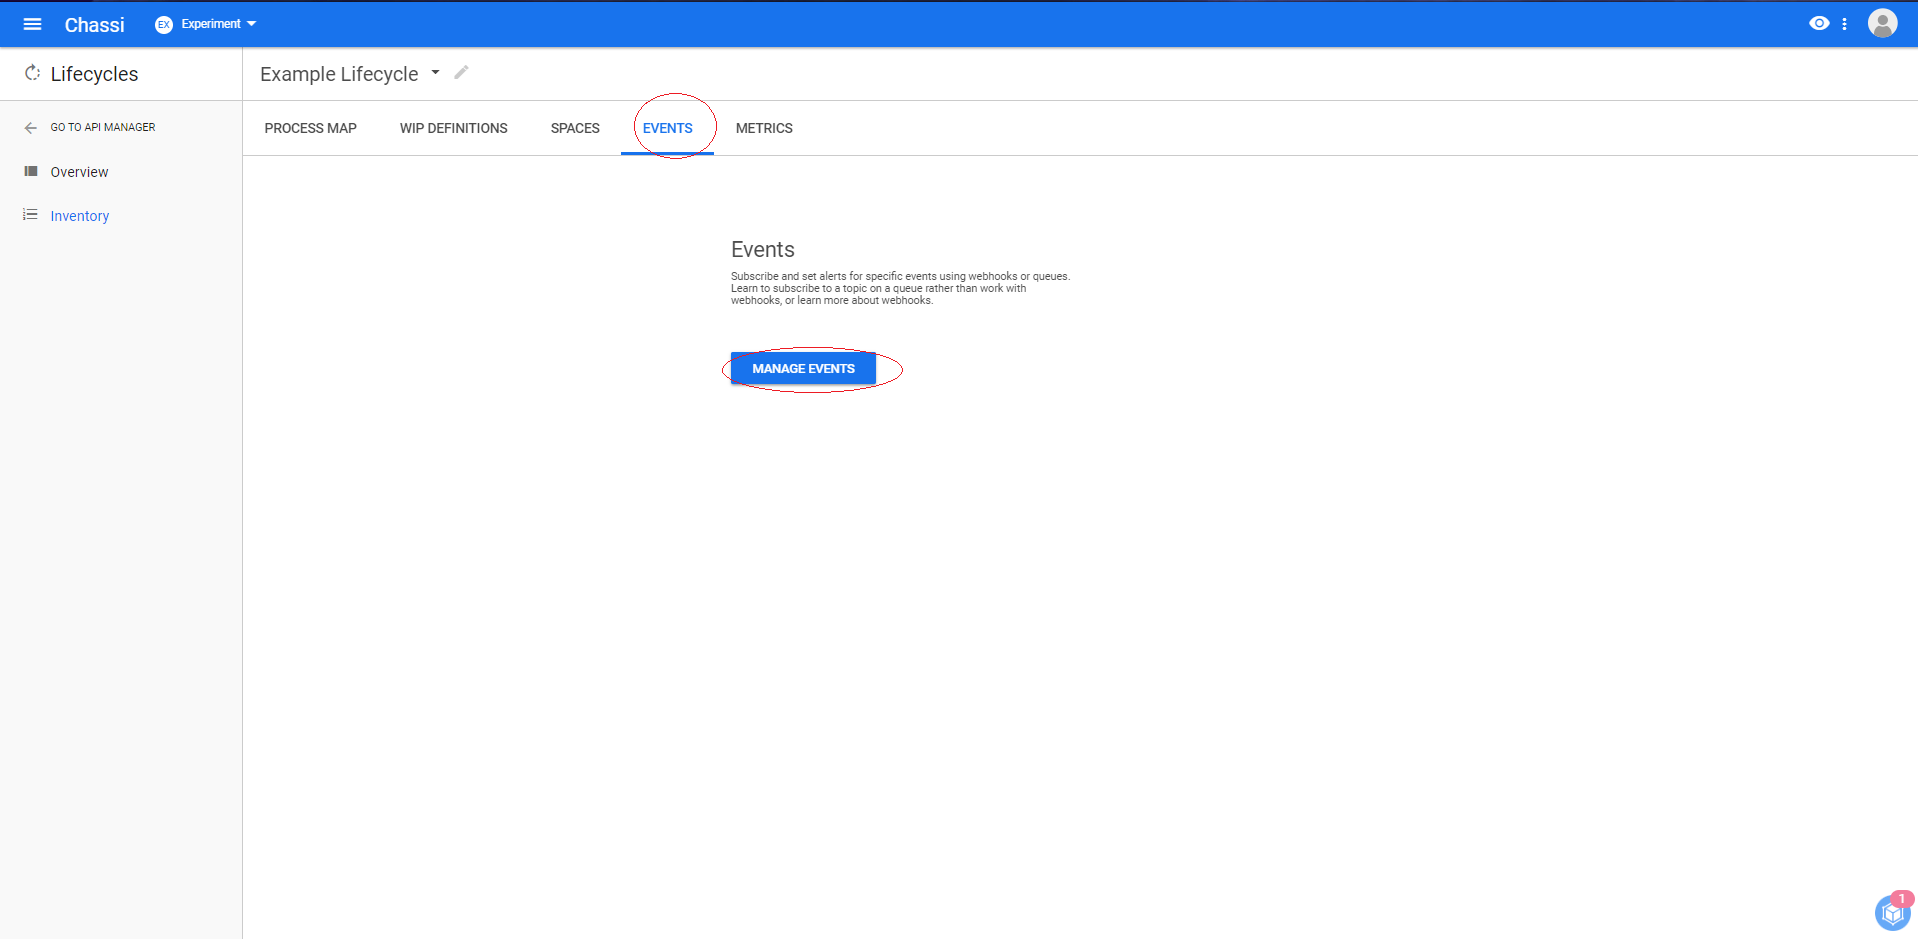
First you will want to click on the EVENTS tab and then click on MANAGE EVENTS.
Step 2:
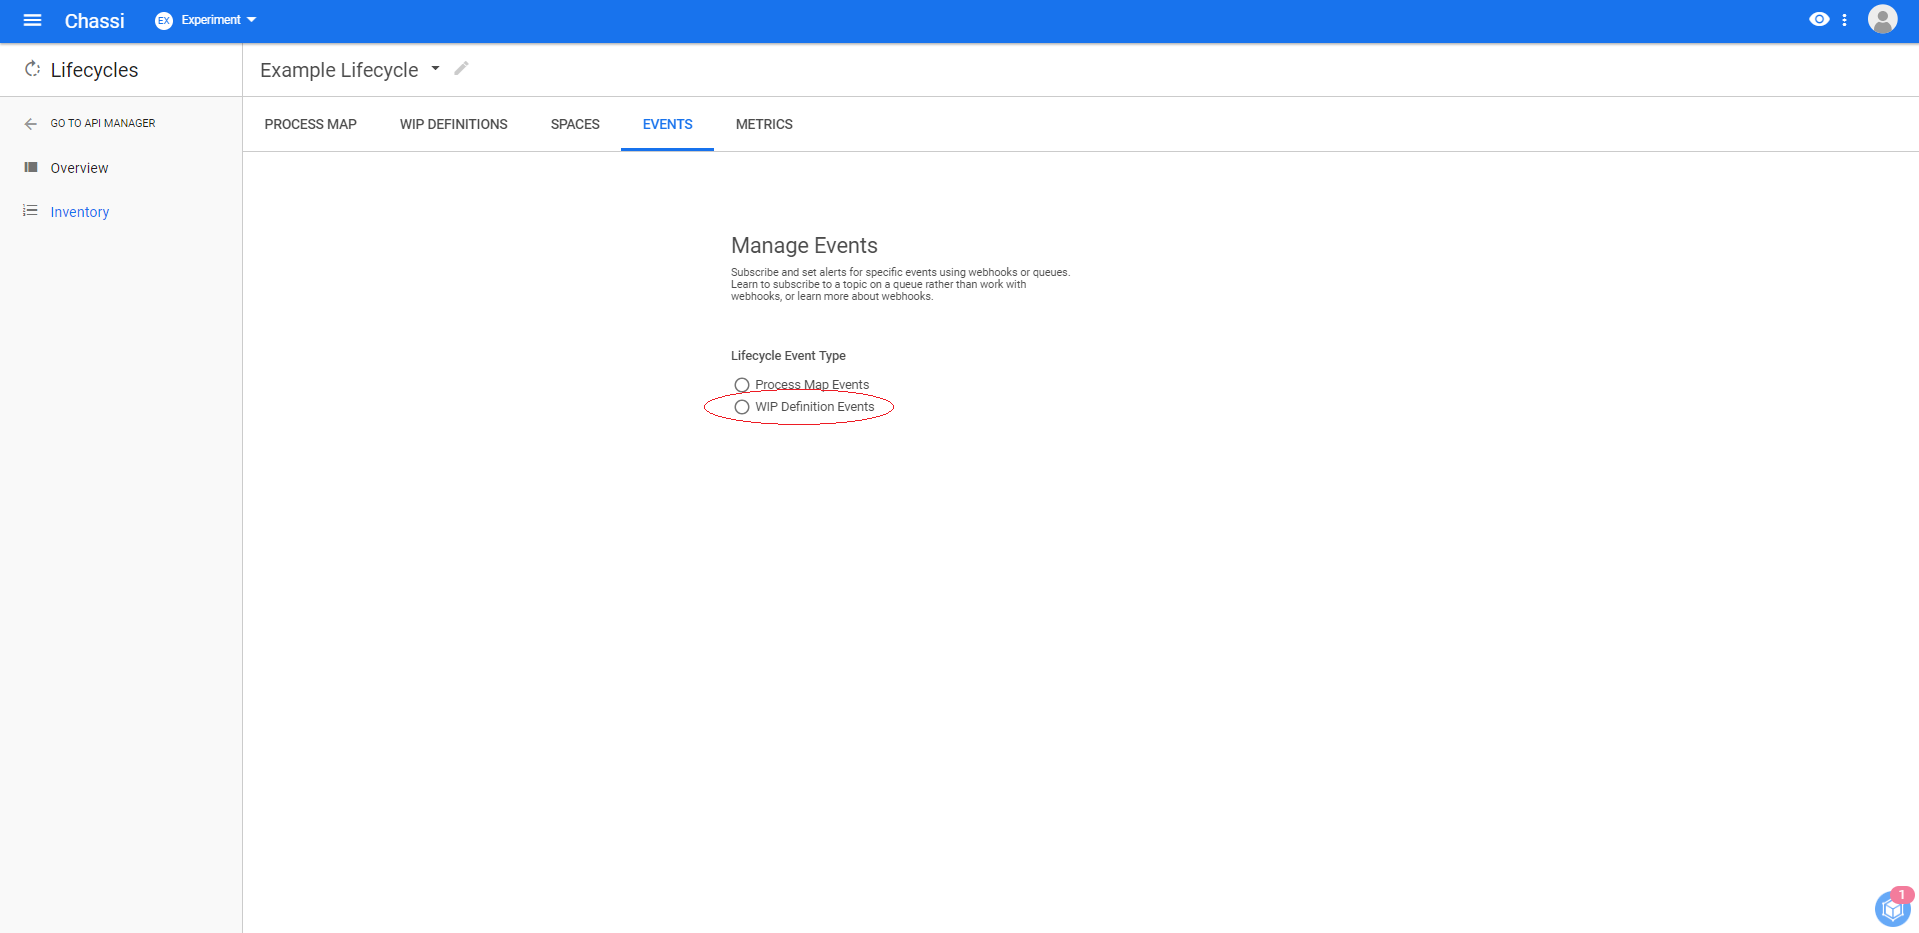
Since we want to subscribe to the WIP definition we just created, click on WIP Defintiion Events.
Step 3:
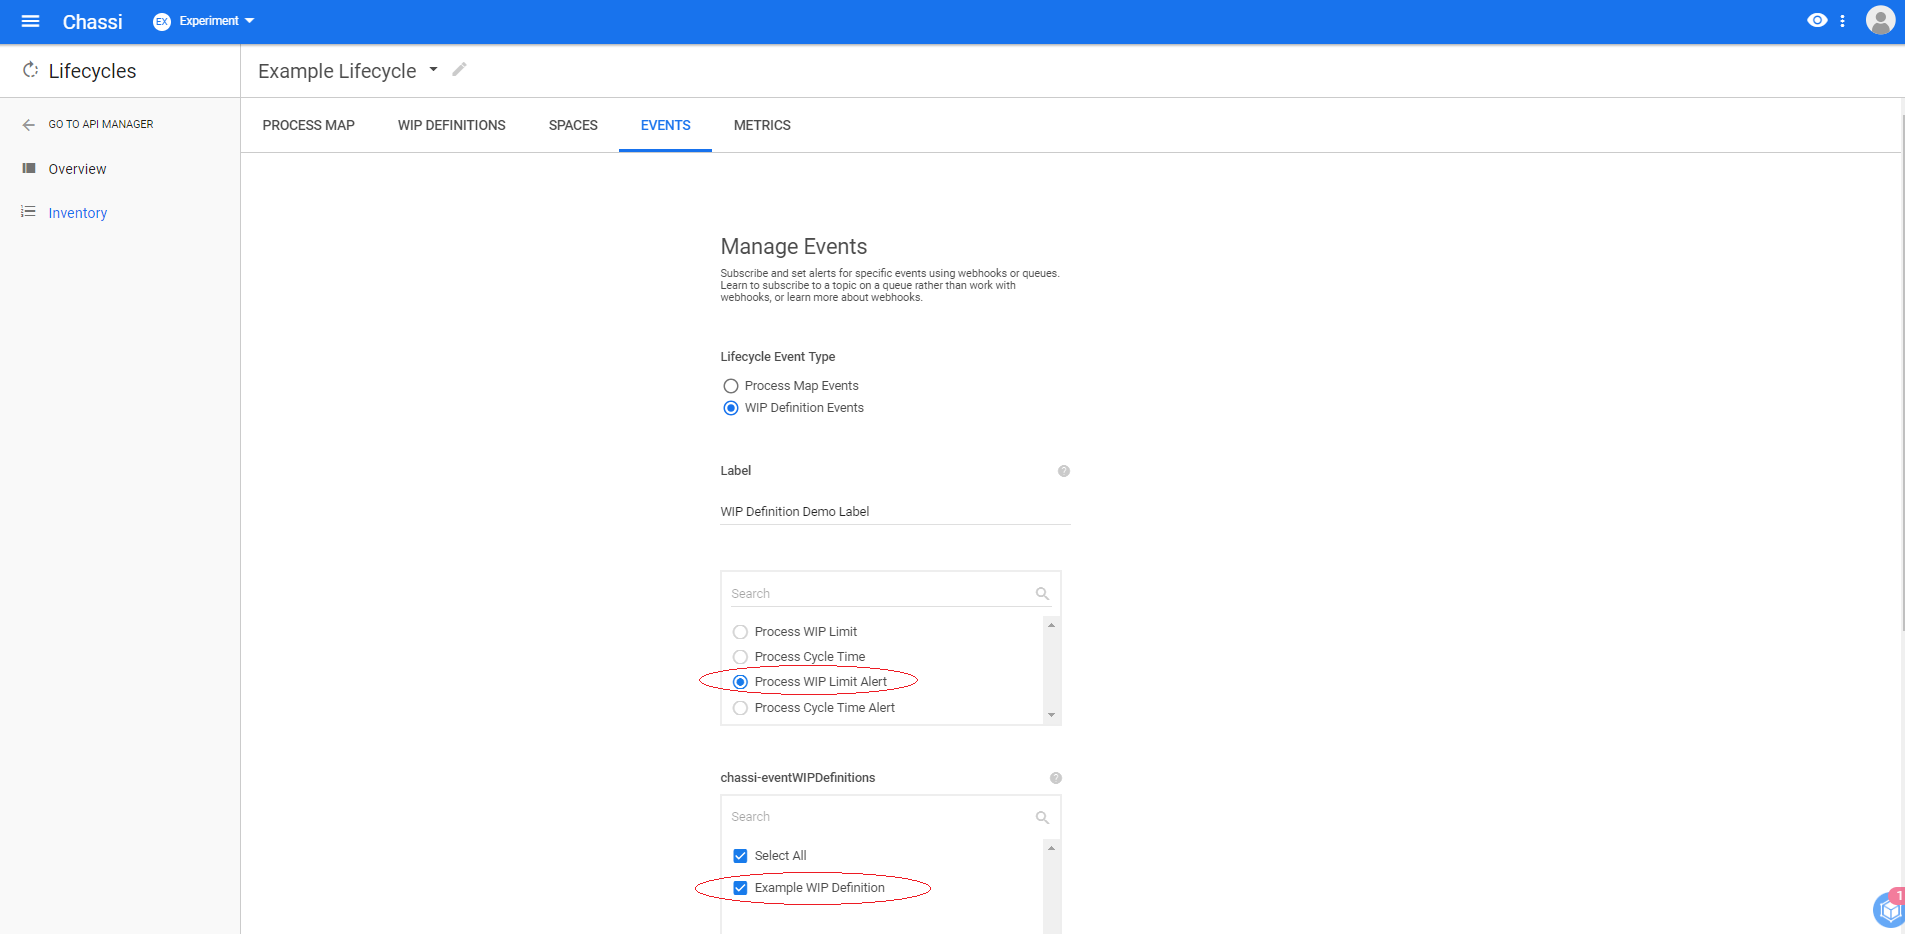
This will then open the window further to allow you to set a label, the event sub type, WIP Defintion, enable and set webhook url, and select which appspace.
For this example, we have set the label, selected the event sub type of Process WIP Limit Alert, and selected our Example WIP Definition that we just created. By selecting Process WIP Limit Alert, this we will be subscribed to and receive alerts when we reach 20, 40, 60, and 80% of our WIP limit (see the WIP Definition image above where we set these).
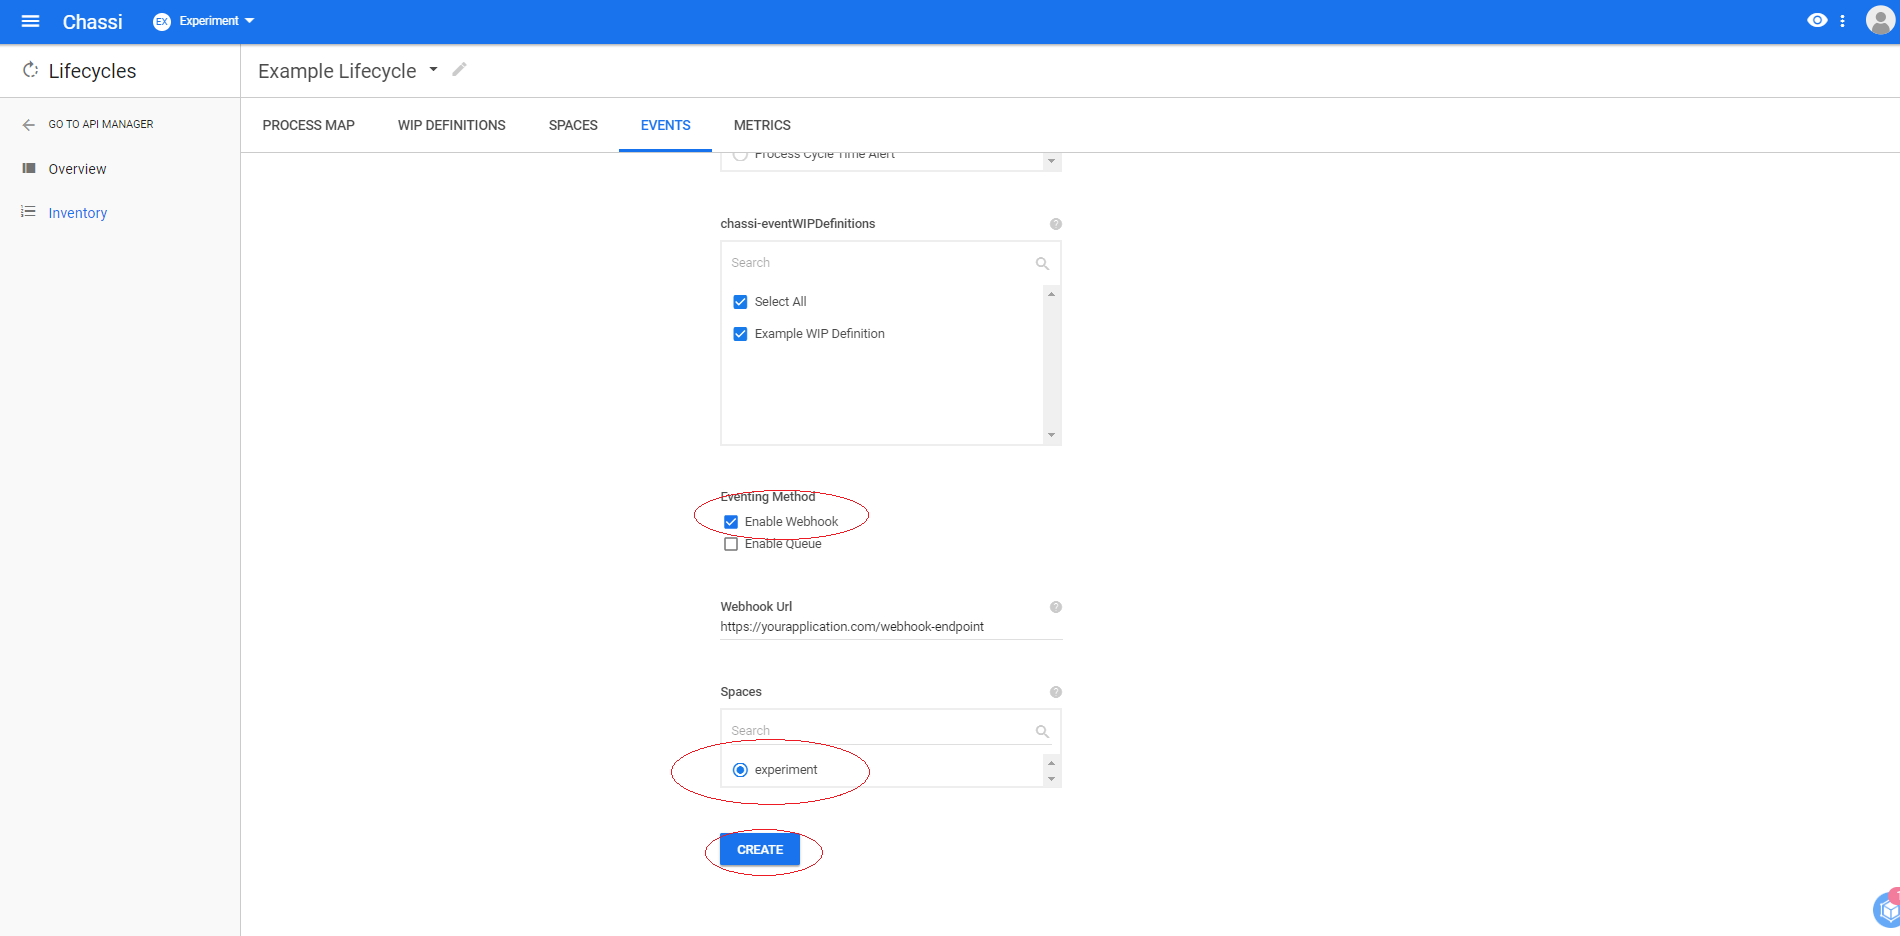
Next we will want to choose how we want to receive these events. For now we will select Enable Webhook and enter a webhook url on our application that is protected behind the resource server (see Web Authenication Primer).
Finally we select the appSpace and click CREATE.
Step 4:
Upon a successful creation, your new event subscription will be shown on the events tab.
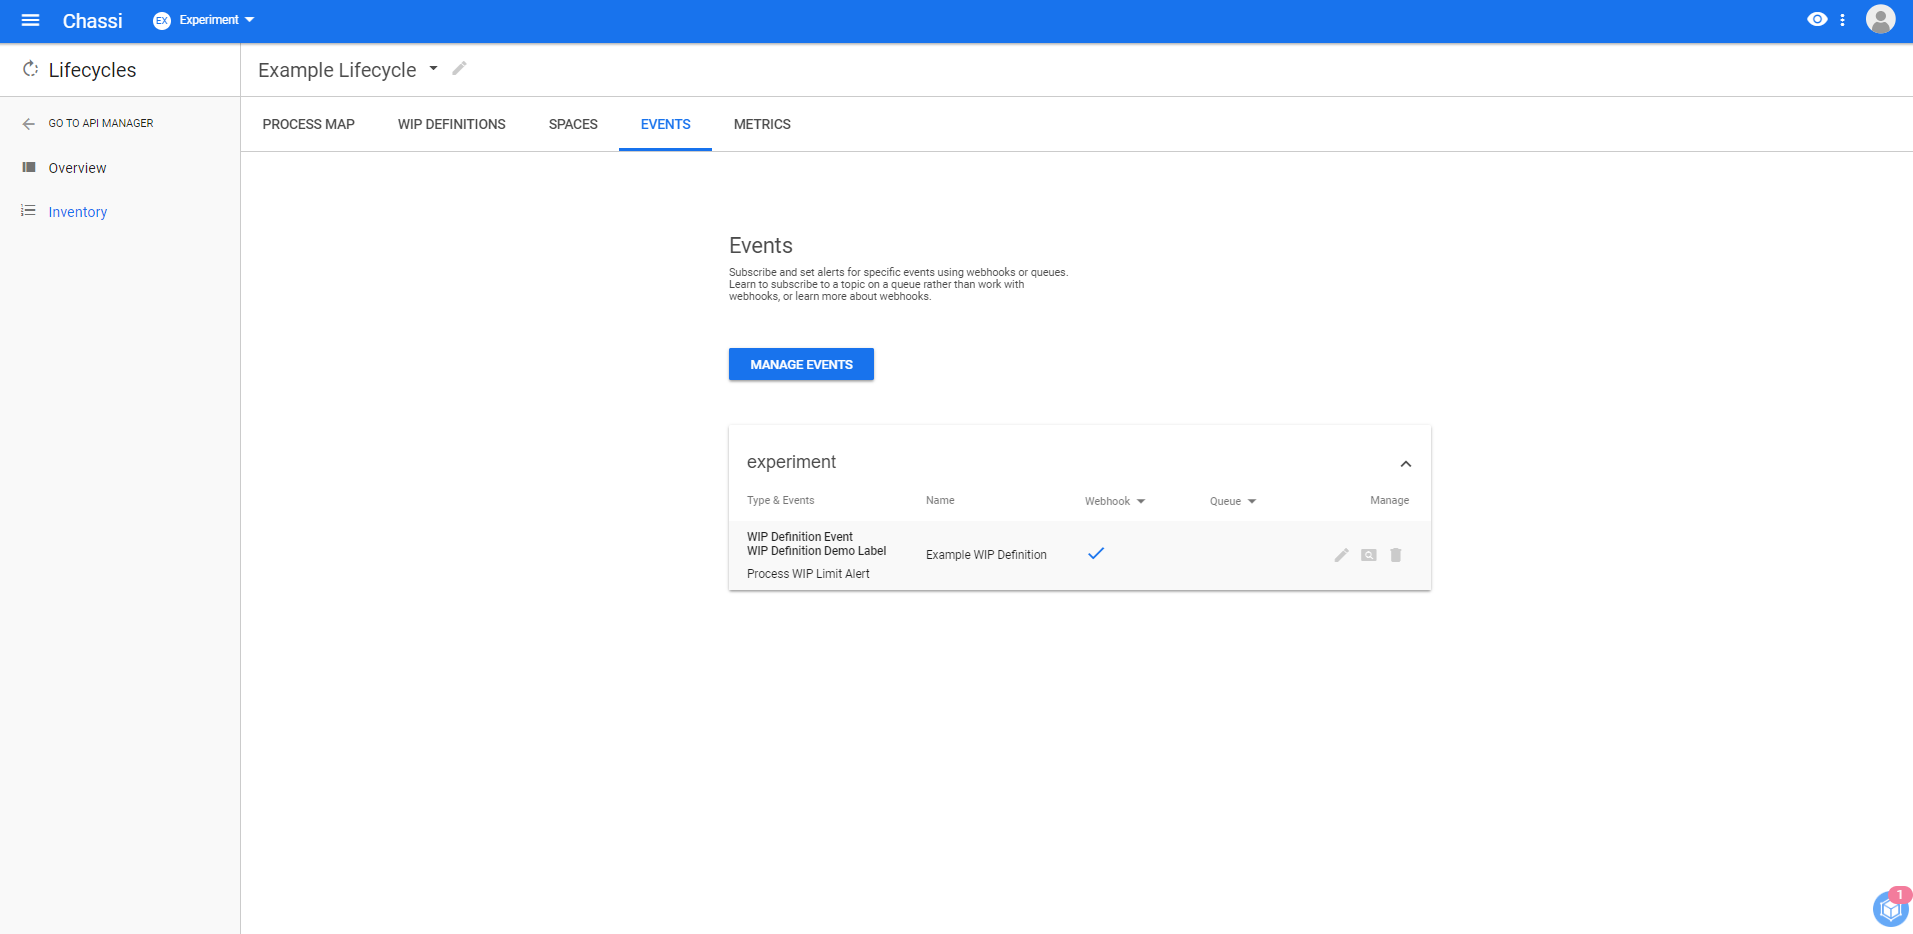
Repeat steps 1-4 to subscribe to the other event sub types of your WIP Definition.
Once subscribed, your webhook url will receive the events when their conditions are met.
Updated almost 7 years ago
