Using Process Map Events
A step by step guide to getting started using Process Map Events
Prerequisites:
In order to move forward with this guide, you will need to:
- Set up a lifecycle : see [Getting Started with Lifecycle](doc:getting-started-with-lifecycle)
- Set up webhook credentials : see [Web Authenication Primer](doc:web-authenication-primer)
Setting up the Process Map:
Step 1:
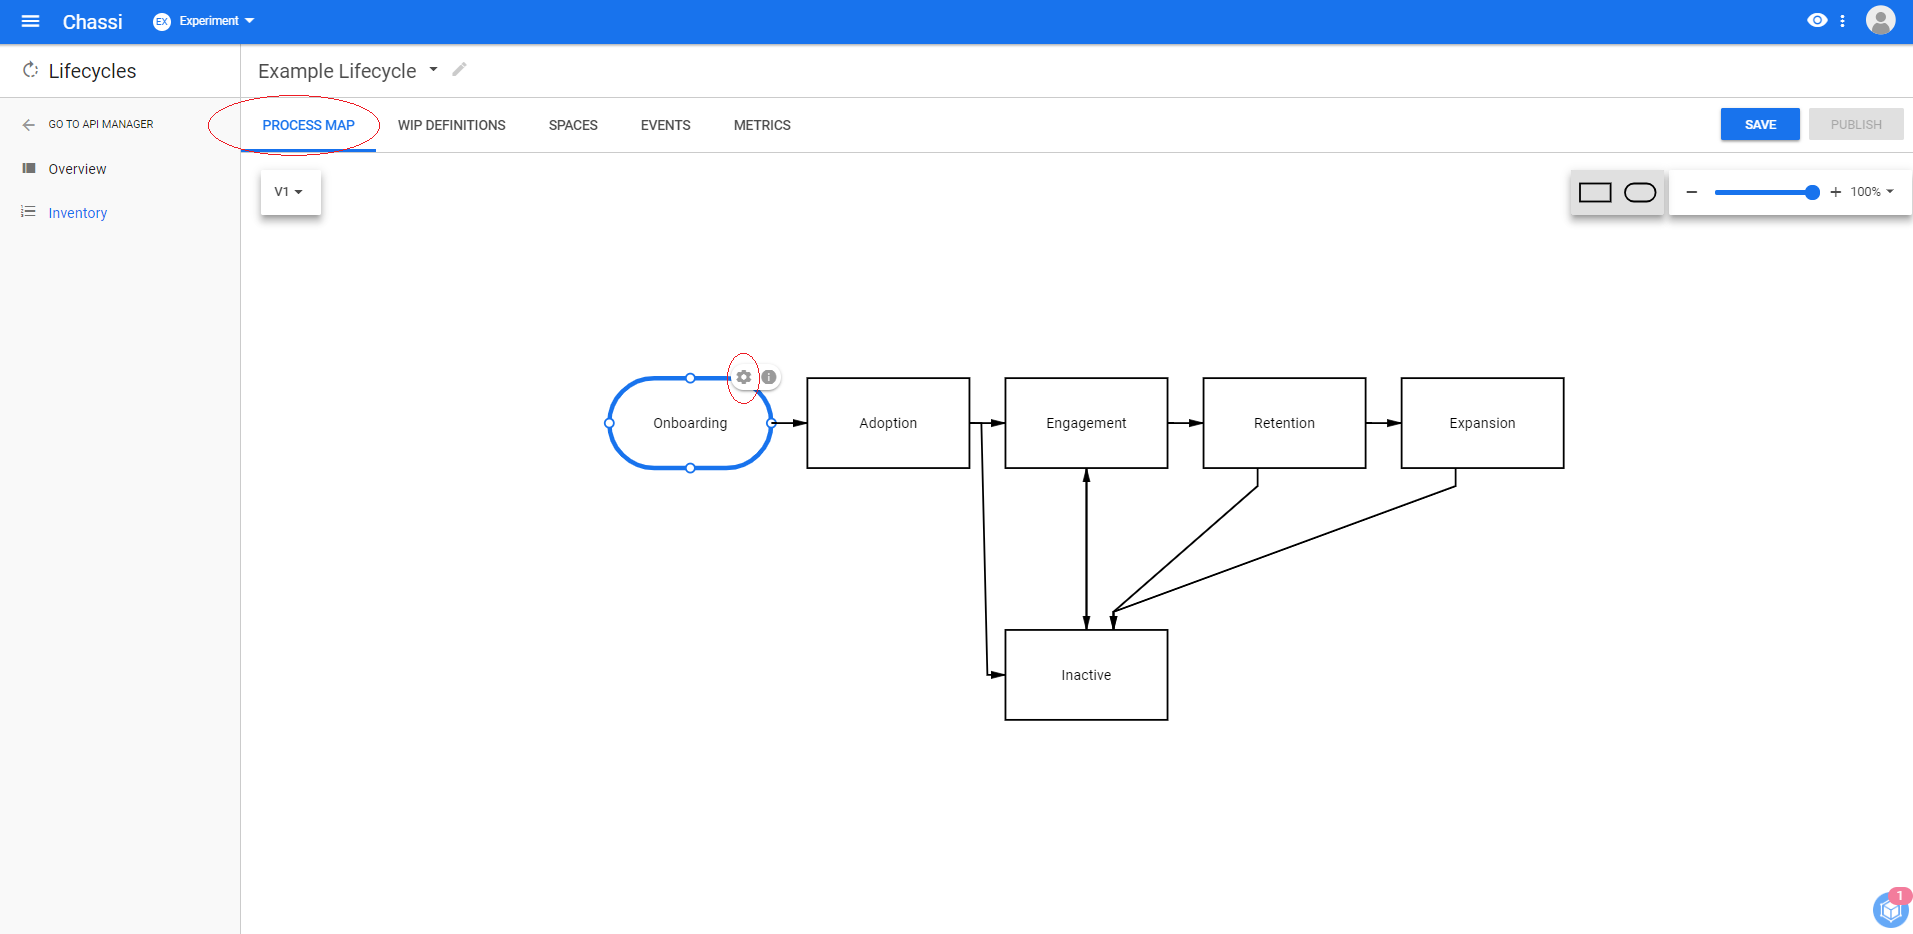
To begin the process, you want to open the PROCESS MAP tab within your lifecycle. From there, each one of your lifecycle's steps have an edit option (indicated by the gear icon in the screenshot below). This is where you are able to set the process map events per step.
Step 2:
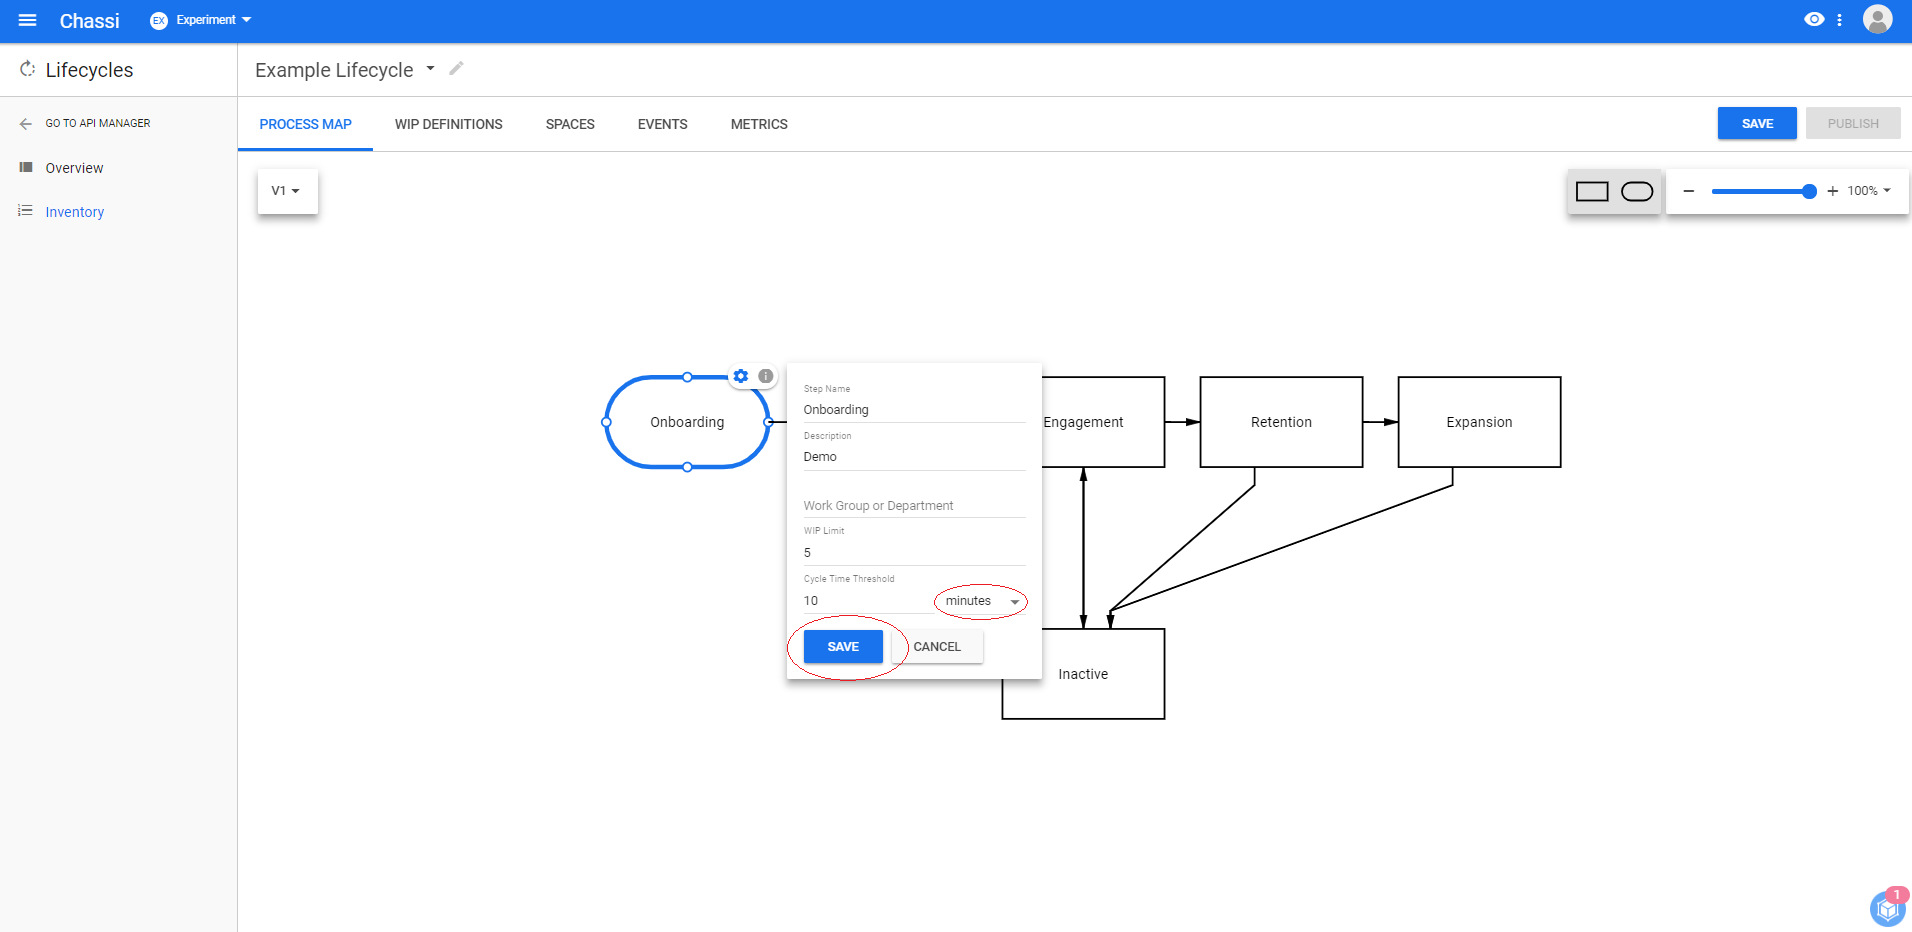
Once clicked, you will see a small pop-up that will allow you to set the step name, description, work group or department, WIP limit, and cycle time threshold. For this example, we will set a WIP limi of 5 and a cycle time threshold of 10 minutes, then hit save.
This process needs to be repeated for each step of the lifecycle that you would like to subscribe to and receive WIP limit and cycle threshold events.
For this example, we have set up the same WIP limit and cycle time threshold for the Onboarding and Adoption steps. Leaving the other steps blank.
Step 3:
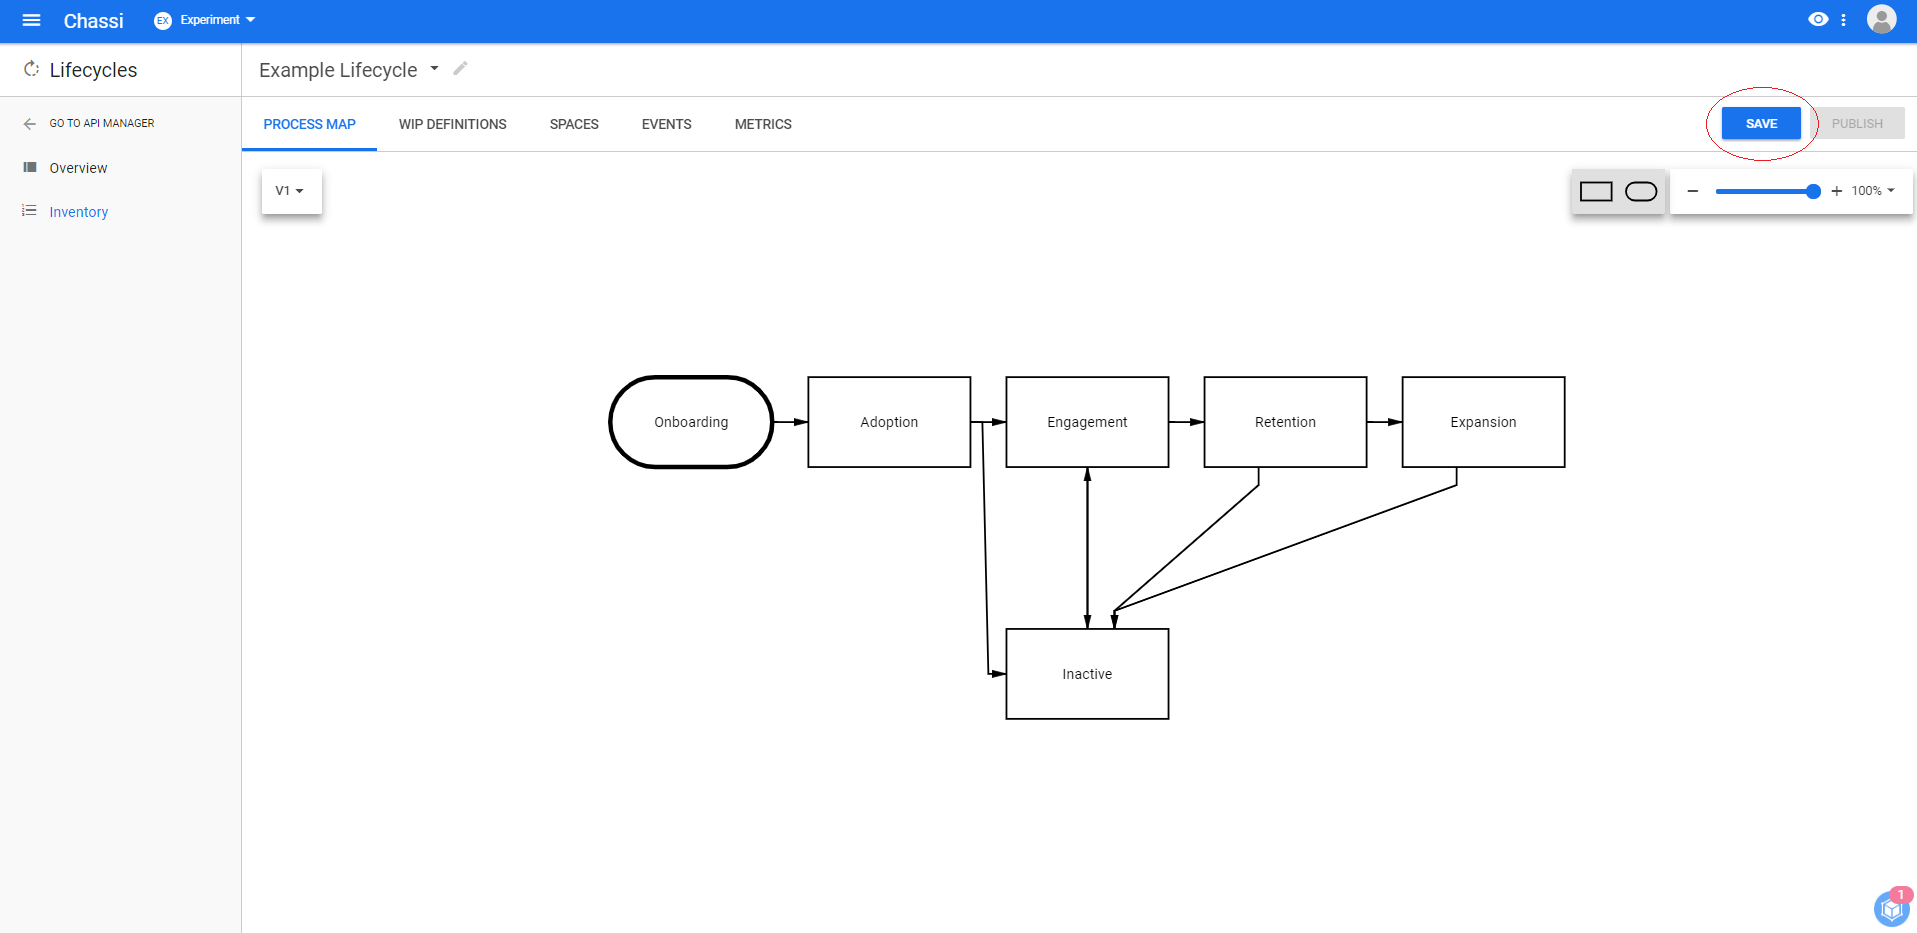
Once all steps that you want to edit are completed, you then want to go ahead and hit SAVE in the top right corner.
Now that your Process Map has been set up, you can move on to subscribing to your process map events.
Subscribing to the Process Map Events
Step 1:
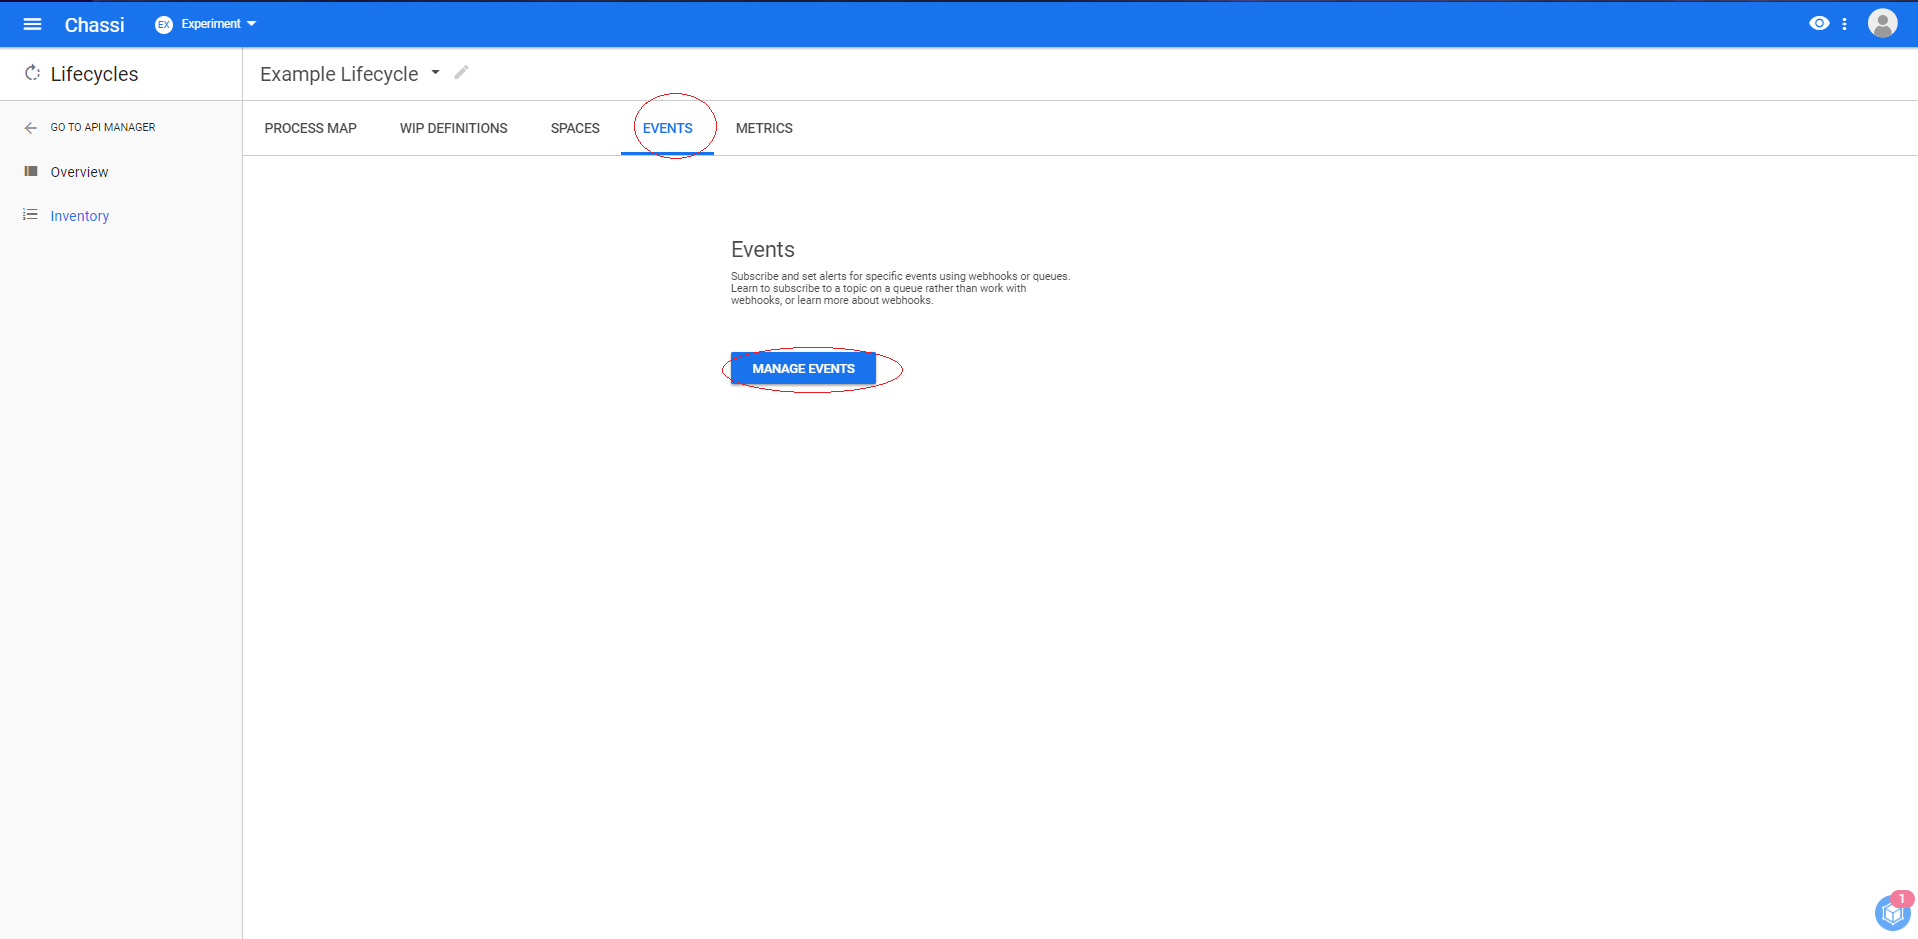
To begin, you'll want to click on the EVENTS tab and start creating an event subscription by clicking the MANAGE EVENTS button.
Step 2:
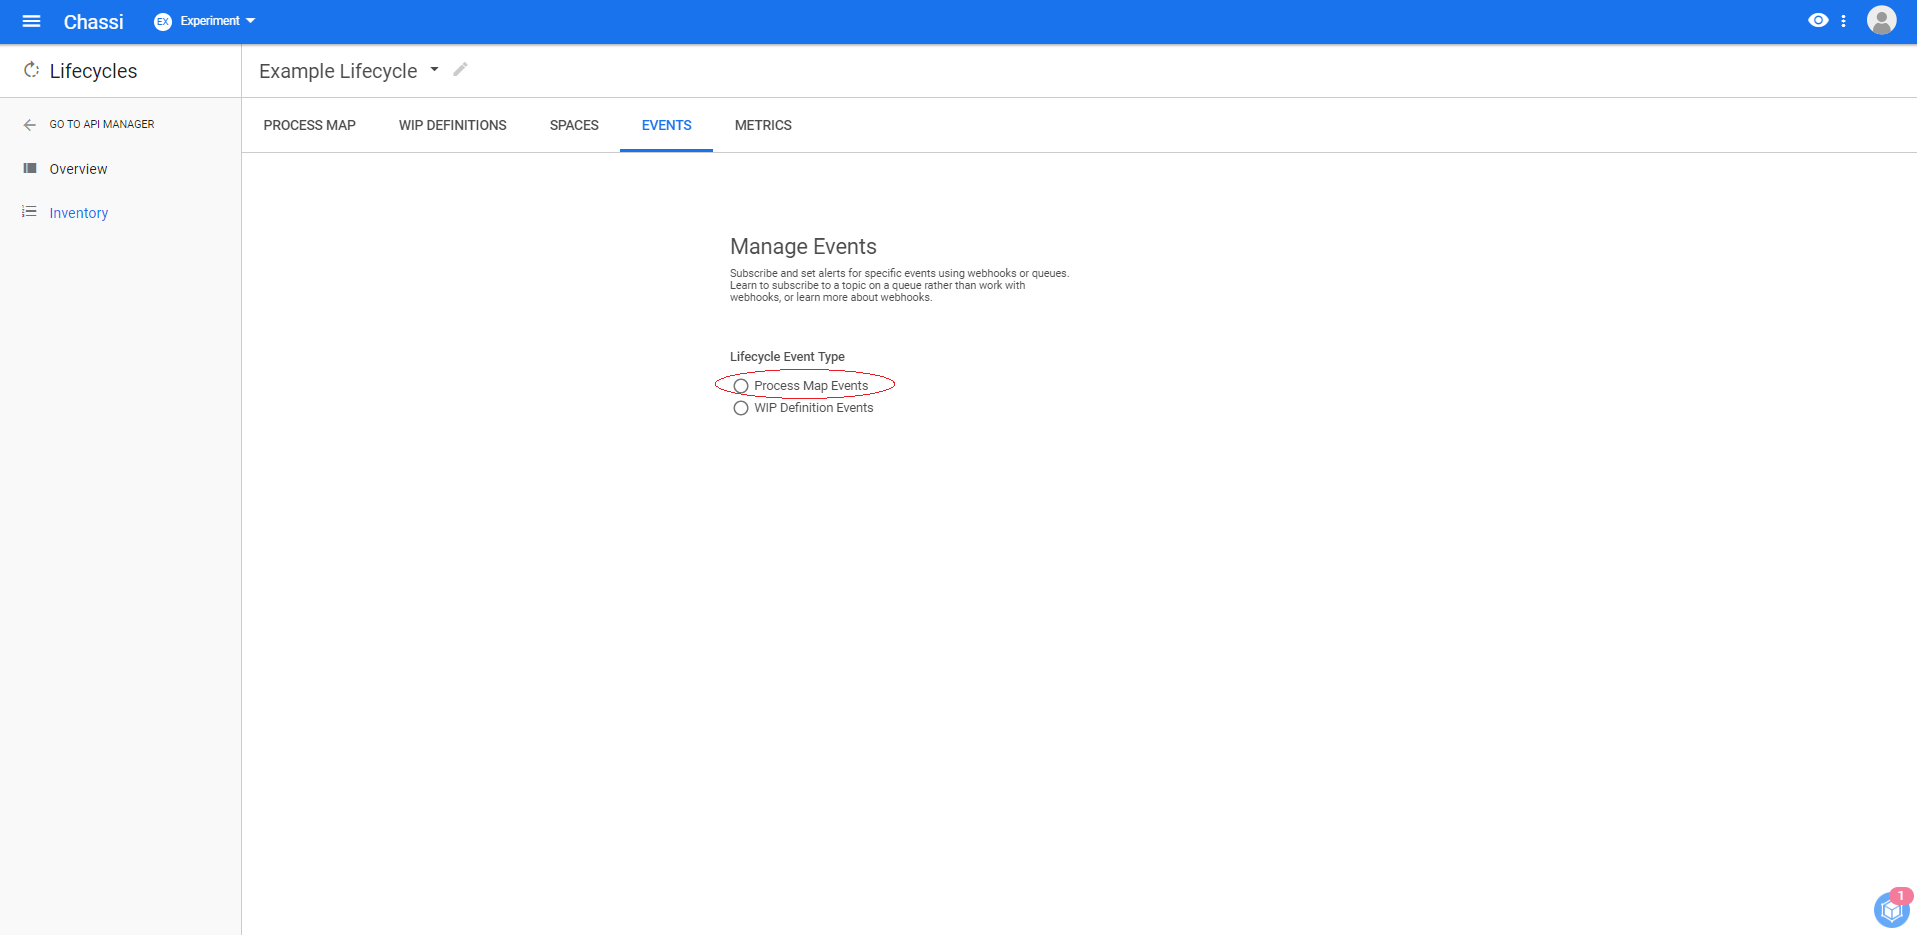
You will then be given the option to choose the event type. Since we are setting up a Process Map Events, you'll want to select that option.
Step 3:
Once Process Map Events is selected, the window will expand and give you further options. After entering a label for this subscription, you will be given the option to choose the sub event types of Pre Step Event, Step Cycle Time, Post Step Event, and Step WIP Limit.
When you select the Pre Step or Post Step options, you will be able to select any (or all) of the steps available to on your lifecycle (See Image 1 below). When you select Step Cycle Time or Step WIP Limit, your step selection options are limited to only those steps that contain values for their corresponding event types. Since we set the WIP limit and Cycle time threshold to the Onboarding and Adoption steps when we set up the Process Map, we will only get the option of those two steps (See Image 2 below).
Moving forward with this example, we will select Step WIP Limit and the two steps available.
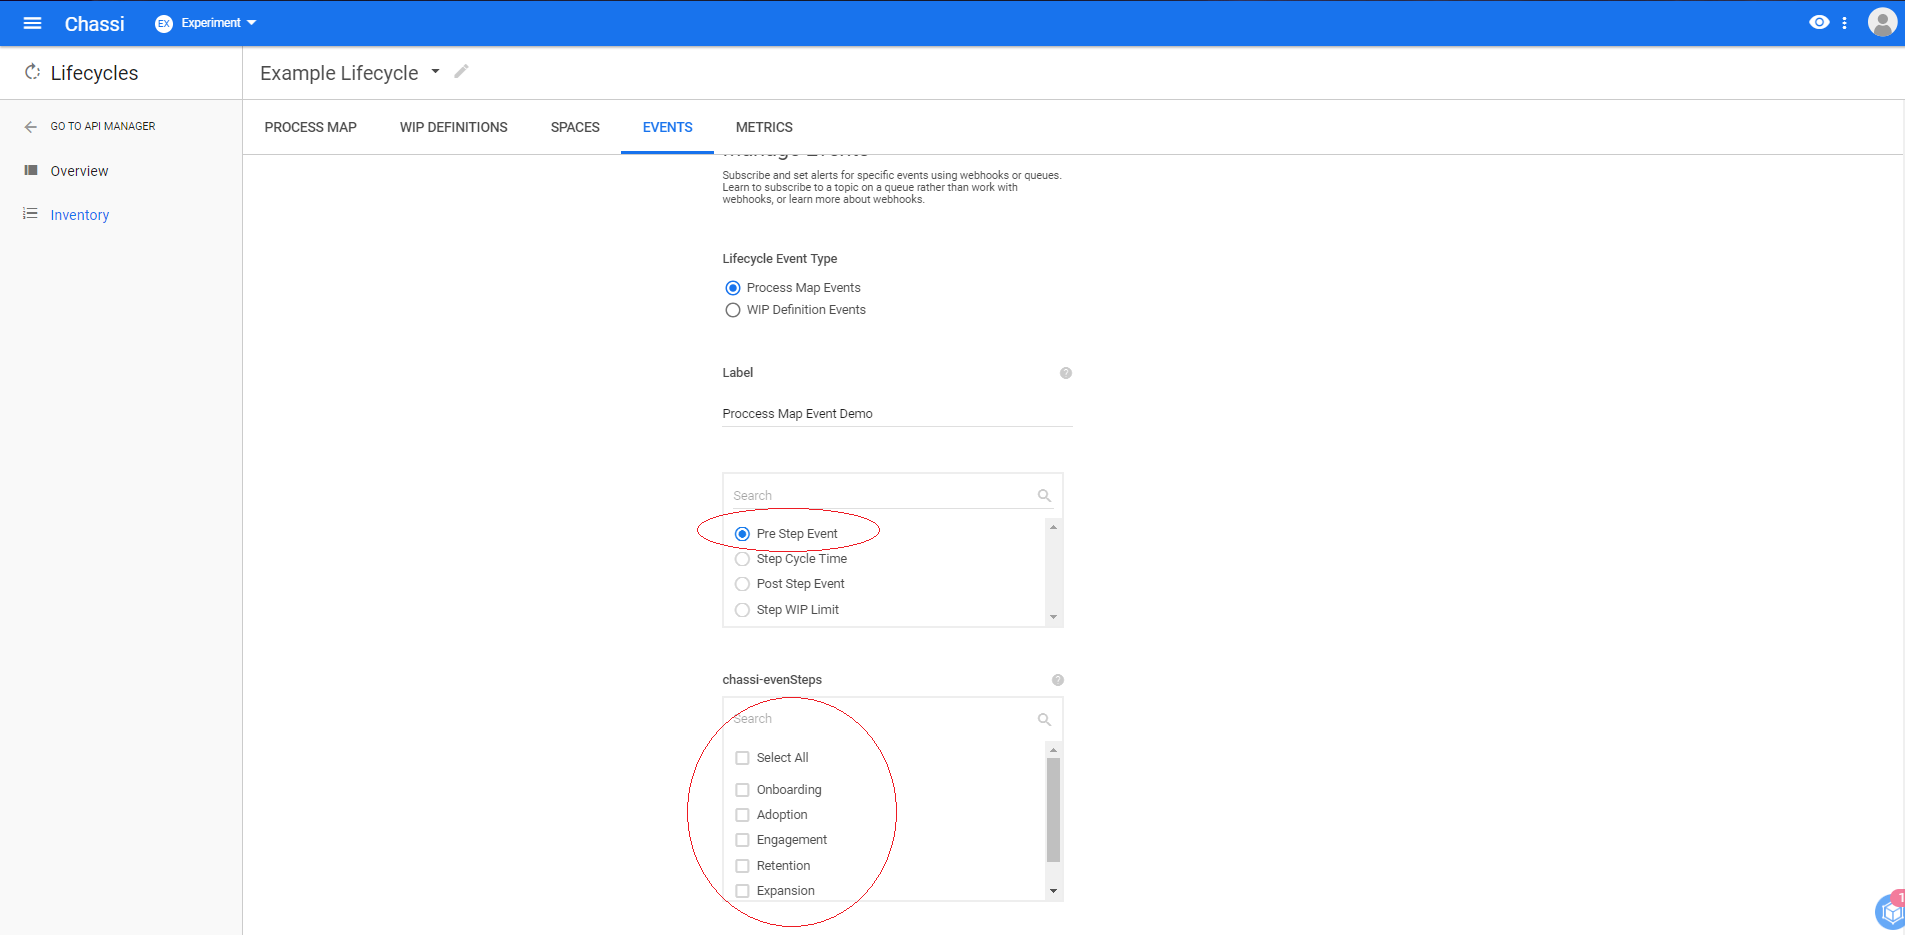
Image 1
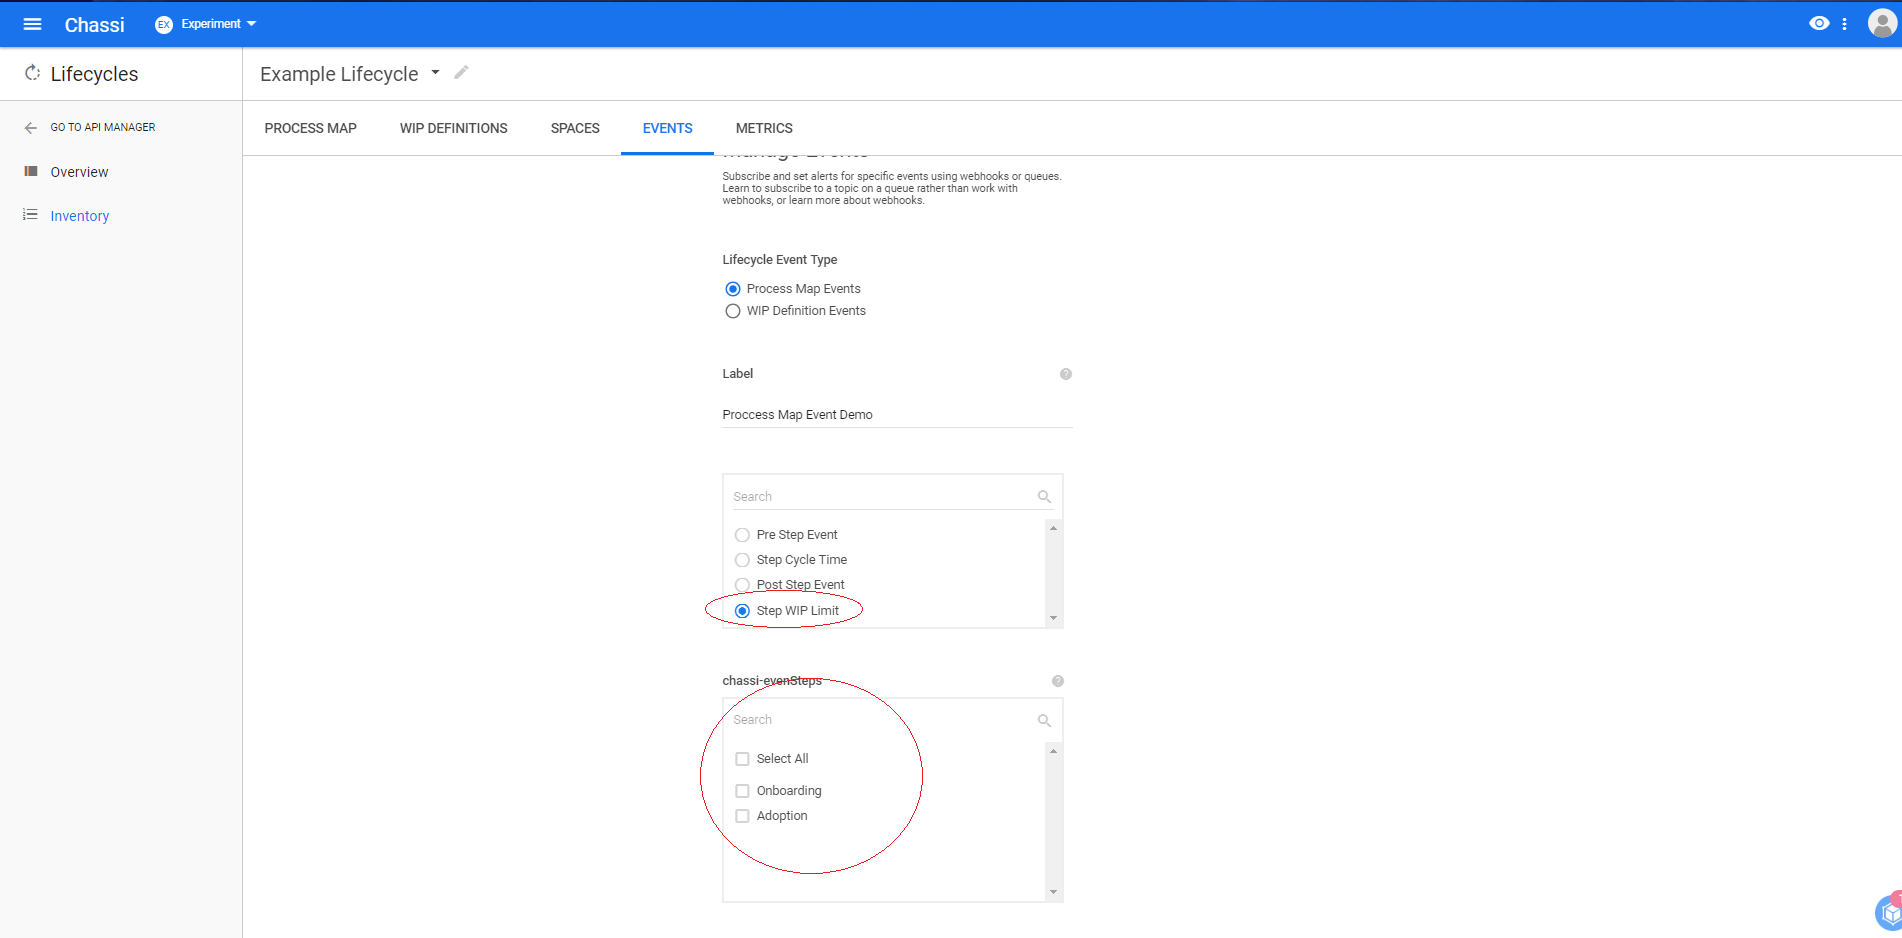
Image 2
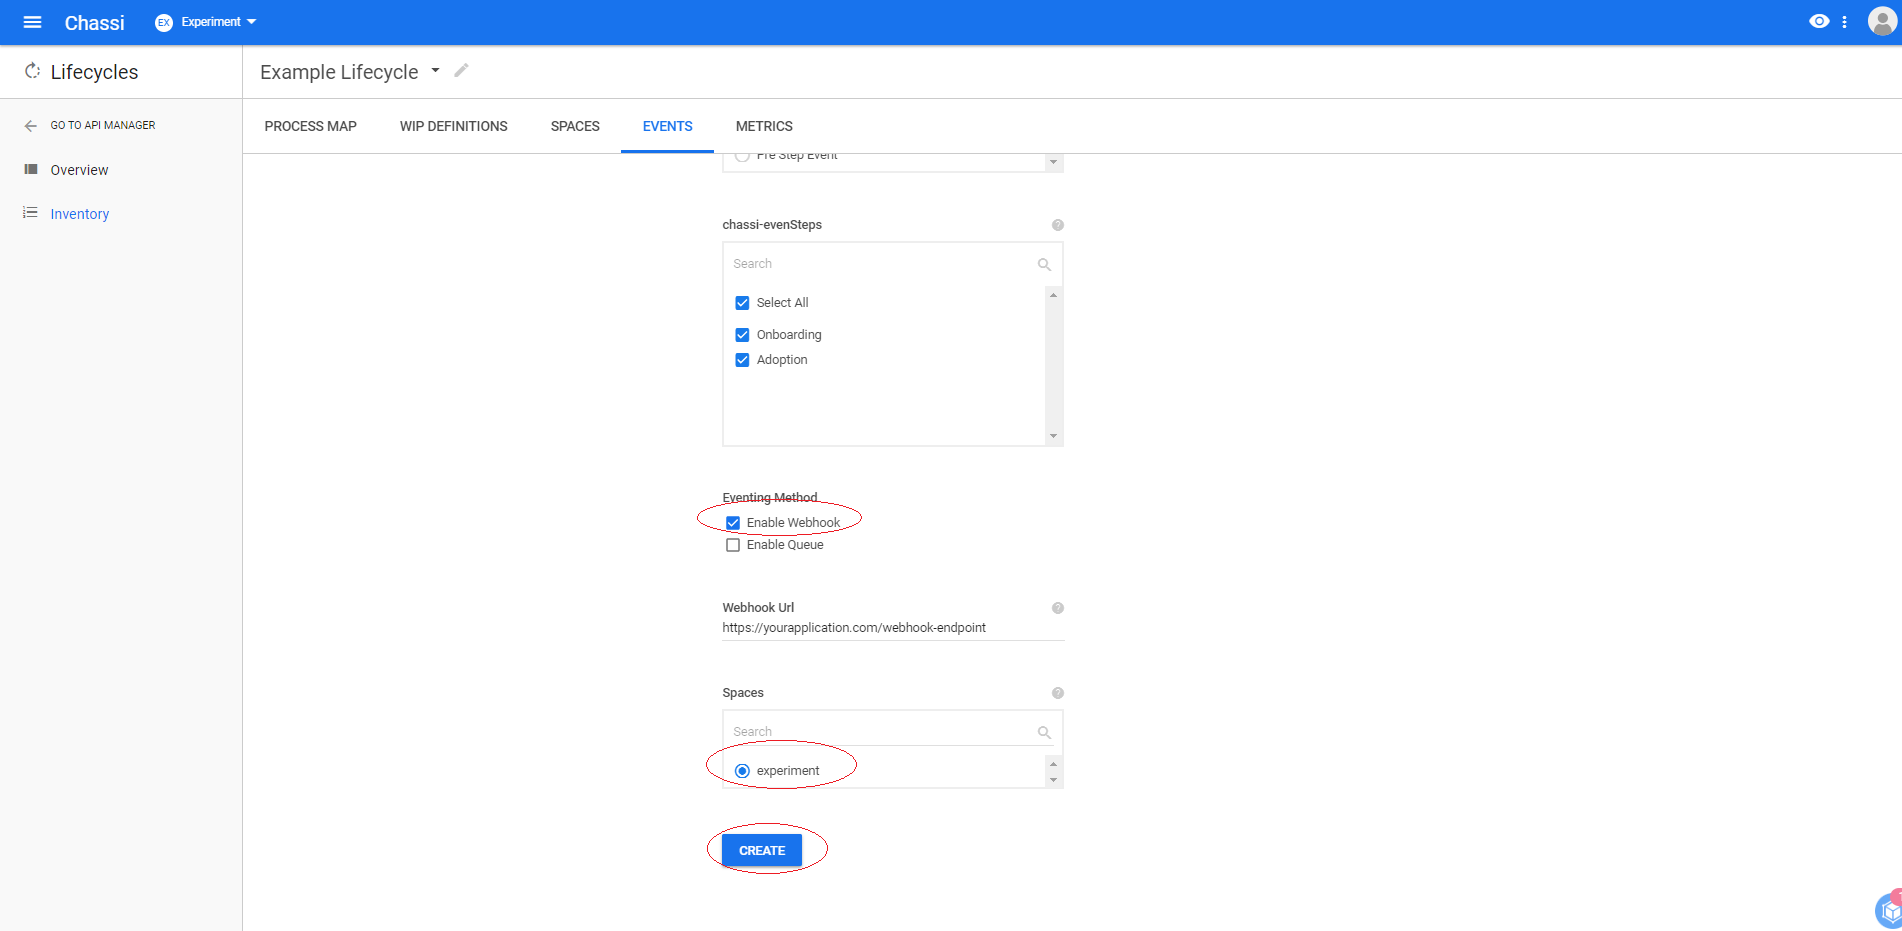
Next we will want to choose how we want to receive these events. For now we will select Enable Webhook and enter a webhook url on our application that is protected behind the resource server (see Web Authenication Primer).
Finally we select the appSpace and click CREATE.
Step 4:
Upon a successful creation, your new event subscription will be shown on the events tab.
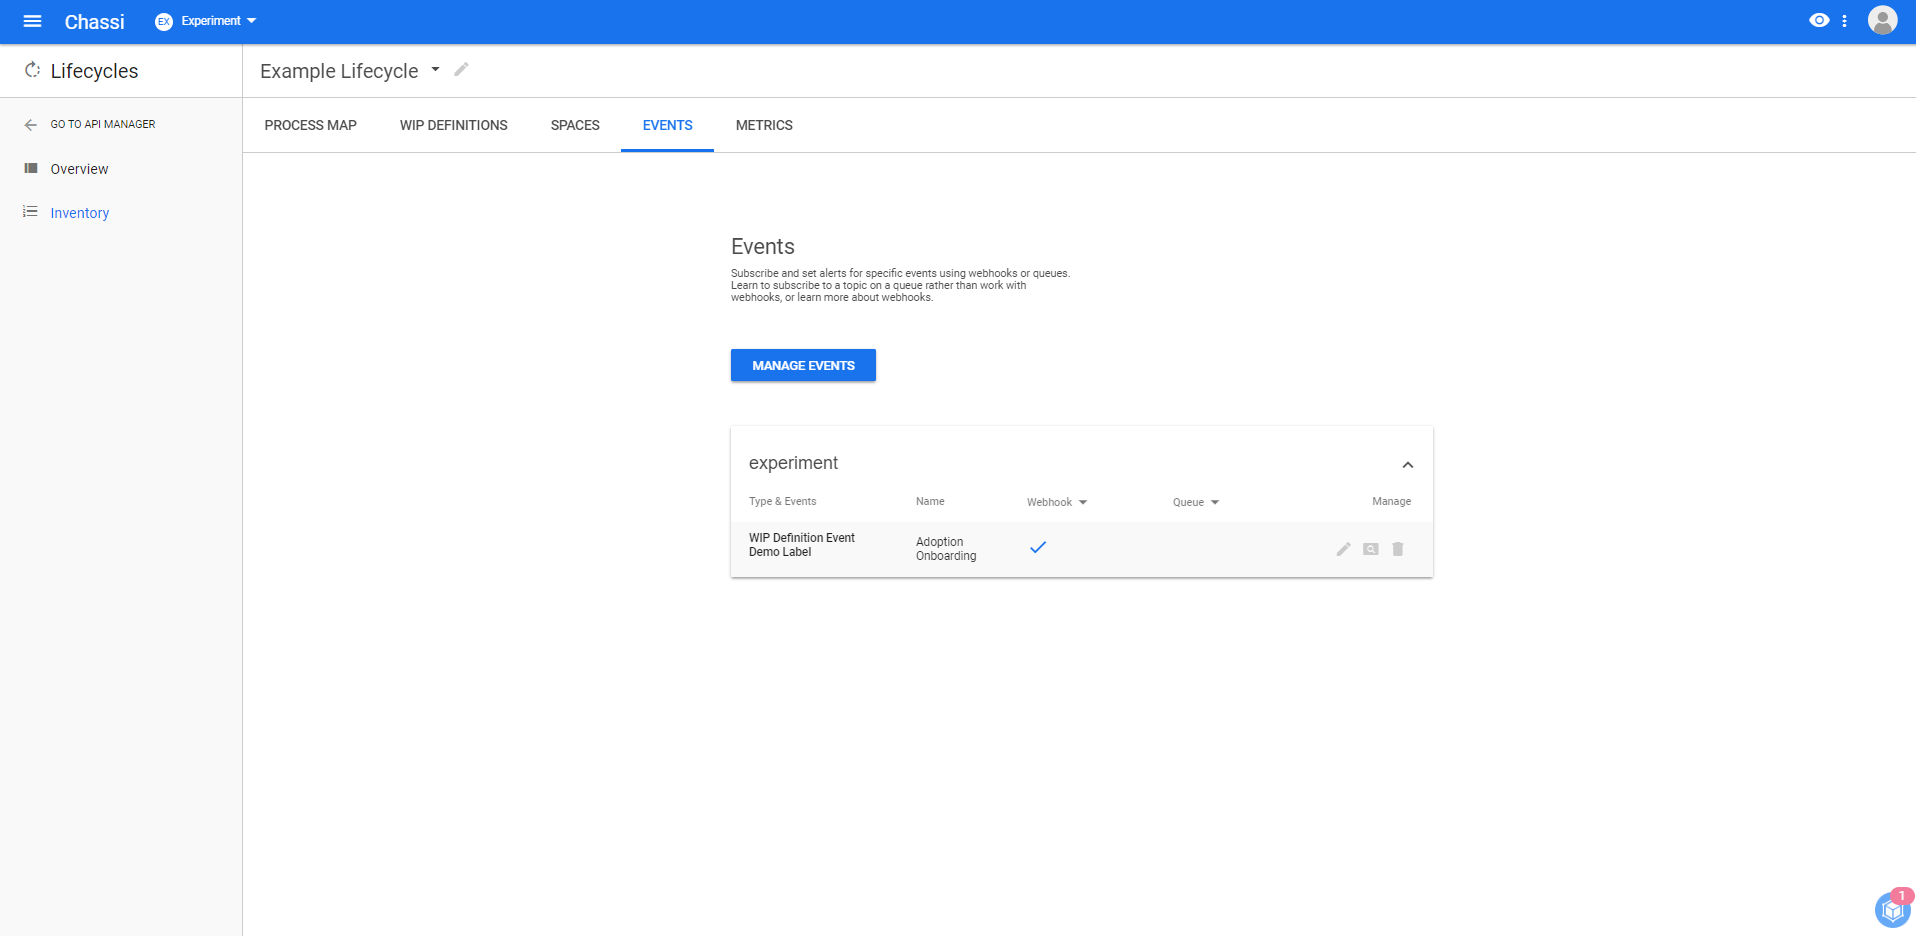
Repeat steps 1-4 to subscribe to the additional event sub types of your Process Map.
Once subscribed, your webhook url will receive the events when their conditions are met.
Updated almost 7 years ago
